With the emergence of mold 3D printers during the 1990s, traditional fabrication processes such as injection molding were already rampant. Skepticism was high whether 3D printing could ever really be used for anything other than engineering models; however, several opportunities materialized, making injection mold 3D printers a very attractive option.
Still, could the new processes actually compete with the current standard processes of injection molding? Even if one could achieve the accuracy needed for specific part geometry, would the process be stable and repeatable? Would the part be stable over time and have the necessary material properties? How much would it actually cost?
Answers to all this and more make up this mold 3D printer buying guide. All we ask is that you take out time to explore this piece before settling for a mold 3D printer for your production line.
Introduction to the Traditional Mold Making Process
Injection molding is the most commonly used manufacturing process for the fabrication of plastic parts. A wide variety of products are manufactured using injection molding, which varies greatly in their size, complexity, and application.
The injection molding process requires the use of an injection molding machine, raw plastic material, and a mold. The plastic is melted in the injection molding machine and then injected into the mold, where it cools and solidifies into the final part.
1.1, Design Molds, Make Processing Drawings
Drawing injection molding assembly is among the many processes of creating a plastic injection mold design. This is the work to be done before the mold is made, just like the house drawing process is required in building a house, so too is making a mold design processing drawing necessary. Mold drawing requires a finer grasp of size. In this section, we will focus on all the intricacies involved in making a mold processing drawing.
Injection molding assembly drawing should include the following:
- Mold forming part structure
- Structure of gating system and exhaust system.
- Parting surface and parting mode.
- Outline structure and position of all connectors, positioning, and guides.
- Mark cavity height dimension (not required, as needed) and overall dimensions of the mold.
- Auxiliary tools (remove unloading tools, calibration tools, etc.).
- Program all part numbers in order and fill out the schedule.
- Label technical requirements and instructions for use.
Technical Requirements For Injection Molding Assembly Drawing:
- Performance requirements for certain systems of mold. For example, assembly requirements for ejector system and slider core structure.
- Requirements for injection molding assembly process. For example, the fitting gap of bonding surface and parting surface after the mold is assembled should be no more than parallelism requirement of upper and lower sides of the mold of 0.05 mm, size determined by assembly, and the requirement for size are pointed out.
- Mold use, assembly, and disassembly methods.
- Anti-oxidation treatment, mold number, lettering, marking, oil seal, storage, and other requirements.
- Requirements for test and inspection.
Draw all parts drawing
Order of drawing parts drawing from injection molding assembly drawing should be: first inside and then outside, first complicated and then simple, first forming parts, then structural parts.
- Graphics requirements: Be sure to draw in proportions, allowing you to zoom in or out. View selection is reasonable, projection is correct, and layout is proper. In order to make processing patent numbers easy to understand and easy to assemble, graphics should be as consistent as possible with the final injection molding assembly drawing; graphics should be clear.
- Dimensioning requirements are uniform, centralized, orderly, and complete. Order of dimensioning is: For instance, first mark main part size and draft angle, then mark fit size and full size. Mark fit size on non-main part drawing and then mark full size.
- Surface roughness. Mark one of the most applied roughnesses in the upper right corner of the drawing, as indicated by “remaining 3.2.”, Similarly, other roughness symbols are marked on each surface of the part.
- Other contents, such as part name, mold drawing number, material grade, heat treatment, and hardness requirements, surface treatment, graphic scale, free-size machining accuracy, technical description, etc., must be correctly filled out.
- Proofreading, reviewing, drawing, and drying.
1.2, Mold Production with CNC
It’s essential to ace the mold tool design process. The higher the precision and mass-production required, the more complex the tooling can become.
Manufacturers create this high degree of precision using computer numerical control (CNC), replacing manually operated machines, vertical millers, and lathes with a centralized, automated system. CNC machines convert computer-aided design (CAD) models into mass-produced parts with as little as .0001 variation between parts. They operate via advanced manufacturing technology, removing material from a solid block using a variety of cutting tools to achieve the intended design.
There are three basic types of CNC machining:
Milling: This process mounts the part onto a bed and removes material using rotational cutting tools, creating products in a wide variety of shapes
Turning: This process mounts the part on a rotating chuck and removes material using stationary cutting tools, creating axially symmetric end products
EDM: This process uses controlled electrical discharge to obtain the desired shape
The process cycle for CNC injection molding is very short, typically between 2 seconds and 2 minutes, and consists of the following four stages:
Clamping – Prior to the injection of the material into the mold, the two halves of the mold must first be securely closed by the clamping unit. Each half of the mold is attached to the injection molding machine, and one half is allowed to slide.
The hydraulically powered clamping unit pushes the mold halves together and exerts sufficient force to keep the mold securely closed while the material is injected.
The time required to close and clamp the mold is dependent upon the machine – larger machines (those with greater clamping forces) will require more time. This time can be estimated from the dry cycle time of the machine.
Injection – The raw plastic material, usually in the form of pellets, is fed into the injection molding machine and advanced towards the mold by the injection unit. During this process, the material is melted by heat and pressure.
The molten plastic is then injected into the mold very quickly, and the buildup of pressure packs and holds the material. The amount of material that is injected is referred to as the shot. The injection time is difficult to calculate accurately due to the complex and changing flow of the molten plastic into the mold.
However, the injection time can be estimated by the shot volume, injection pressure, and injection power.
Cooling – The molten plastic that is inside the mold begins to cool as soon as it makes contact with the interior mold surfaces. As the plastic cools, it will solidify into the shape of the desired part. However, during cooling, some shrinkage of the part may occur.
The packing of material in the injection stage allows additional material to flow into the mold and reduce the amount of visible shrinkage. The mold cannot be opened until the required cooling time has elapsed. The cooling time can be estimated from several thermodynamic properties of the plastic and the maximum wall thickness of the part.
Ejection – After sufficient time has passed, the cooled part may be ejected from the mold by the ejection system, which is attached to the rear half of the mold. When the mold is opened, a mechanism is used to push the part out of the mold.
Force must be applied to eject the part because, during cooling, the part shrinks and adheres to the mold. In order to facilitate the ejection of the part, a mold release agent can be sprayed onto the surfaces of the mold cavity prior to injection of the material.
The time that is required to open the mold and eject the part can be estimated from the dry cycle time of the machine and should include time for the part to fall free of the mold. Once the part is ejected, the mold can be clamped shut for the next shot to be injected.
1.3, Debug the Mold and Finally Put it Into Production
The quality of the mold is inseparable from the preparation of the extrusion die equipment. In order to ensure the quality of the mold, the mold must be carefully debugged before the start of production. The operator must be familiar with the extruder he is operating.
The characteristics of the screw, the control of heating and cooling, the characteristics of the instrument, the control of the tractor, the structure and assembly of the mold, etc., in order to correctly grasp the extrusion process conditions and operate the machine correctly. So, what are the debugging steps?
Step One
Before starting the machine, check whether the temperature control is sensitive, whether the meter is malfunctioning, and whether the cooling water channel is unblocked. It is usually detected by a thermometer or cooling water.
Step Two
According to the extruder operating procedure, the screw, barrel, and die of the extruder are heated. After the temperature rises to the set temperature, it must be kept for another 10 minutes to start up so that the temperature of each part of the machine tends to be stable.
Step Three
Be sure to heat the joint screws and bolts of the die before starting the machine. The operator must not stand in front of the die before the material is extruded to prevent the bolt or screw from breaking and causing injury.
Step Four
When starting to extrude, the screw speed should be slow and then gradually speed up to prevent overload and damage to the machine at startup.
Step Five
When starting up, first add a small amount of material, and keep the feeding balance. Pay attention to various values such as torque when feeding. After the material is extruded from the die and pulled on the traction equipment, the material can be gradually increased until normal extrusion.
Step Six
When starting to pull, the sizing die should have a certain distance from the die to facilitate traction. The waterway is opened, the shape of the complex cavity is small, and the multi-cavity profile needs to open the cover of the mold; after confirming that the plasticization of the extruded material is normal, the material is drawn to the tractor through the set traction rope.
Step Seven
If it is found that the parison is not formed at the inlet end of the sizing die or the inner rib adheres to the inner cavity surface of the profile, a pointed tool can be used to poke a small hole at the non-formed portion of the inner rib portion of the parison at the inlet end of the first sizing die. The small cavity is connected to the atmosphere, and the parison is open when it is set into a mold, which is convenient for forming a negative pressure, and the parison is closely attached to the mold wall of the sizing die.
Step Eight
In the case of blocking the mold (not blocked), the setting table should be moved backward, or the traction speed should be increased immediately, or the above two schemes should be implemented at the same time, and then the process adjustment can be used to resume normal production. If the implementation of the above scheme is invalid, the setting table should be moved back immediately, and the material should be cut along the shaping die, the water vapor of the shaping die should be closed, the traction speed can be reduced, and the profile can be slowly pulled out from the shaping die.
Step Nine
When shutting down, it is generally necessary to first add the stop material to exhaust the production materials in the machine, then stop and heat the disassembly die for cleaning.
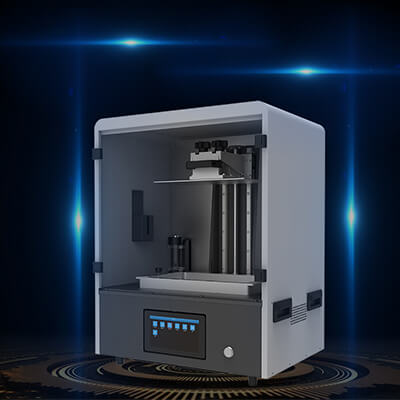
How to Make a Mold with a 3D Printer
One major way to expand your 3D printing capacity is by learning how to 3D print molds. They’re great for mass manufacturing, standardizing your designs, and expanding your repertoire of what you can make for yourself. Here, we’ll give you the rundown on what 3D printed molds are, how to create and use them, why they’re a good idea, and the mold 3D printer to use.
First, we need to distinguish between two types of object creation to illustrate how mold 3D printing is different than your standard 3D printing projects. The main difference is in how you get to the final object.
Standard 3D printing is its own means to an end – once your printer stops and your material cools, you’ve got your end product. The standard 3D printing process is additive, which means you’re building your shape as you print. Your design falls into place as the material is extruding, which is how it’s finalized as soon as you’re done.
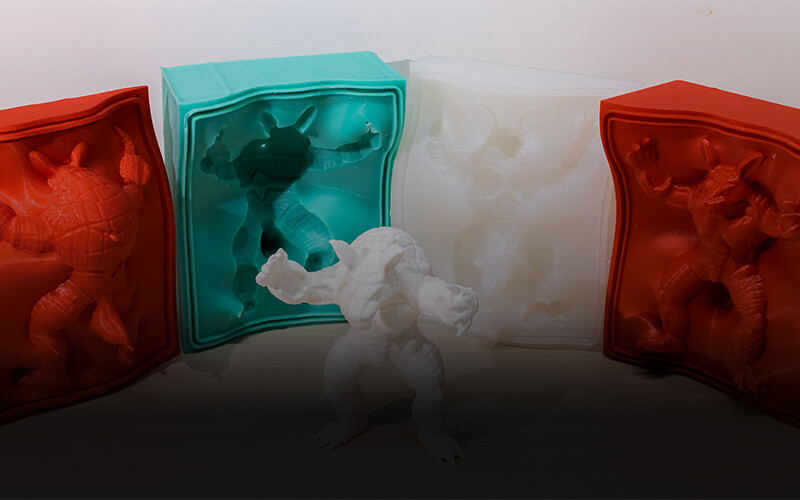
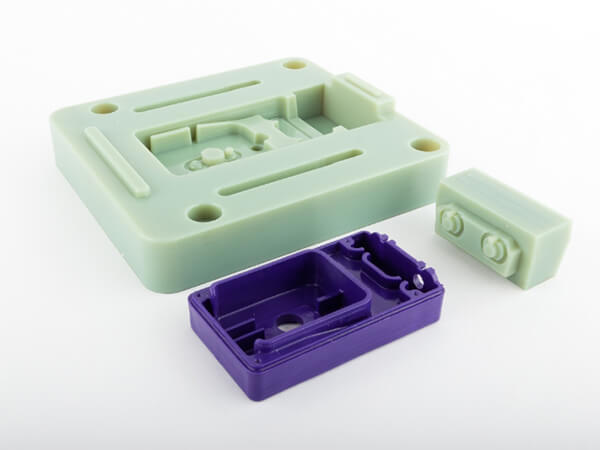
Mold 3D printing takes an extra step. First, you print a container that is the inversion of your final design; then you fill that container with your final manufacturing material, let that dry, then open the mold to reveal your final object. We’ll get into the nitty-gritty below, but for now, just know these general steps are called additive manufacturing and do require a little more work than standard 3D printing projects. But we promise it’s totally worth it.
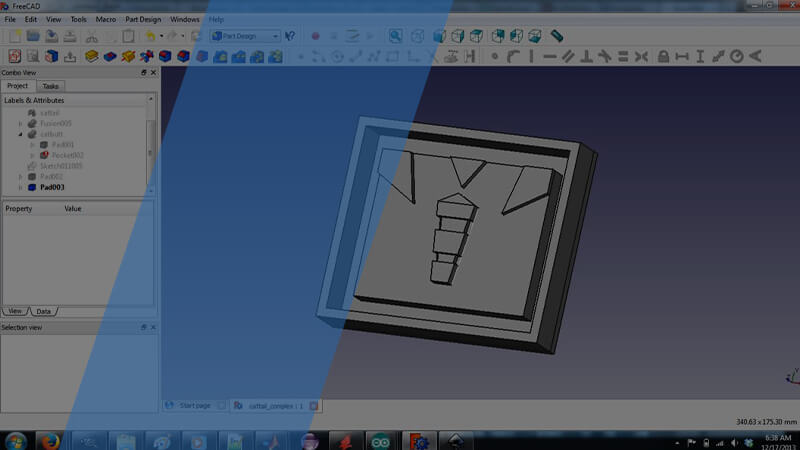
2.1, 3D Modelling Through Software
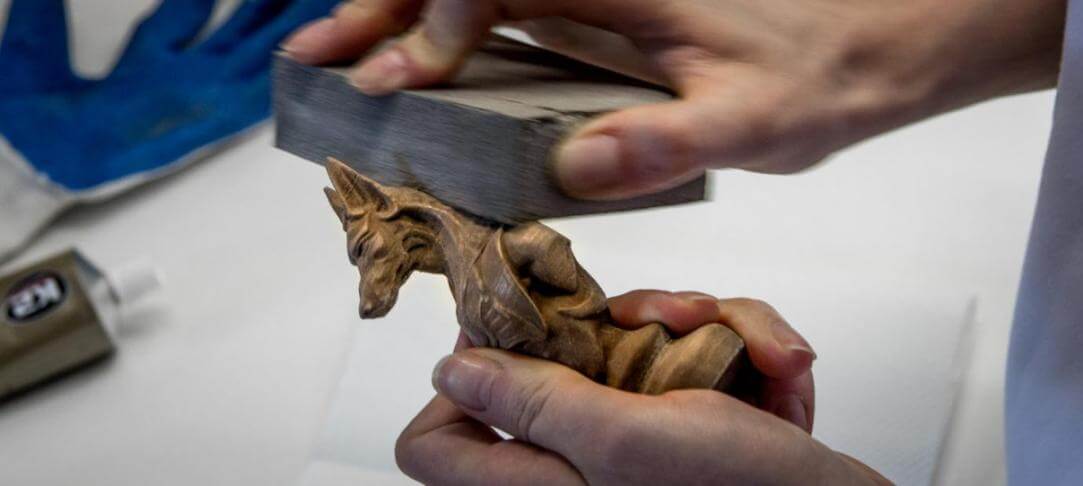
3D printing your own custom mold is a great way to bring a new level of creativity to your project. From the computer to fruition, this is one of the most versatile things you can accomplish with a mold 3D printer. Custom molds are great for a variety of projects. On the crafty side, you can make things like pendants, bracelets, and stamps. But don’t rule out the industrial side of this project. 3D printed Silicone molds are great for duplicating things like machine parts, tools, and grips.
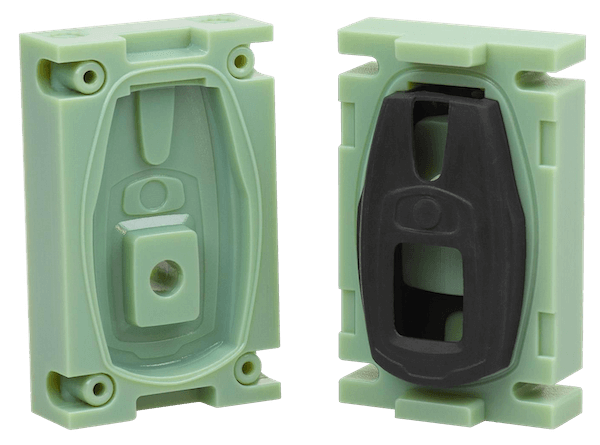
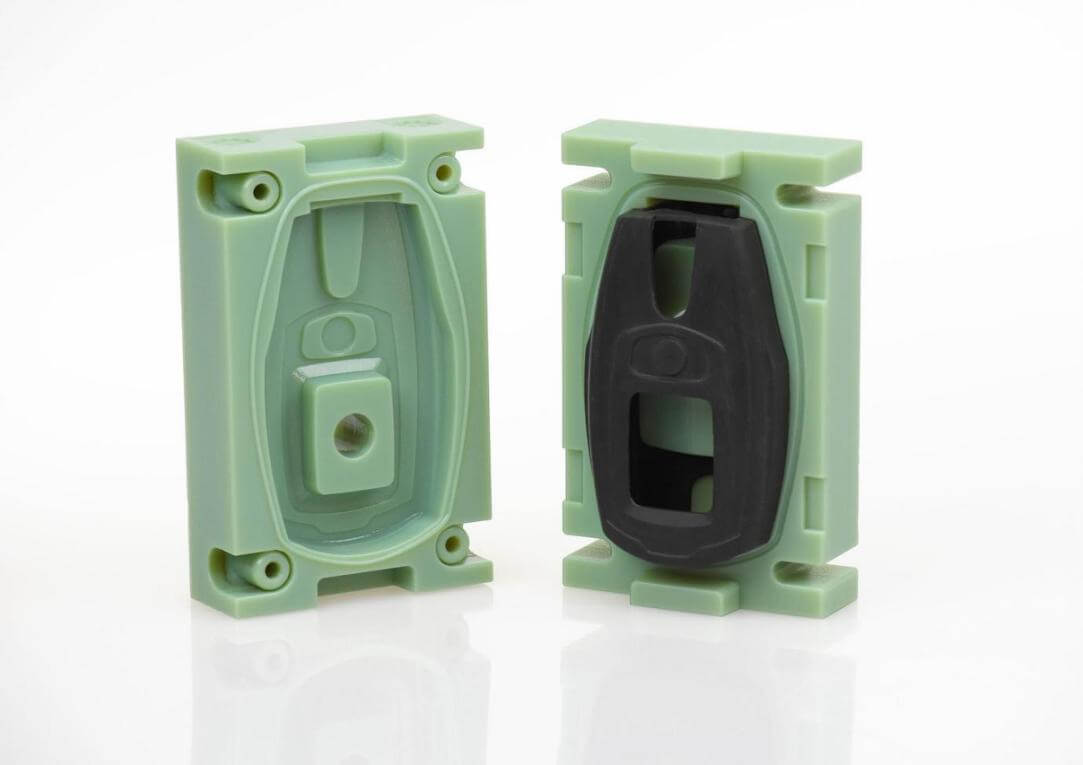
Using a 3D software of your choosing, design the model you want to create a mold for. You can also find a 3D model to use online. There are two distinct mold types that can be modeled through software; two-part molds and flexible molds. The two-part molds are molds that can be easily assembled/disassembled. The other kind we’ll cover are known as flexible molds—these molds can be reused for casting purposes.
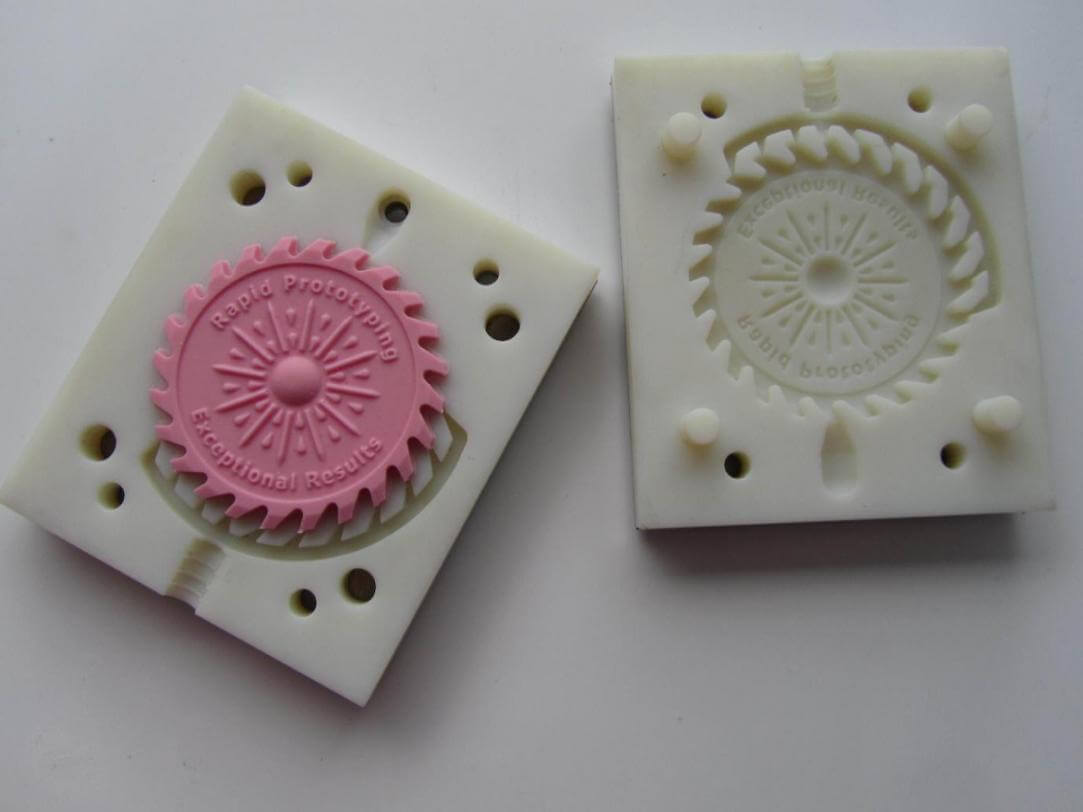
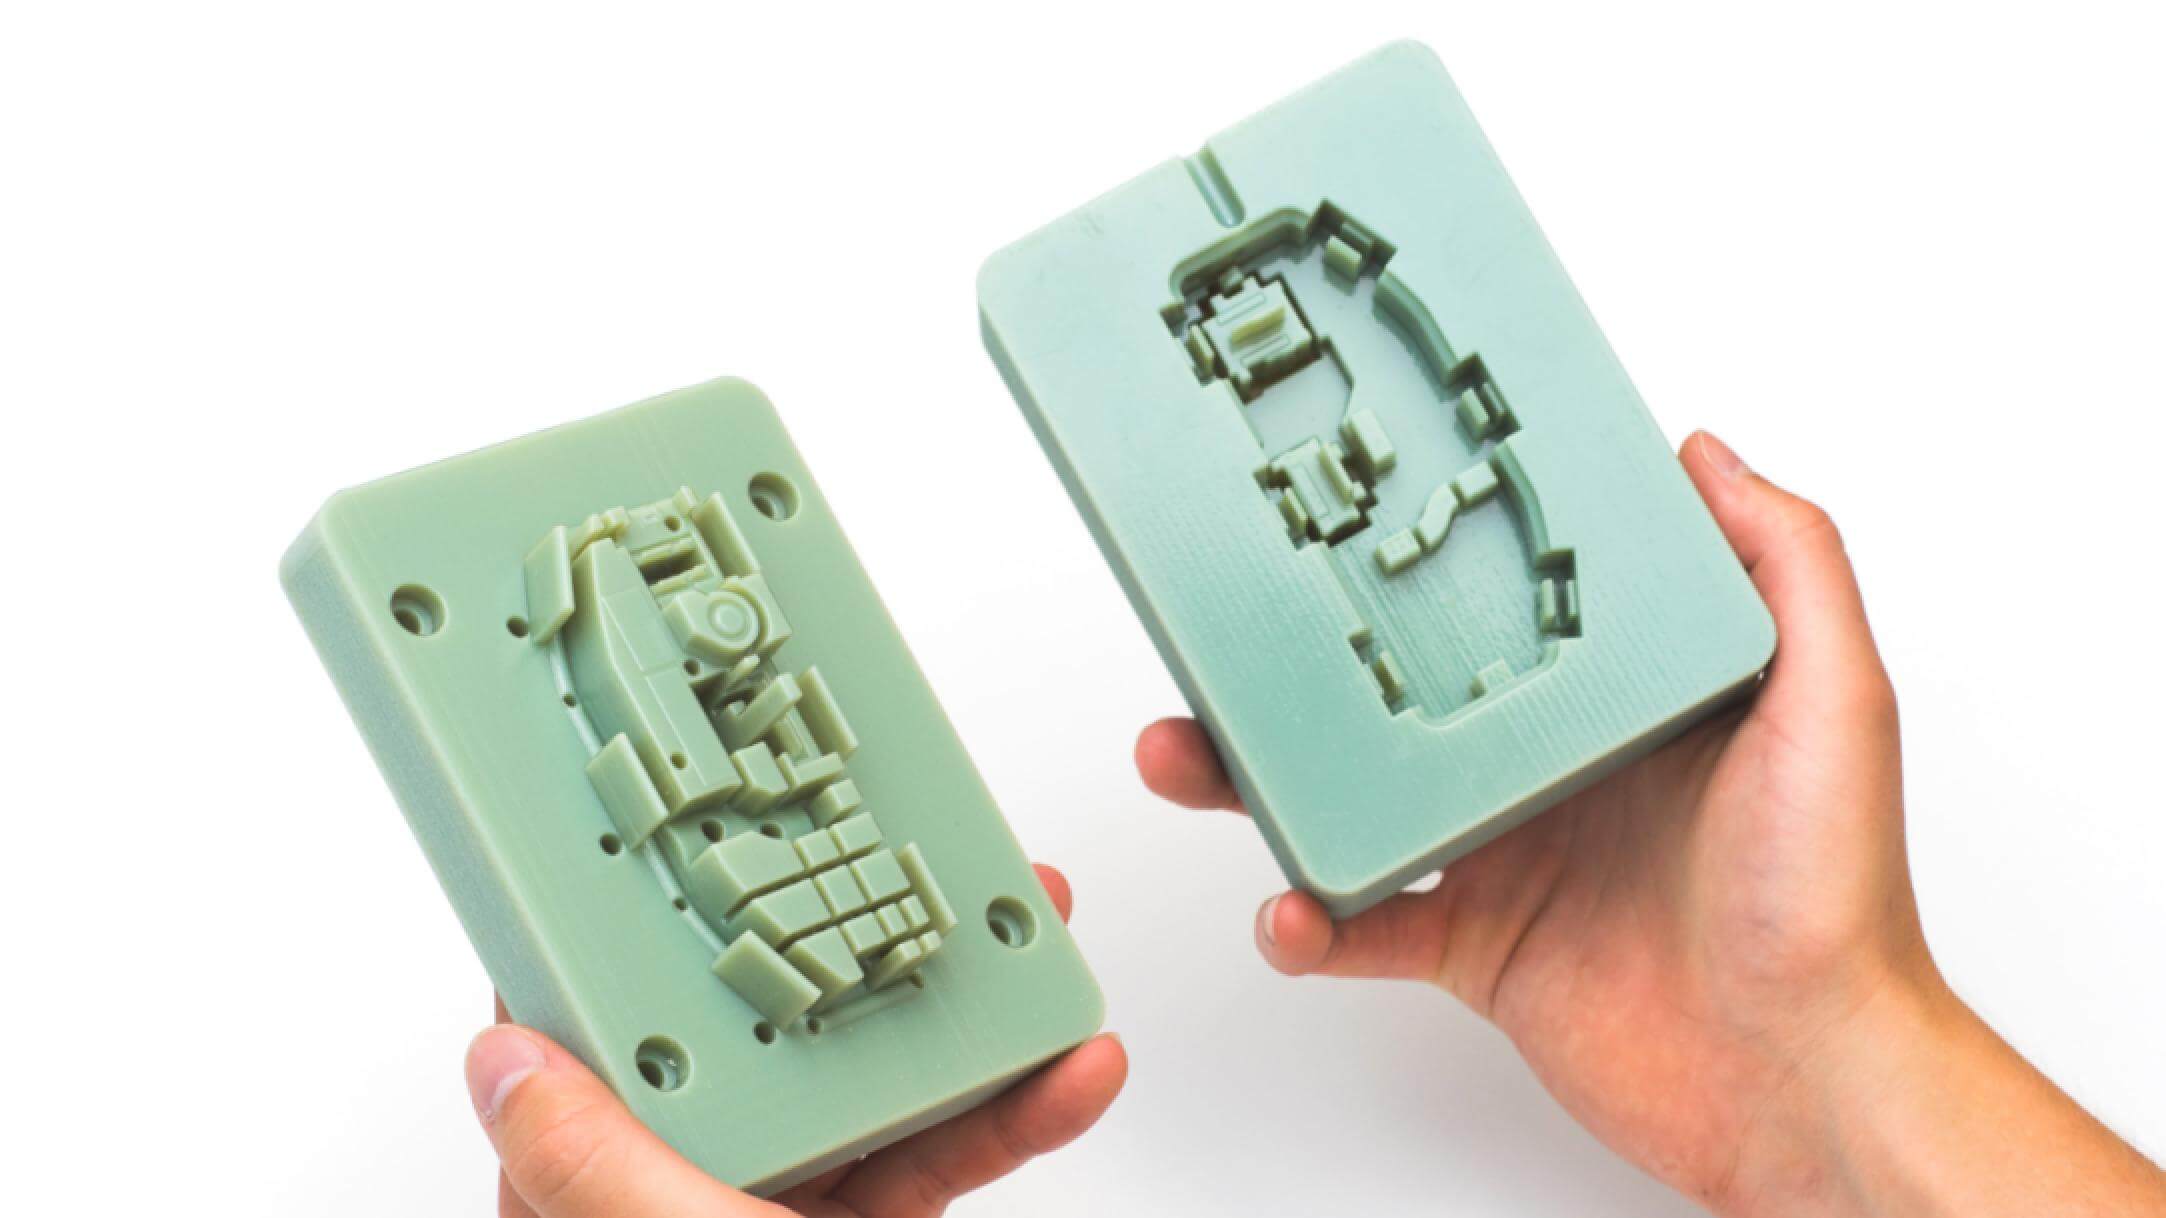
Two-part mold
Two-part molds can make your model in two halves separately or be combined to create the model all at once. Using a 3D modeling program of your choice, overlap the custom model with the two-part mold block and cut a hole with it. You can use blender or any other CAD modeling software of choice to accomplish this.
If you’d like the model to set as one piece, you will need to cut a hole in the block for silicone to pour in through. The two halves can be held together with rubber bands or tape.
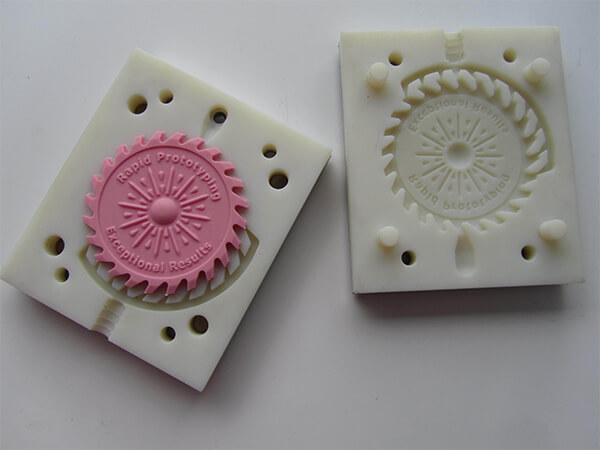
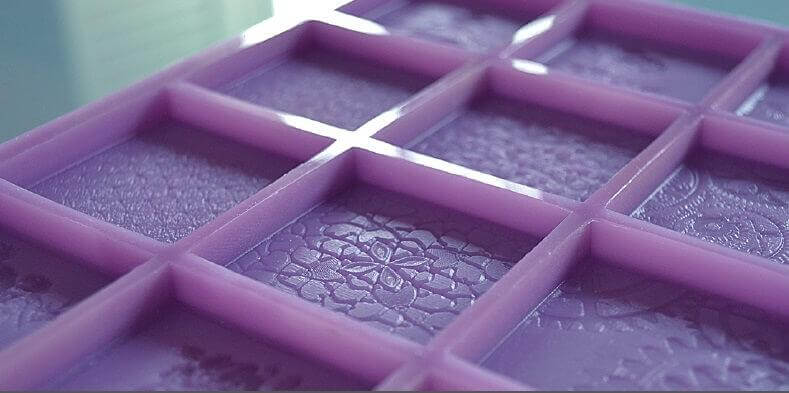
Flexible mold
Flexible molds are really neat because of their versatility. We’re essentially creating a mold for another mold. The final product will be a flexible piece of silicone rubber that can be used for future casting. This is ideal for things like jewelry, cosplay, and other crafting needs.
To create a flexible mold, start with a block and position a smaller block to overlap with it. This block will form the edges of our flexible mold. Using a boolean difference modifier, cut a cavity from the starting block. Place the desired design inside the cavity. Consider the angle you use when placing the design, as this will affect the final mold.
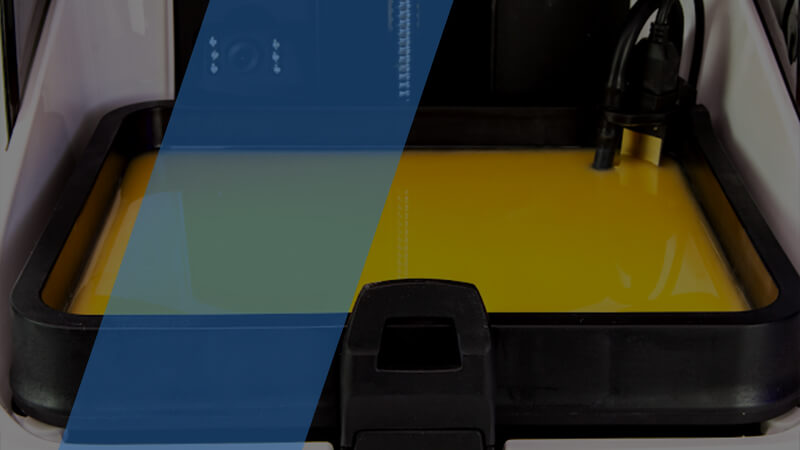
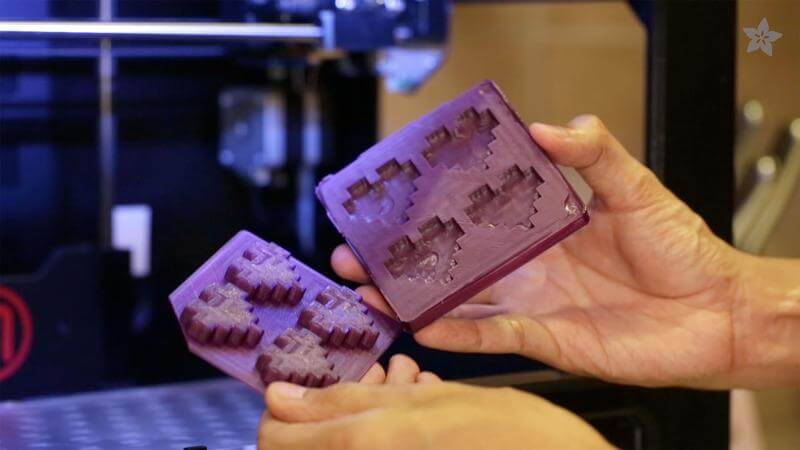
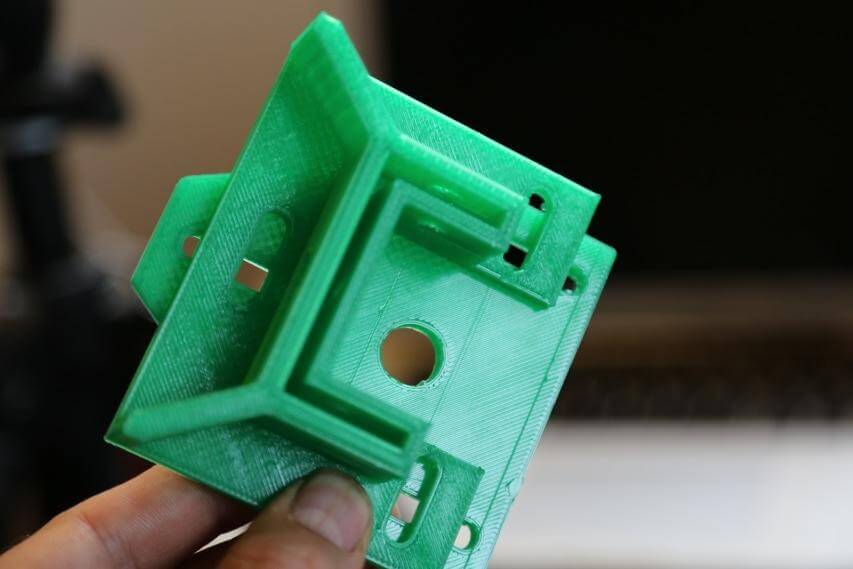
2.2, Print the Mold Through 3D Printer
After getting a CAD design that works well as a mold, and finding suitable material, print the mold. From this point, it is more or less standard operating procedure. Your 3D printed mold is going to see a lot of temperature changes and manipulations to get your final objects created and freed, so make sure you print the mold itself from something that can handle that on a regular basis.
Digital ABS is a variation of the more standard acrylonitrile butadiene styrene and is a great filament for making your molds. It boasts an improved impact rating for parts that take a lot of beating without sacrificing the original formula’s excellent surface finish and high-temperature resistance.
Note that during the mold 3D printing process, you might have to fill the molds with materials so as to avoid space that can create bubbles. Here, you can use anything that will meltdown and harden in your mold’s shape, like metal or other thermoplastics. If you’re completely new to injection molding, we recommend using silicone. It’s easy to work with because its mix of firmness and flexibility makes it easy to get out of the mold and brings this versatility to your final object.
2.3, Assembled and Put into Use
No need for a biohazard suit – all you need is a spray to coat your mold before you pour material in it to make it easier to get out when it’s dried, like when you oil up a baking sheet to make your cookies come off easier. Think of mold release as a cooking spray for your 3D printed molds. It’s cheap and much easier than wax or just hoping nothing will break when you take it out.
Be sure to give your mold plenty of time to cure. Carefully pull the silicone rubber from the 3D printed mold. You may need to finish up with a few final touches. Cutaway any excess silicone and clean up rough edges with an X-Acto knife.
Analysis of the Advantages of Using 3D Printers to Make Molds
In modern times, manufacturing and molding are highly dependent on each other, and countless product components are manufactured by molding (injection, blow molding, and silicone) or by casting (e.g., mold casting, fining, and spinning). Whatever the application, making molds guarantees quality while increasing efficiency and profitability. CNC machining is the most common technique used to make molds.
Although it provides highly reliable results, it is also very expensive and time-consuming. Therefore, many manufacturers of molds are also beginning to find more effective alternatives. Creating molds from additive manufacturing (ALM or 3D printing technology) is an attractive way to make 3D molds because molds are generally found in smaller quantities and come in more complex shapes. Here is a brief overview of the many advantages that come with using 3D printers to create molds.
3.1, Shorten Mold Production Cycle
3D printing a mold shortens the entire product-development cycle and encourages innovation. In the past, companies sometimes opted to postpone or abandon product design updates due to the large amount of capital needed to make new molds.
By reducing 3D print mold making setup times and enabling existing design tools to be updated quickly, 3D printing mold enables businesses to afford more frequent mold changes and improvements. It enables the mold design cycle to keep pace with the product design cycle.
In addition, some companies have purchased their own mold 3D printer, thus further accelerating the speed of product development, increased flexibility, and adaptability. Strategically, it increases the ability of supply chain defenses to extend deadlines and minimize the risk of stagnation, such as obtaining inappropriate molds from suppliers.
3.2, Manufacturing Cost Reduction
If the current cost of metal 3D printing is higher than the cost of traditional metal fabrication processes, the cost savings will be made easier in the plastic area.
Metal 3D printed molds are economically advantageous in the production of small, discontinuous series of end products because the fixed costs for these products are difficult to amortize or because they are limited to certain specific geometries (i.e., they are optimized for 3D printing only).
But there are even more economic advantages. In particular, molding 3D printed parts is cost-effective when using materials that are very expensive and where traditional mold-making results in high material scrap rates.
In addition, the ability of mold 3D printers to produce accurate molds in just a few hours can have a positive impact on the manufacturing processes and margins, especially when the production downtime or mold inventory is very expensive.
Finally, there are often times when the mold has to be changed after the start of production. The flexibility of mold 3D printers allows engineers to simultaneously produce multiple iterations, thus reducing upfront costs associated with mold-design changes.
3.3, Custom Molds Help Realise the Customization of End Products
Shorter production cycles, more complex geometries, and the ability to reduce final manufacturing costs allow companies to create a large number of personalized tools to support the manufacture of custom parts.
3D printing mold is very conducive to customized production, such as medical equipment and other elements within the medical industry. Mold 3D printers offer surgeons personalized 3D printed instruments, such as surgical guides and tools that enable them to improve surgical results and reduce operating time.
3.4, Not Limited by Mold Size
Making a standard manufacturing mold is a multifaceted process that doesn’t allow for easy change once you’ve completed the final version. But mold 3D printers give you design ease with the duplication benefits of manufacturing. If you notice a change you need to make after your first batch, no sweat.
Just go to your CAD, tweak it, and 3D print it into your next mold in the time it would take an industrial manufacturer to notice there’s a problem at all. No paying extra for new molds, no waiting another month and a half to see if the change worked, and no need to settle for molds not in-line with your desired mold size – you’re already back in business.
3.5, The improvement of mold design adds more functionality to the end product
Often, the special metallurgical approach to mold 3D printers improves the microstructure of the metal and produces a fully dense print component with mechanical or physical properties as good as or better than those forged or cast (depending on the heat treatment and test orientation).
Injection mold 3D printers offer engineers unlimited options to improve mold design. When the target part consists of several subcomponents, 3D printed molds have the ability to integrate the design and reduce the number of parts. This simplifies the product assembly process and reduces the tolerances.
3.6, Optimize tools to make them more ergonomic and improve their performance
Mold 3D printing reduces the barrier of validating new tools that address the unmet needs in the manufacturing process, enabling more moving fixtures and fixtures to be manufactured. Traditionally, tool design and corresponding devices have always been used for as long as possible due to the cost and effort required to redesign and manufacture them.
With mold 3D printers, businesses can refurbish any tool at any time, not just those that are already scrapped and do not meet the requirements. Due to the small amount of time and initial cost required, making molds with 3D printing makes it more economical to optimize tools for better marginal performance.
Specific Application and Cases of 3D Printing Molds
Mold 3D printing has had a major impact on the world. It has the potential to transform multiple industries. As the technology behind mold 3D printers evolves, it will become increasingly affordable to simply buy your own home mold 3D printer. Already, there are printers available for less than $100. The cheaper models have limitations in terms of what they can print, but the trend points to the wider use of mold 3D printers.
Just how wide are we talking? 3D printed molds have already found use in the medical, manufacturing, fashion, food, aerospace, transport, and education sectors. Even museums have been buying 3D printers to recreate missing portions of their valuable relics. 3D mold printing can be a very powerful and transformative technology. Here are some of the industries where mold 3D printer usage runs rampant.
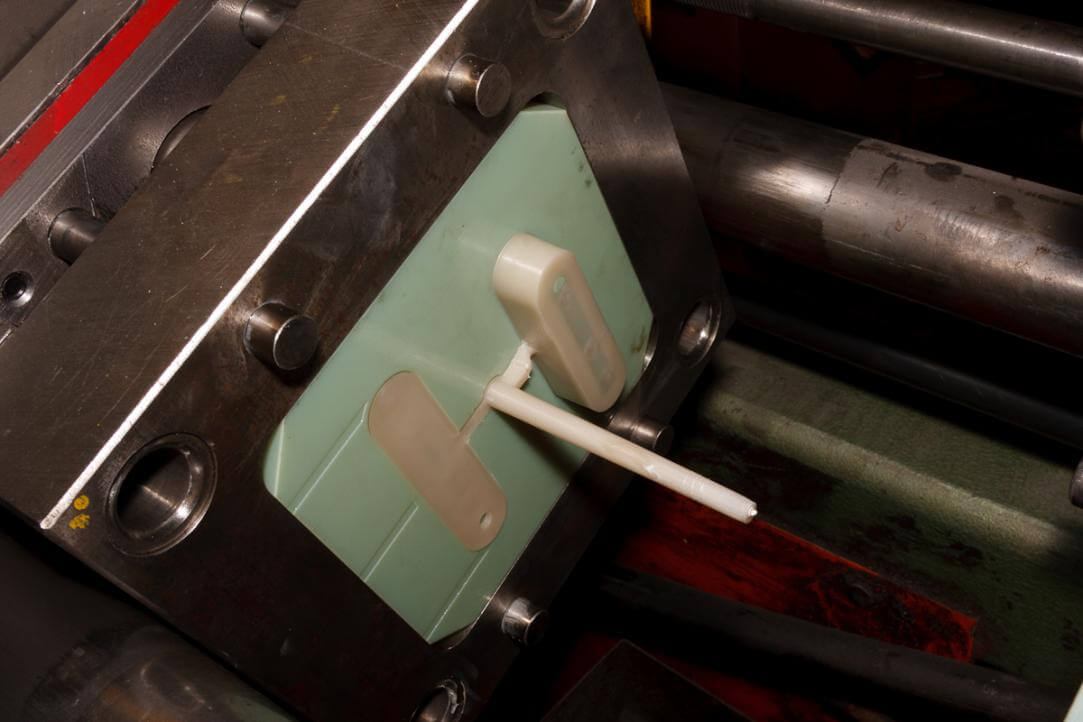
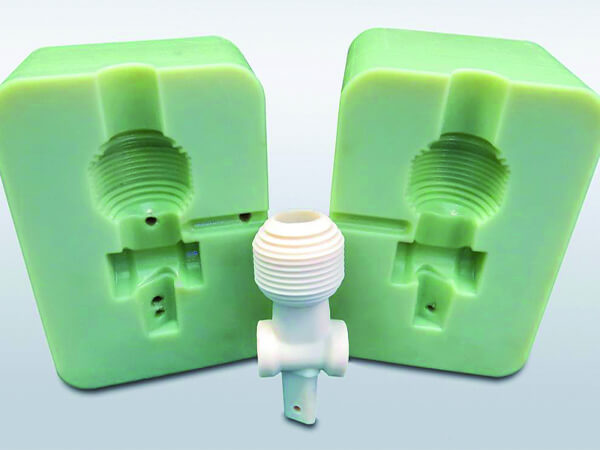
4.1, Injection Mold 3D Printer
Injection molding is one of the most common manufacturing processes in the plastic industry. Essentially, molten plastic is injected into a mold cavity, it hardens as it cools, and then the mold is opened, and the plastic pieces were taken out.
Injection molding is primarily used in mass production because of its high upfront costs from design, tests, and tooling. Of course, the unit price drops dramatically the more parts that are produced, which is why it’s worth using injection molding for mass production.
Injection molds themselves are blocks with cavities that determine the shapes of the products being made. Molds are traditionally designed and produced via computer numerically controlled (CNC) milling machinery, which is quite expensive.
Since molds are usually made out of metals such as steel and aluminum, they’re very difficult to alter once produced. Therefore, using injection mold 3D printers offers a cheap and flexible alternative.
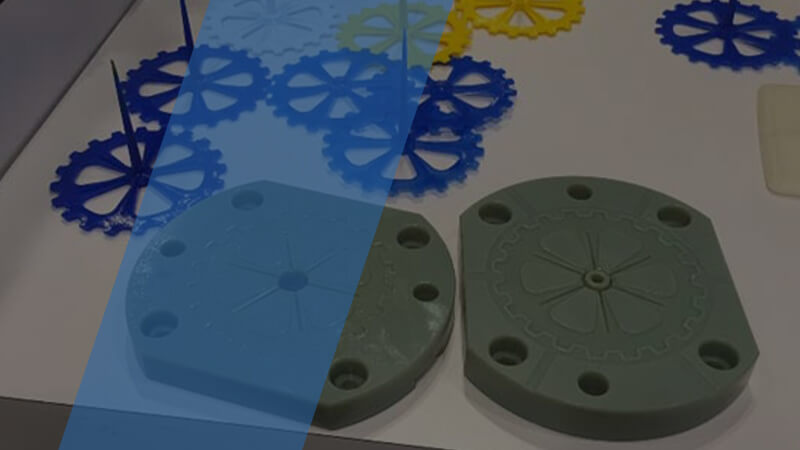
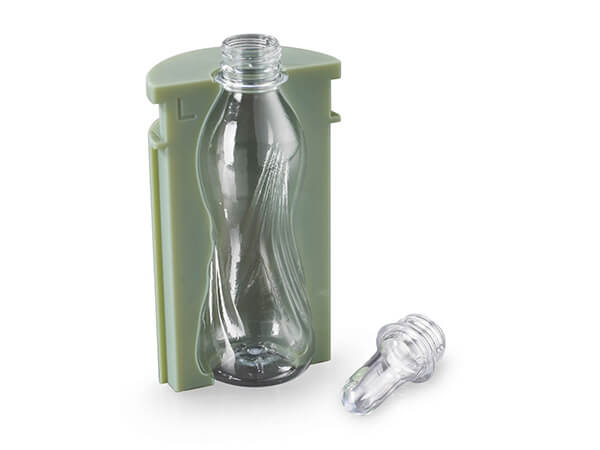
4.2, 3D Printing Molds for Casting
Creating a mold or cast requires precision. To make a mistake – or to have second thoughts – can be expensive, both from a financial and a time standpoint. Every feature, every detail, every customization also comes at a price. Whether it’s for a one-off piece or mass production, molds and casts are a tricky matter.
That’s where mold 3D printers come in. Professionals around the world are taking advantage of the technology’s ability to easily customize molds for prototypes, metal parts, jewelry – and even cakes. Doing so shortens development time from months to days and cuts production costs by potentially thousands of dollars.
Casting metal parts has been around for thousands of years. Today modern casting is the backbone of many industries, from automotive and aerospace to IT and consumer goods. Due to its importance, a wide variety of technologies have been developed for metal casting, and 3D printing is the latest to make its mark by delivering faster, more accurate, and less expensive methods.
If you’re new to casting, here are a few basics. Any metal casting process consists of two parts – preparing the mold and the casting itself. The mold is the frame into which molten metal is poured. Creating the mold requires first making a master model (also known as a pattern), which is an exact non-metal replica of the final metal part. A mold is made from this model.
After the metal poured into the mold has cooled and solidified, the casting process is complete. The part can be pried out of the mold for further processing or sale.
4.3, 3D Printer for Silicone Mold
With 3D printing, you have the ability to take something you’ve thought of, make it in a virtual setting, and then make it a reality. It’s not a new idea, but it’s so much more accessible. You can print after-market parts for your car, fancy or “pop-culture” knobs for your kitchen, customized badges for your car, and so much more.
The possibilities are endless for creativity, but 3D printing can take a long time. If you have friends, family, or potential customers all interested in one model that’s really time-intense, it’ll take a while to print it all. The solution: use 3D printing to make a silicone mold.
Benefits of Making a Silicone Mold With Mold 3D Printers
- Faster production of multiple copies.
- More material options for the finished part.
- Ability to cast in a wide range of colors and finishing effects without specialized equipment or additional print media/filaments.
4.4, 3D Printer for Jewelry Molds
Without question, 3D printing has revolutionized how jewelry is made. Uniqueness, precision, and attention to detail are the key aspects of quality jewelry, and this is exactly where 3D printing shines.
Before we really get into it, it’s important to realize that “3D printing jewelry” doesn’t necessarily mean directly producing end-use pieces of jewelry. Although metal 3D printing is a thing, jewelers often 3D print highly-detailed wax models of the desired rings, which are later used to make molds.
To better understand the basics of how jewelry is printed, imagine you’re a jeweler who needs to print 100 highly-detailed, custom golden rings. The first thing you’d need to do is to model the desired ring in CAD and later export the model as a file compatible with your mold 3D printer.
The next step would be to print 100 models of that exact ring (or as many as you can accommodate in the next steps). If you didn’t connect them with a weak lattice, you would then need to attach them to a plastic or wax stand.
Either way, the collection goes into a bin into which the mold material is poured. When the mold hardens, it’s put in an oven to melt or burn out the rings and the connecting structure. This leaves a space on the inside for a certain material, such as gold, to be poured into.
It may sound like a complex process, but in fact, it’s much easier and faster than conventional means.
How to Buy a 3D Printer for Mold Production
Without the right 3D printer for jewelry molds, making a mold for 3D print can become a very complicated task. There are numerous mold 3D printers available, but not all are authentic enough to provide you with a smooth and highly efficient casting process required to keep your mold production line running effectively. To be on a safe edge, we advise you to take out time to explore the following sections.
5.1, Common 3D Printing Materials for Making Molds
Almost every type of 3D printer available on the planet is suitable for making mold. Simply put, individuals in the jewelry and mold casting industry have a wide selection of mold 3D printers to choose from and numerous mold making materials at their disposal. Let’s highlight some of the basic materials that can be used in creating 3D printed molds.
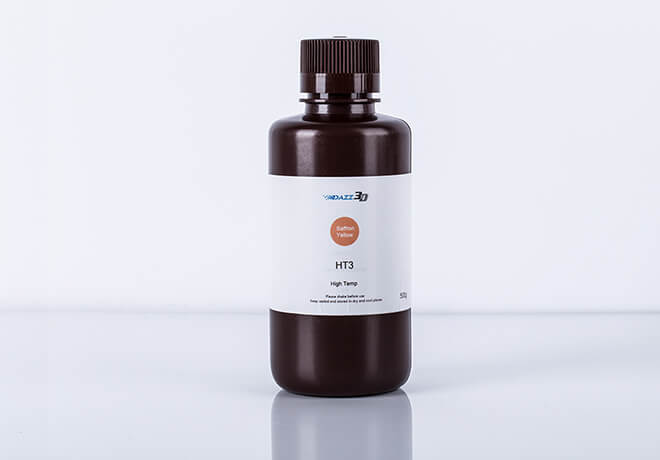
Resin
While FDM 3D printing technology uses traditional industrial plastics like ABS and Polycarbonate (PC), SLA, DLP, and LCD 3D printers require special photopolymer resins that harden (cure) once UV light is directed at it. Most 3D printing resins are either epoxy-based or acrylate-based, the latter being used more often in desktop printers.
A lot of people think of resin 3D printed parts as fragile and most suitable for ornamental and prototyping applications rather than functional and load-bearing components. But this is only true if the resin isn’t properly selected. That being said, if you’re buying a generic resin for a tough job, it won’t give you the strength that you’re looking for.
Examples of super-strong resin can be found in multiple industries. There are castable resins for making jewelry and 3D printing molds in the field of dentistry to produce mouth guards, crowns, and surgical guides. There’s also high-temperature resins that are suitable for 3D printing in aerospace and even resins that can produce rubber-like parts.
As the definition suggests, tensile strength values are usually measured by a pull test that follows strict international procedures, so the results can be used worldwide. The higher the tensile strength, the stronger the material is considered to be because of how much stress it can withstand.
Just because the resin is tough, it doesn’t mean that a mold 3D printed part made from these resins will be twice as strong as if printed with a standard resin. Other factors, like model design and print settings, play important roles in the final print’s strength, which we’ll discuss in more detail later.
Nonetheless, comparing tensile strength is a straightforward way to determine which material is stronger, and from the numbers supplied by the manufacturers, it’s clear that these resins are much tougher than the standard.
ABS {Acrylonitrile Butadiene Styrene}
As a thermoplastic polymer, it can melt and cool without altering its chemical properties. That makes it an interesting mold making 3D printing material. The filament is known to be strong, tough, and durable. It is also forgiving to scratches, offers good resistance to heat and everyday chemicals.
It can endure heat, pressure, and stress like no other industrial FDM material for mold 3D printing, making it a great choice for wear and tear prints. You can try this out yourself: If you move a strain of ABS filament, it will distort and bend before breaking. PLA breaks much more easily. ABS is quite forgiving, as long as you print with the right settings and proper temperature management. You can even achieve overhangs of around 45 degrees. If the print succeeds, the results are very convincing.
Most makers like the material because you can process its surfaces with acetone, glue parts, and even file off some material. Lastly, it can be easily painted with acrylic colors. ABS filament is not toxic when 3D printed. Only at very high temperatures (400 °C), the material decomposes into butadiene (which is carcinogenic to humans), acrylonitrile (possibly carcinogenic to humans), and styrene—nothing you want to inhale under any circumstances.
If you don’t have a mold 3D printer at hand, you can have ABS parts printed by a professional 3D printing service. You can put a call through to our support representative to obtain the best deal on a high-resolution FDM 3D printer for mold 3D printing.
PLA {Polylactic Acid}
PLA filament is a great material for 3D printed mold making. It comes in many shades and styles, making it ideal for a wide range of applications. Whether you’re looking for vibrant colors or unique blends, it’s an easy-to-use and aesthetically pleasing material.
PLA is short for Polylactic Acid, a thermoplastic polymer that is derived from renewable resources, more specifically from corn starch or sugar cane. This sets the material apart from other commonly used plastics, which are procured through the distillation and polymerization of non-renewable petroleum reserves.
Since PLA filament is a biodegradable product, it tends to naturally break down in about three to six months. Other thermoplastic materials can take up to a thousand years to decompose, making PLA much more environmentally-friendly.
PLA material has been thrust into the spotlight by the rise of custom industrial FDM printers. PLA filament is available in a wide variety of colors and blends, and innovative PLA-based materials seem to be constantly hitting the market.
Outside of mold 3D printing, PLA is also used to produce things like medical implants, food packaging, and disposable tableware. But inside of the industrial FDM 3D printing sphere, PLA filament is widely thought of as an aesthetic material best used for prototyping.

Carbon Fiber
Carbon fiber filaments are composite materials formed by infusing fragments of carbon fiber in a polymer base, similar to metal-infused filaments but with tiny fibers instead. The polymer base can be of different 3D printing materials, such as PLA, ABS, PETG, or nylon, among others.
While true carbon fiber materials have long continuous fiber strands that improve mechanical resistance, these FDM 3D printer materials contain short particles of around 0.01 mm in diameter. Although this is enough for improving the strength of printed parts, keep in mind that such filaments cannot compare to the actual material.
For those seeking tougher FDM 3D printer materials, carbon fiber filament presents a relatively easy alternative to the more expensive and demanding materials, such as polycarbonate (PC) or PEEK. Moreover, the increased strength provided by the carbon fiber particles contributes to greater dimensional stability, helping to avoid warping and shrinking.
However, using a mold 3D printer to 3D print these materials does present some issues. The infused carbon fiber particles aren’t melted by the nozzle during extrusion, which may lead to frequent clogging. In addition, these particles work as abrasive agents during extrusion, which over time will wear down a brass nozzles’ internal bore. This is why special nozzles like hardened steel are strongly suggested for printing with composite materials.
5.2, How to Choose and Buy a 3D Printer
Now to the focal point of this buying guide. Finalizing this buying guide without providing detailed insight on the steps and processes involved in buying the right mold 3D printer would void the guide’s efficiency. Ranging from the types of mold 3D printers available to the factors to consider when making your buying decision, we covered it all.
5.2.1 The Types of 3D Printer You Need
Like we said earlier, looking at the types of 3D printers necessary for 3D mold printing is key to building an efficient and highly lucrative mold casting business. While there are a lot of printers suitable for mold 3D printing, the most durable and FDM and LCD 3D printers. These printers provide a smooth and efficient casting process; they are cost-effective and do not require complex printing when molding 3D printed parts. More details on their working principles below.
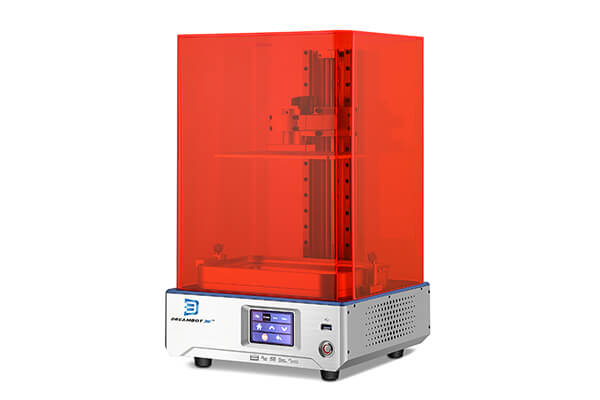
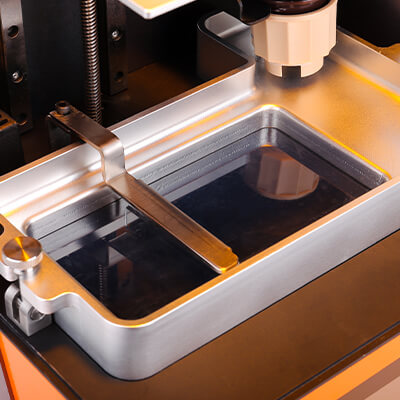
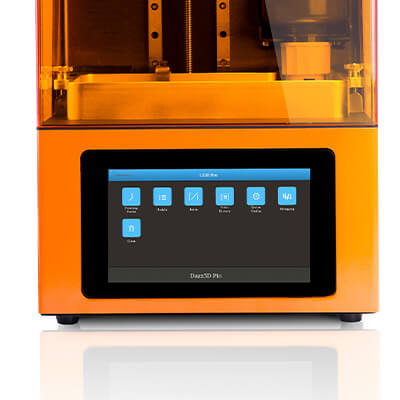
- LCD 3D Printer for Resin
Liquid crystal display printers, or LCD 3D printers as they are popularly known, are mold 3D printers use to create 3D models or designs of numerous objects in education, automotive, aerospace, medicine, dentistry, etc. LCD mold 3D printers generate their light source through an array of UV LCDs. These printers are used to create 3D patterns or images of CAD models using materials such as resin, wax, or metals. The images or 3D models obtained using LCD 3D printers are composed of dots.
LCD mold 3D printers display images by sending light from a metal-halide lamp through a prism or series of dichroic filters. This dichroic filter separates light into three polysilicon panels. In simple terms, a liquid 3D mold making printer uses an array of UV LCD as its light source. The printer shines light directly from the flat LCD panel in a parallel fashion onto the build area.
As the light travels through the light source, the individual pixels open up to allow light to pass or close to block the light. This combination of open and closed pixels creates room for the liquid polymer 3D printer to produce multiple colors and shades on the projected image.
The light emitted from an LCD mold 3D printer isn’t expanded—that’s, it doesn’t spread beyond its projected frame. When using these mold 3D printers, you can design patterns and images of multiple variations; rest assured you wouldn’t experience pixel distortion halfway. Note that unlike most other resin printers, the LCD mold 3D printers print quality depends on its LCD density.
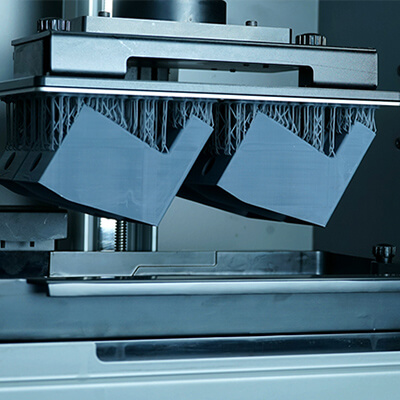
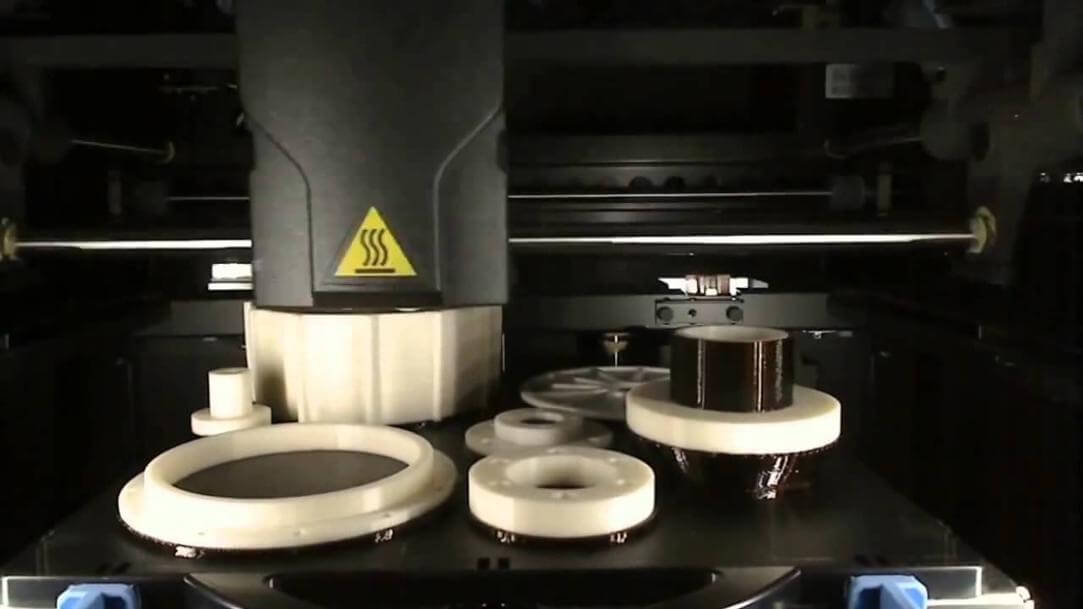
- FDM 3D Printer
FDM industrial 3D printer is currently the most popular 3D printer for mold 3D printing. It is used in casting and molding 3D printed parts for jewelry, shoe industry, dentistry, aerospace, etc. FDM printing was originally developed and implemented by Scott Crump from Stratasys, founded in the 1980s. Other 3D printing companies have embraced similar technology but under different names. A well-known manufacturer MakerBot coined a virtually identical technology, calling it Fused Filament Fabrication (FFF).
Mold 3D printers that use FDM Technology construct objects layer by layer from the very bottom up by heating and extruding thermoplastic filament. The whole process is somewhat similar to stereolithography. Specialized programs or Slicers “cut” CAD models into layers and computes the manner printer’s extruder would assemble each layer.
In addition to thermoplastic, a printer may extrude support materials too. Then the printer heats thermoplastic until its melting point and extrudes it throughout the nozzle on a printing bed, which you may know as a build platform or a desk, on a predetermined pattern determined by the 3D model and Slicer software.
The Slicer software running on the computer connected to the mold 3D printer translates the measurements of an object into X, Y, and Z coordinates and controls the nozzle and the foundation to follow the calculated route during printing.
When the thin layer of plastic binds to the layer beneath it, it melts and hardens. When the layer is completed, the base is lowered to accommodate the printing of the next layer.
5.2.2 What is the size of the Print?
The size of the print says a lot about the type of mold 3D printer to buy. While most LCD Jewelry 3D printers can create CAD designs suitable for every printing task, you might want to keep in mind that you can sometimes come across machines with size, dimension, or weight constraints.
Determining the size of a print requires in-depth knowledge of the customer base or audience you create 3D models for on a regular. If your day-to-day workload revolves around providing CAD designs and models of large print size to experts in numerous other industries, we recommend you thoroughly scout for a machine palatable enough to handle the dynamic needs of your customer base before finalizing the purchase.
Print size is one factor most individuals take for granted when purchasing a mold 3D printer. If you don’t carefully consider the dimension, weight, or size of the model your mold 3D printer would be able to print before making payment, then keep in mind that the need to purchase another printer wouldn’t be far off.
If it seems impossible for you to accurately pinpoint the size of the 3D models or patterns you would be subjected to creating on a regular; please put a call through to our support team; they are fully equipped to guide you through every step of the decision-making process.
5.2.3 Chose a Reliable Brand
Every smartphone or gadget lover would easily relate to how frustrating buying a device from an unverified or unreliable brand can be. Starting up a mold 3D printing company might not require a million-dollar investment—it’s amongst the few lucrative businesses that individuals from all walks of life can easily use to make earns meet.
Before we dive deep into what choosing a reliable brand entails, note that your printing line is only as viable or as functional as the type of 3D mold printers available. If your 3D printers are by-products of companies or manufacturers with little to no track record of providing sustainable mold 3D printers, it’s advisable you revisit the market as soon as possible and arm your production line with printers created by reputable brands.
While it’s important you choose the right brand for your mold 3D printing need, the process involved can sometimes get confusing. To know if a mold 3D printer of choice is an ideal end product for individuals and manufacturers who would go the extra mile to ensure you enjoy the best printing experience possible, explore the following factors;
- For how long has the manufacturer you are about to purchase a 3D printer from been in business?
- What sort of customer feedback is backing up their brand’s identity?
- Are they regarded as a top brand by professionals and experts in the industry?
- How often do they provide mold 3D printers with a price tag in line with the productivity, efficiency, and durability you require from the device?
5.2.4 Safety Configuration of the Machine
When purchasing or using a 3D printer to make a mold, you must keep in mind that safety is paramount. And this is not just because you wouldn’t want to expose yourself to the toxic fumes most mold 3D printers emit during the design and creation process, but also because your ability to build a lucrative 3D printing business is largely dependent on how safe and ready-to-use your 3D printers are.
If this is the first time you are tasked with handling all the challenges that come with purchasing a jewelry printer, the safety configuration of the machine might seem alien to you. Don’t neglect the durability effect that comes with purchasing a 3D mold printer with safety configurations that does not reflect the productive ability of the machine.
When making your 3d printing machine buying decision, you need to be on the safe edge. The only way to achieve this feat is by putting due diligence into every step involved in the process. Note that the safety configuration of most mold 3D printers is quite complex and bulky. To demystify this tiring yet important process, consult with a support service representative before finalizing your buying decision.
5.2.5 Resolution Requirement of the Machine
How important is the resolution of a 3D printer to the end processor finish product? The answer to this question depends on the industry, client, and customer base you are serving. Having a high-resolution injection mold 3D printer is quite essential for artisans and jewelers who design complex prototypes. A hobbyist can easily make do with mold 3D printers of any type; rest assured, the finished product and design are guaranteed.
There is no ideal benchmark or resolution requirement for hobbyists or artisans looking to provide their clients with the best models and designs possible. However, having a mold 3D printer with high definition can help you attract, build and grow a formidable client base.
Before making a purchase, explore the resolution of the 3D printer. Try to be as detailed as possible. You can seek advice from experts and professionals with a reputable track record in the mold casting industry. Endeavor to have a basic idea or information on the mold 3D printer resolution requirements that would keep your production line running at an optimal level before actualizing your mold 3D printer purchase.
5.2.6 Consider Weather the Price of the Machine is Acceptable
It’s never a fun experience to have explored all the remarkable features and benefits a mold 3D printer is offering, weighed it with your production line, and obtained satisfactory results just to find out during checkout that the mold 3D printer you want to purchase is far above your budget.
Molding 3D printed parts is are quite expensive. It requires a sizable investment, especially if you are looking for industrial-grade printers. As an artisan or hobbyist looking to help individuals from different walks of life obtain the mold design or finish product they desire, having the best mold 3D printer is essential.
Before exploring all the features and benefits of a mold 3D printer, weigh its price range with your budget. Note that the price of a mold 3D printer does not determine efficiency. There are a lot of mold 3D printers with a high price but not as durable and efficient as counterparts with low price tags.
To hasten your 3D printer buying process in terms of price, it’s advisable you put a call through to a support representative backing up the activities of a brand of choice stating your estimated budget and the type of 3D printing activities you would like to carry out using the machine.
5.2.7 Consider the Suppliers After-sales Service Capability
While most of the decision-making process involved in buying a 3D printer for silicone mold we have listed thus far revolves around upfront features, benefits, and price tags, you might want to bear in mind that there is more.
What’s the after-sales service of the brand you are purchasing a mold 3D printer from like? Is their support service trained to assist you during and after the sales? Do they take up complaints even after the deal is finalized? Is there room for free shipment or a money-back guarantee if the mold 3D printer shipped to you does not meet the required specification?
The after-sales service of your vendor or manufacturer goes a long way to determining how long your mold 3D printer would last. Many 3D printer manufacturers do not provide their users with sustainable after-sales service. Most brands tend to neglect complaints and don’t take into consideration customers feedback not in line with their sales and marketing goals.
Since its impossible to accurately determine how reliable a brand or supplier’s after-sales service is by asking the customer representative, the most viable method you can use to ascertain the quality of the brand’s after-sales service is by contacting individuals who have previously purchased mold 3D printers from your chosen manufacturer.
5.2.8 Consider the Service Life of the Machine
Every 3D mold making printer comes with designated service life. Most manufacturers state how long a machine would last base on the equipment and products that went into the design and development phase. To authenticate this claim, most mold 3D suppliers attribute a warrantee on their machine based on the service life.
Most 3D printing mold casting machines come with a one-year warranty. While this is the normal service life for most mold 3D printers, it shouldn’t come as a surprise if mold printers with six months warranty are thrown your way. In most cases, such printers are relatively cheaper and come with limited benefits and features.
It’s best you ask your supplier’s support representative about the warrantee policy backing up the machine you are about to purchase. Try as much as possible to weigh in on the same scale as your production line and the price tag attached. If the service life of the mold 3D printer doesn’t seem to one that can yield profitable returns within the estimated time, it’s best you abort the purchase.
5.2.9 Consider the Maintenance Cost of the Machine
It’s no news that without maintenance, even the strongest of machines would at some point fail. Maintenance isn’t a factor that’s to be considered after you must have finalized the buy; it’s a factor that should be considered as so as you come across a mold 3D printer capable of handling the dynamic printing task at hand.
Maintenance can become an expensive venture when proper consideration is not given to it during the buying process. You don’t have to weigh how much every part of the machine would cost, or the effect print fails would have on the machine in the long run. The basic maintenance culture needed to keep the mold 3D printer running effectively is all that’s needed.
Consider how much catering to the day-to-day needs of the machine would cost, weigh it against your budget, and, if possible, allocate a stipulated amount into maintenance. Note that creating a healthy maintenance culture during the buying process can help you heighten your mold 3D printer service life for a far longer time than your manufacturer or supplier proffered.