Silicone molding is a manufacturing technique used to transform uncured silicone rubber into a pre-defined shape.
Several molding techniques may be used, including compression, injection, extrusion. The choice depends on the component’s size and complexity, required volumes, and budget available for tooling.
The most popular manufacturing method, molding, is ideal for making silicon rubber components consistently and efficiently.
The pressure of the press ensures that the material is forced into all areas of the cavity, and the heat of the mold cures the silicon rubber, making it retain its shape.
This buying guide contains all the information you need to make the right 3D printer buying decision to set up your silicone mold production line.
Ranging from the process involved in silicone mold making, to the various application fields, to the 3D printer for the silicone mold buying process, this buying guide covers it all—sit back and enjoy a good read.
Introduction to the Traditional Mold Making Process
Throughout history, artisans have used molds to make everything from Bronze Age weaponry to modern-day consumer products. While molds were commonly shaped in stone, modern science has given rise to far easier materials to work with, such as silicone.
Today, a vast array of industries rely on silicone molding. Product developers, engineers, DIY makers, and even chefs all make silicone molds to create one-off or smaller runs of parts.
In this practical guide to silicone mold-making, we’ll break down everything you need to know before getting started, provide a list of items you’ll need, and give you a step-by-step guide for incorporating silicone molds into any type of project.
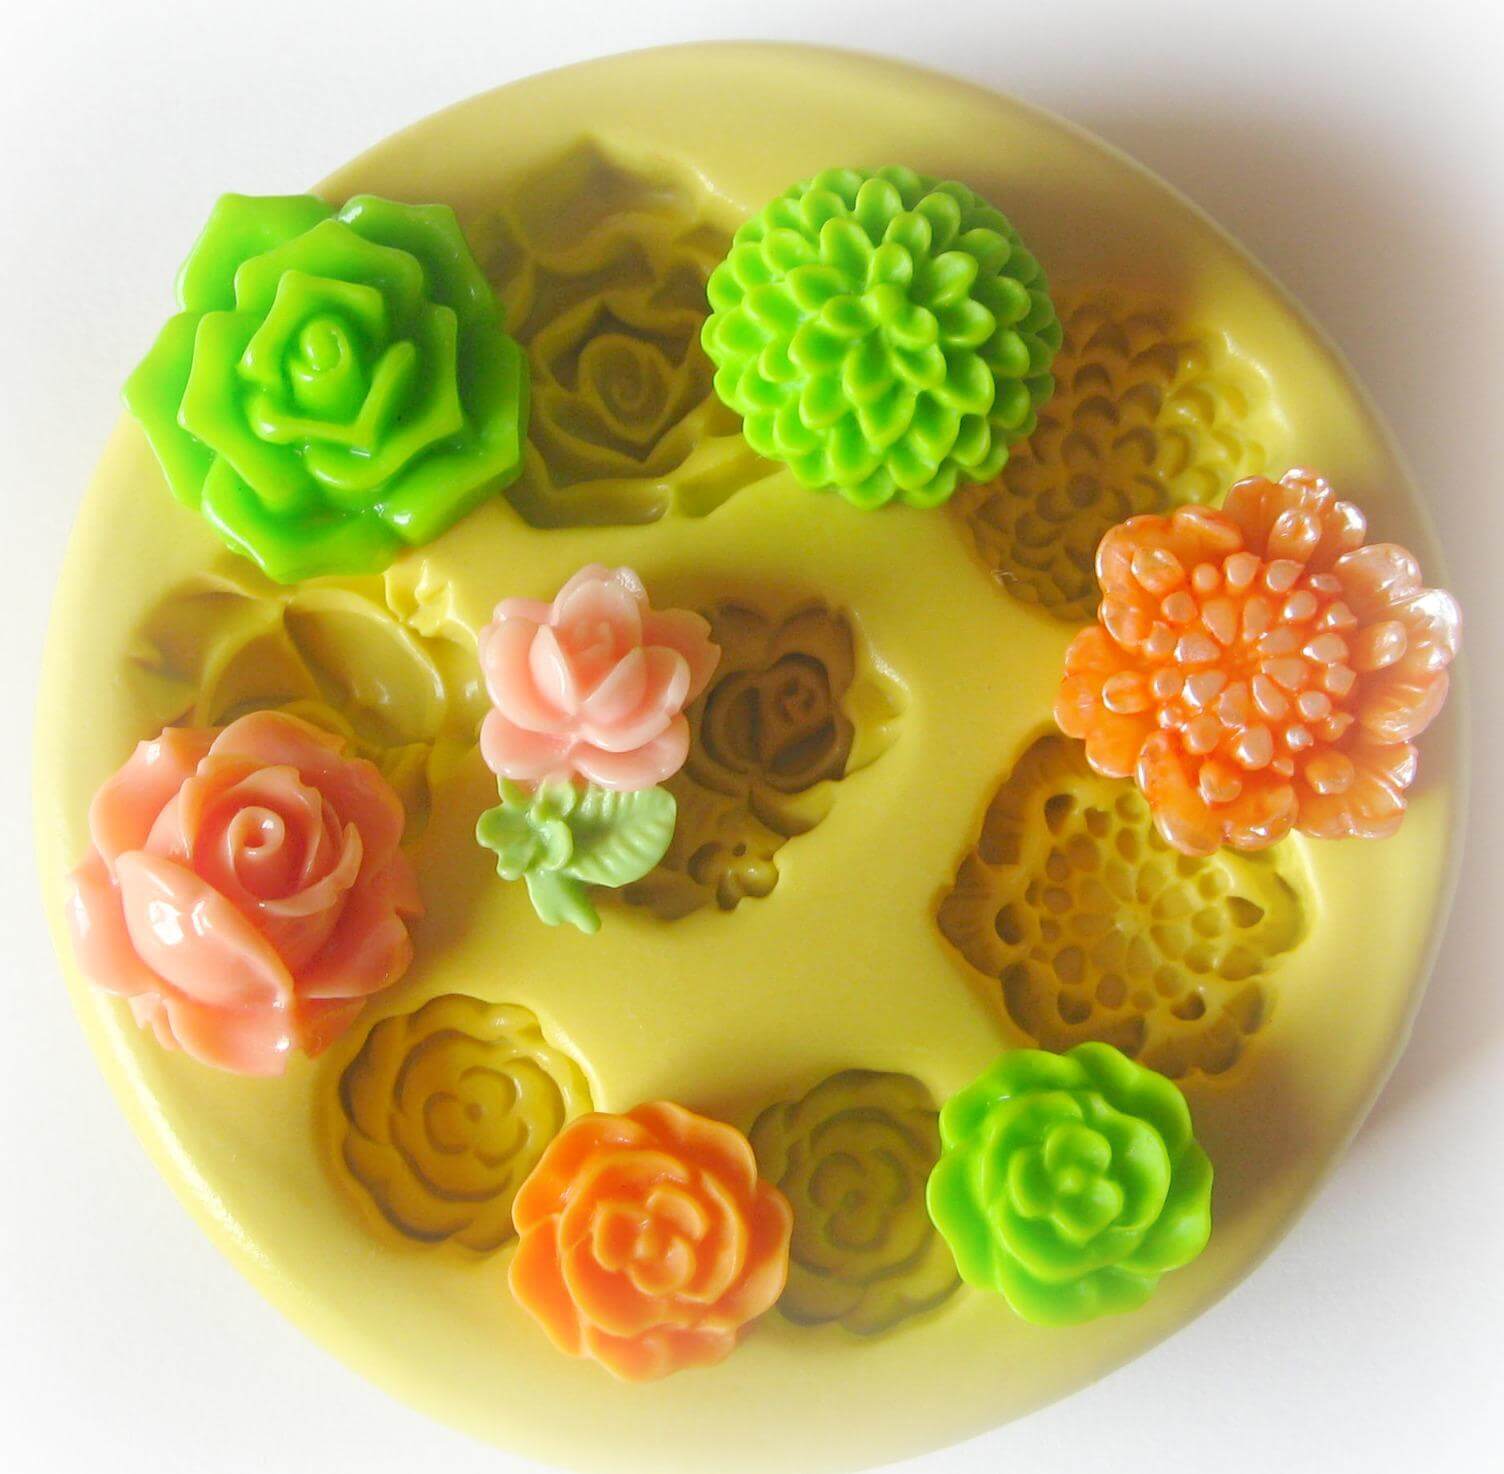
Making a silicone mold is surprisingly simple and requires only a handful of components. And while professional equipment gives you more options, there are also plenty of at-home uses for silicone molds. The components needed to make a silicone mold are:
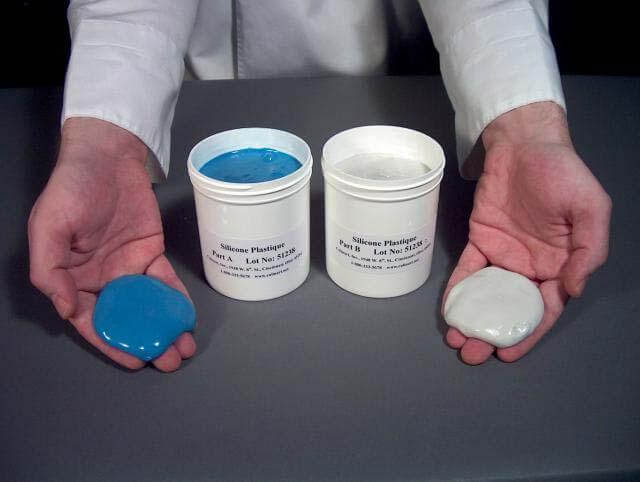
- Liquid silicone: Silicone for mold making is widely available and usually comes in two parts that must be mixed immediately before use.
- A container: The liquid silicone is poured into a container, which should be larger (but not much larger) than the master pattern. In many cases, a new and suitably sized box can be made on-demand using, e.g., wood or cardboard.
- A master pattern: The master pattern is the original object that you will duplicate using the silicone mold. A master pattern can be an existing object like a plastic toy or a fabricated item.
- Mold release: Mold release is a spray-on liquid used to prevent the mold from sticking to the watertight container and also to prevent casting materials from sticking to the inside of the mold. (It should not be used for applications like making food products.)
- Casting material: The material poured into a silicone mold can be anything from polyurethane to melted chocolate.
- Clay (optional): Clay is only required when making a two-part mold.
1.1, Prototype the Finished Product Model
When it comes to the silicone mold production process, the first step or material required is a finished product prototype. It’s listed above as the master pattern. The prototype simply represents the type of material you want to make.
The master is a positive original of the parts you will make with the silicone mold. This can be an existing solid object or a new item made with manufacturing equipment. For best results, the master pattern should not contain complex cavities or overhangs.
Note that without a prototype or master pattern, it’s impossible to create a silicone mold. After obtaining a prototype of the finished product, lay the prototype into a container. In many cases, a container is made specifically for the pattern. The box container can be made from, e.g., wood or cardboard.
After applying mold release to the inside of the container, place the patterns flat side down in the container or suspend them within the newly made container. If you have multiple patterns (for making a popsicle tray, for example), spread them out evenly.
Spray them with mold release. If you are making a two-part mold, half of the container should be filled with clay and the patterns inserted halfway into the clay.
1.2, Preparation of Liquid Silicone and Curing Agent
Because of settling during storage, always stir the silicone in the original container before pouring it into a mixing cup. Stir steadily with a circular motion rather than beating it or using an up-and-down motion to avoid trapping air bubbles, scraping the bottom of the can to loosen any settled material.
Then let the silicone rest for a few minutes or more to allow air bubbles to rise to the surface (this short resting time will not cause any re-settling of the silicone itself).
Tip: Tongue depressors or craft sticks make good, cheap stirrers for small batches; paint stirrers make good stirrers for larger batches.
Next, pour the desired amount of silicone into a separate mixing container, such as a plastic cup or wax-free paper cup. Select mixing containers with relatively straight bottoms and sides and little or no inner lip to make stirring easier.
Use a gram scale to weigh out the amounts for the proper manufacturer’s mix ratios (e.g., 1:1 or 10:1 ratio). Add the catalyst to the base and mix thoroughly, scraping the sides and bottom of the container to get a thorough mix.
1.3, Pouring and Vacuuming to Remove Air Bubbles
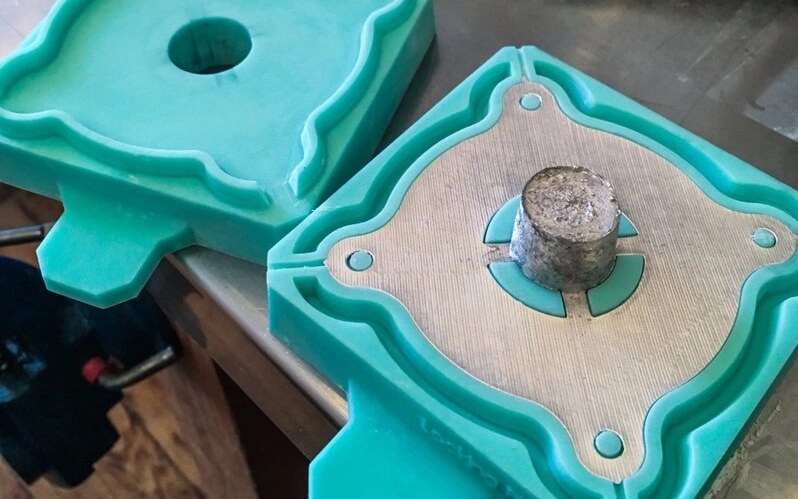
After mixing the two silicone components according to the instructions on the bottle and pouring it slowly into the container, the surface level should rise half an inch above the top of the master pattern to prevent the mold from tearing.
Curing can take several hours (specific times may be specified on the silicone bottle). For professional applications at 3ERP, we remove air bubbles, then cure the silicone mold in an oven at a medium temperature.
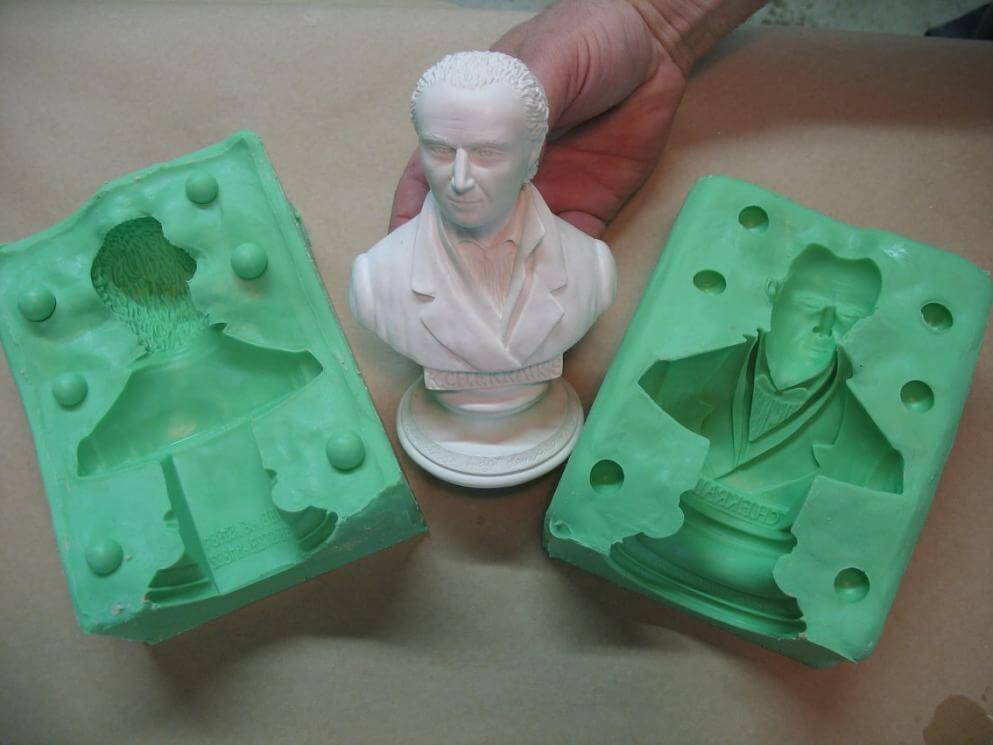
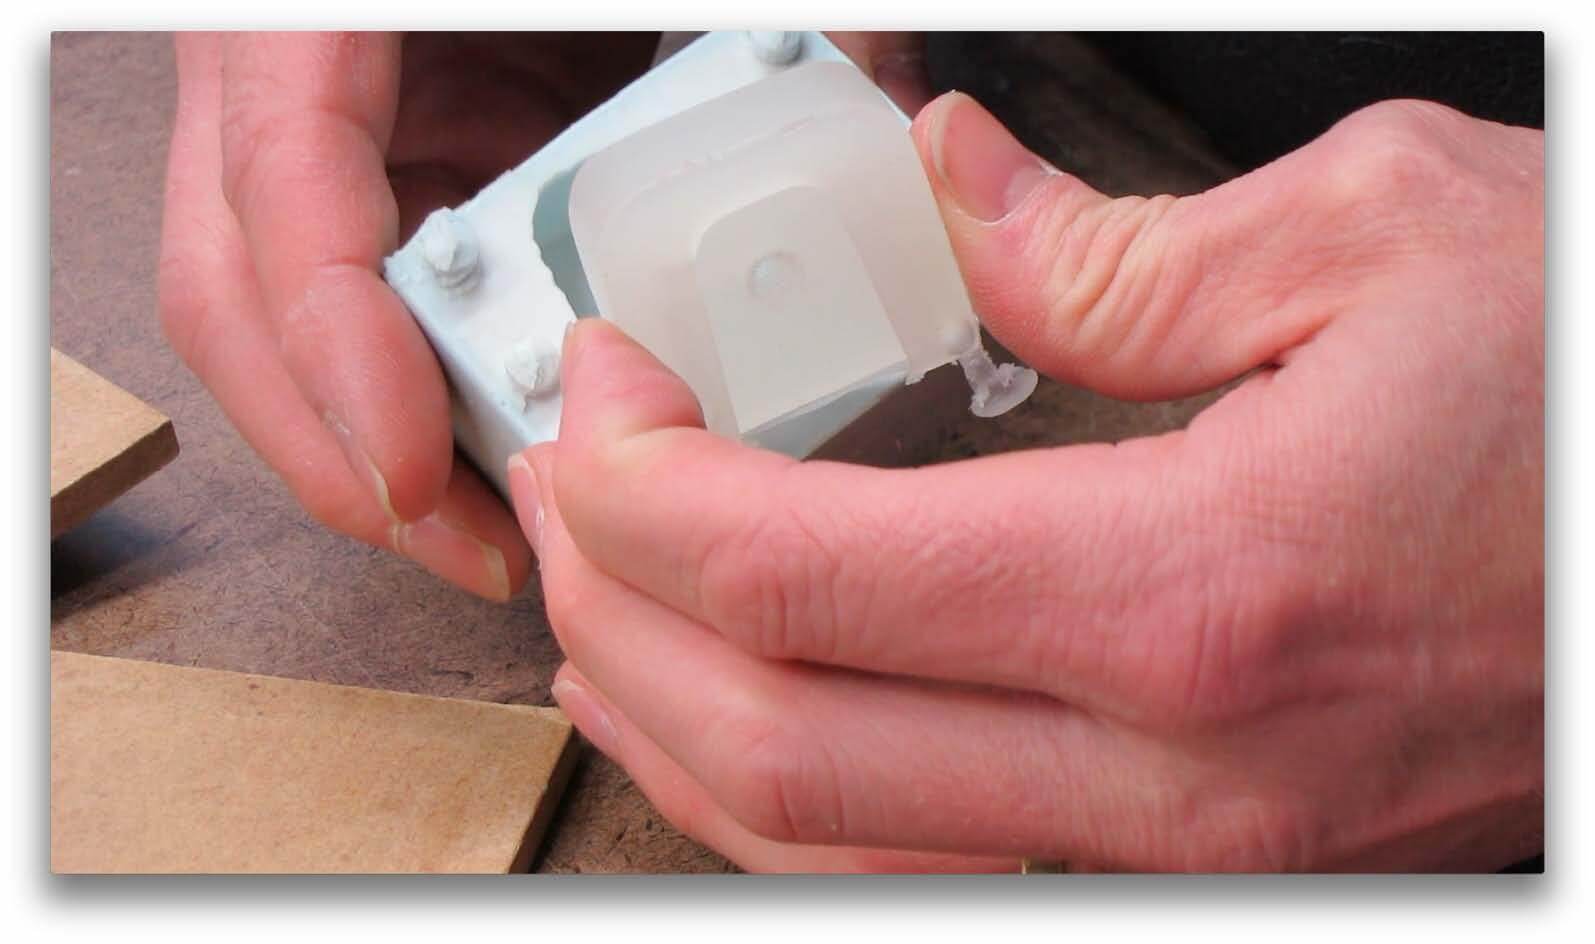
Once it has fully cured, the silicone mold can be gently removed from the container. If you are making a two-part mold, you should remove the clay, leaving just the mold with the pattern still half sticking out.
Return the mold to the container the other way up, so the pattern is protruding upwards. Apply mold release, fill the other half of the container with silicone, wait for curing, then remove.
1.4, Finish the Mold for Production
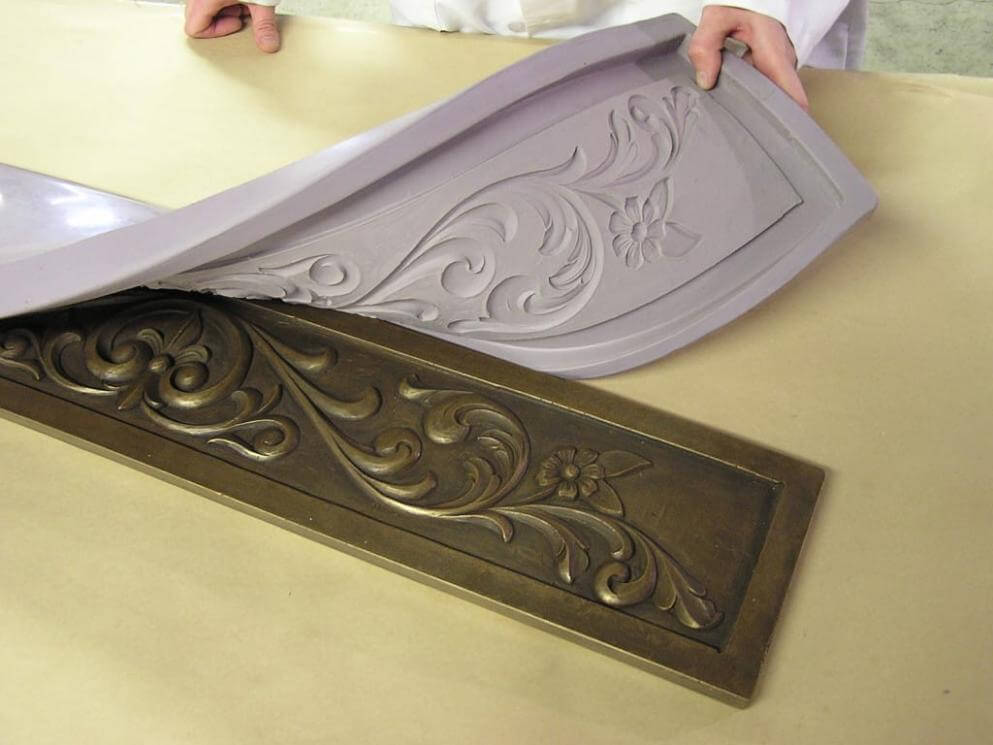
After the prescribed cure time has elapsed and the outer surface of the mold feels firm and dry, the mold is usually ready for removal or “demolding.” However, if the mold has any deep areas or time is not of the essence, it is best to wait a bit longer to ensure that all areas of the mold are fully cured.
When removing the mold, gently peel up all the edges first, and then the middle section. If any portion seems too soft, immediately stop pulling and replace any lifted sections, allowing more time to cure further. If you are making a two-part mold, you will first have to separate the two halves of the mold.
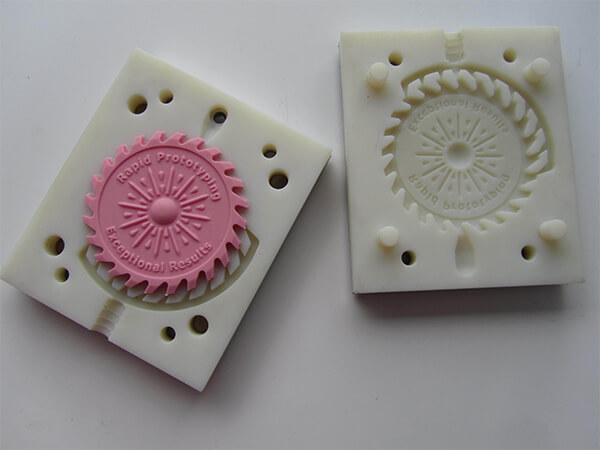
The final assembling process involves casting the parts. Note that, depending on your casting material, casting your parts may be as simple as applying for mold release then pouring liquid into the mold. Professional processes like vacuum casting involve inserting the silicone mold into a machine that removes air bubbles from the casting material.
How to Make a Silicone Mold with a 3D Printer
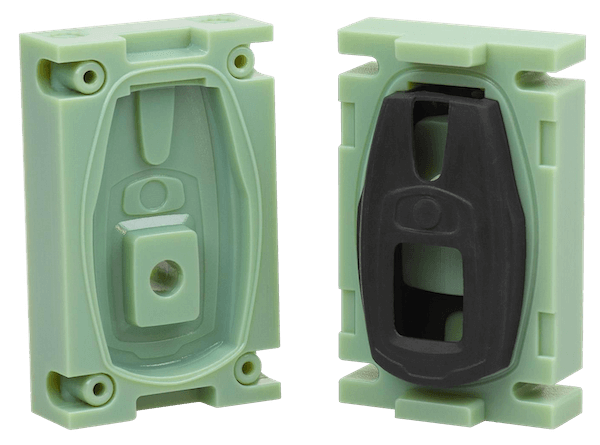
Silicone molding is a powerful production method that, when combined with 3D printing, can allow you to make several copies of one product. You can also create a product in a material that is not supported by your 3D printer.
Hobbyists and professionals alike rely on silicone molds because of their versatility and ease of use.
3D printers for silicone mold offers many benefits, including design flexibility within CAD software, high accuracy, ease of prototype modification, and quick turnaround times.
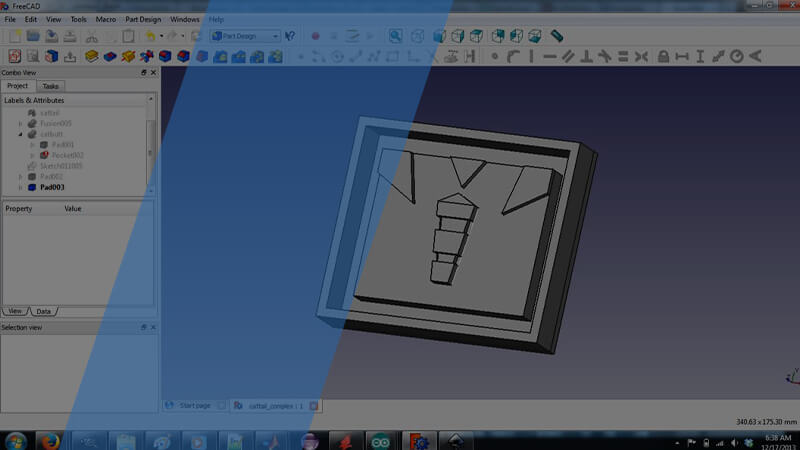
2.1, 3D Modelling through Software
3D printing your own silicone mold is a great way to bring a new level of creativity to your project. From the computer to fruition, this is one of the most versatile things you can accomplish with a mold 3D printer.
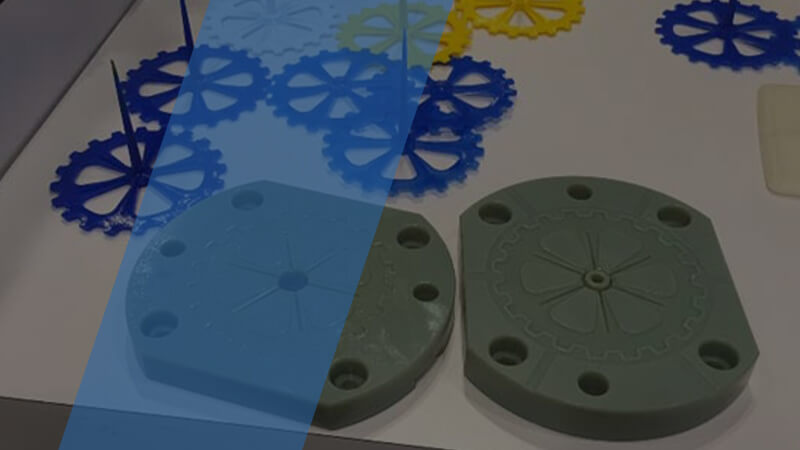
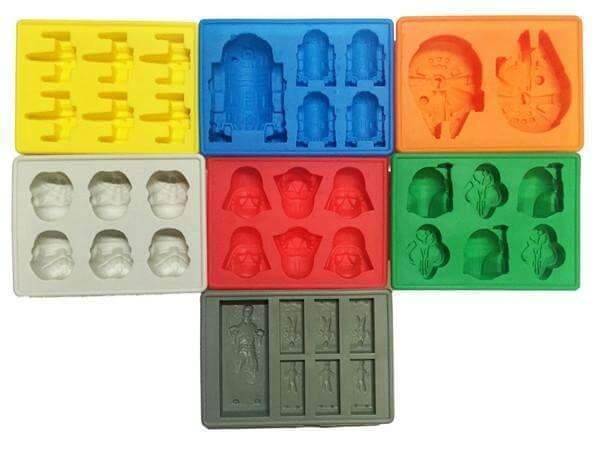
Silicone molds are great for a variety of projects. On the crafty side, you can make things like pendants, bracelets, anime figures, and stamps. But don’t rule out the industrial side of this project.
3D printers for silicone molds are useful for duplicating things like machine parts, tools, and grips. So here is the process involved in modeling a 3D print silicone mold via CAD software.
Using a 3D software of your choosing, design the model you want to create a silicone mold for. You can also find a 3D model to use online.
There are two distinct mold types that can be modeled through software; two-part molds and flexible molds.
The two-part molds are molds that can be easily assembled/disassembled. The other kind we’ll cover are known as flexible molds—these molds can be reused for casting purposes.
Two-part mold
Two-part silicone molds can make your model in two halves separately or be combined to create the model all at once.
Using a 3D modeling program of your choice, overlap the custom model with the two-part mold block and cut a hole with it. You can use blender or any other CAD modeling software of choice to accomplish this.
If you’d like the model to set as one piece, you will need to cut a hole in the block for silicone to pour in through. The two halves can be held together with rubber bands or tape.
Flexible mold
Flexible molds are really neat because of their versatility. We’re essentially creating a mold for another mold. The final product will be a flexible piece of silicone rubber that can be used for future casting. This is ideal for things like jewelry, cosplay, and other crafting needs.
To create a flexible mold, start with a block and position a smaller block to overlap with it. This block will form the edges of our flexible mold. Using a boolean difference modifier, cut a cavity from the starting block. Place the desired design inside the cavity. Consider the angle you use when placing the design, as this will affect the final cast.
2.2, Print the Mold through a 3D Printer
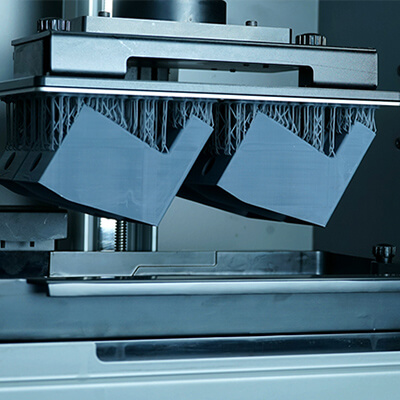
After getting a CAD design that works well as a mold, and finding a suitable material, print the mold. From this point, it is more or less standard operating procedure.
Your 3D printer for silicone mold is going to experience a lot of temperature changes and manipulations to get your final objects created and freed, so make sure you print the mold with an FDM or LCD 3D printer that can handle that on a regular basis.
Digital ABS is a variation of the more standard acrylonitrile butadiene styrene and is a great filament for making your silicone molds.
It boasts an improved impact rating for parts that take a lot of beating without sacrificing the original formula’s excellent surface finish and high-temperature resistance.
Note that during the silicone mold 3D printing process, you might have to fill the molds with materials so as to avoid space that can create bubbles.
Here, you can use anything that will meltdown and harden in your mold’s shape, like metal or other thermoplastics. If you’re completely new to the process involved in casting 3D printed molds, we recommend using silicone.
It’s easy to work with because its mix of firmness and flexibility makes it easy to get out of the mold and brings this versatility to your final object.
2.3, Assembled and Put into Production
No need for a biohazard suit – all you need is a spray to coat your silicone mold before you pour material in it to make it easier to get out when it’s dried, like when you oil up a baking sheet to make your cookies come off easier.

Think of mold release as a cooking spray for your silicone 3D printed molds. It’s cheap and much easier than wax or just hoping nothing will break when you take it out.
Be sure to give your mold plenty of time to cure. Carefully pull the silicone rubber from the 3D printed mold. You may need to finish up with a few final touches. Cutaway any excess silicone and clean up rough edges with an X-Acto knife.
Application Field of Silicone Mold
Silicone is a strong choice for mold-making because it offers such a diverse array of benefits. You can easily create custom designs using silicone molding.
The molds themselves are also quite durable, so you can use them repeatedly without fear of breakage. Silicone’s inorganic makeup—compared to rubber, its organic counterpart—makes it highly resilient to heat and cold, chemical exposure, and even fungus.
Silicone’s rare nature has earned it a renowned spot in numerous industries. It is a highly valued mold making material by experts in production and manufacturing.
To further explain and breakdown the impact silicone molds from 3D print are having in the global market, let’s take a look at its sphere of influence in numerous industries.
3.1, Anime Figure Industry
An action figure is a doll-like toy designed to resemble characters from movies or literature. The figures can be articulated to hold a variety of poses and may come equipped with accessories, such as clothing, tools, weapons, and vehicles. Action figures are created by assembling molded plastic parts made based on hand-sculpted prototypes.
Aluminum wire, modeling clay, and various sculpting tools are used to create the prototype. The actual figure is molded from a plastic resin, such as acrylonitrile butadiene styrene (ABS).
This is a harder plastic used to form the main body. Softer plastics, like polypropylene, silicone molds, and polyethylene, are commonly used to mold smaller accessories and costume pieces.
Various fabrics, such as rayon and nylon, may be used for costume components, including bodysuits, capes, and face masks. As a final decoration, acrylic paints of various colors may be used to decorate the figure.
In addition, more elaborate toys may contain miniature electronic components that provide light and sound effects. Below is a step by step guide to creating an anime figure using a silicone mold.

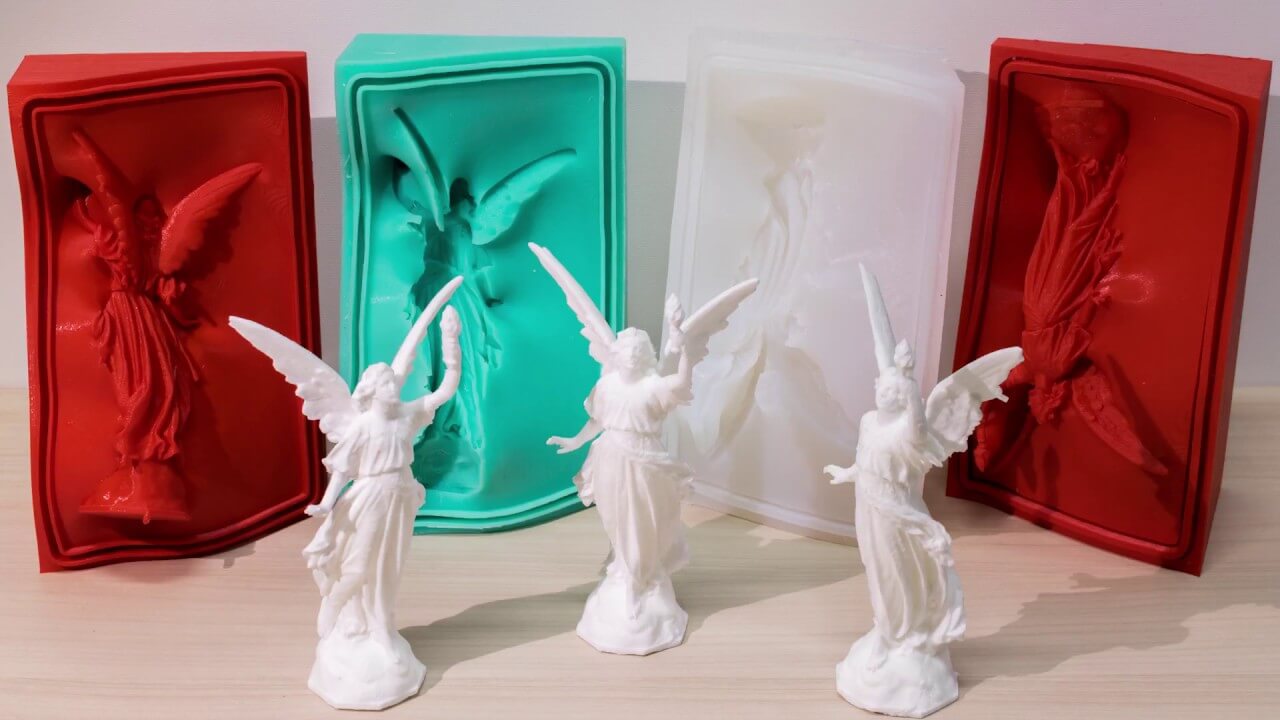
- A master silicone mold, or series of silicone molds, are made from the finished clay prototype. These silicone molds are used for mass-producing the finished parts for the figure. Approximately two-thirds of the time required to make an action figure is involved in the creation and operation of the silicone molds. Patterns based on the prototype are made for each individual piece and sent out for assembly line production.
- The designers must figure out how to best turn the three-dimensional figure into a series of plastic parts. Some figures are simply molded from a single piece of plastic and contain a wire skeleton, allowing limited movement. For figures with greater articulation, each moveable part is molded as a separate component.
- Several molding processes can be used to create the plastic parts components. Numerous companies originally considered a rotational molding process to give their anime figures a smooth, seamless look. However, the size of the pieces caused them to lose some detail, and this process was unacceptable.
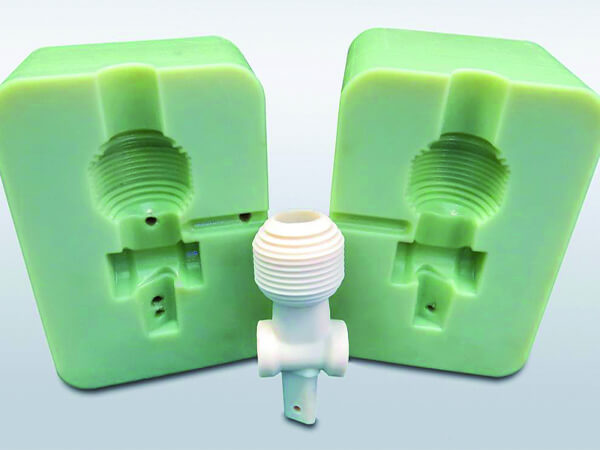
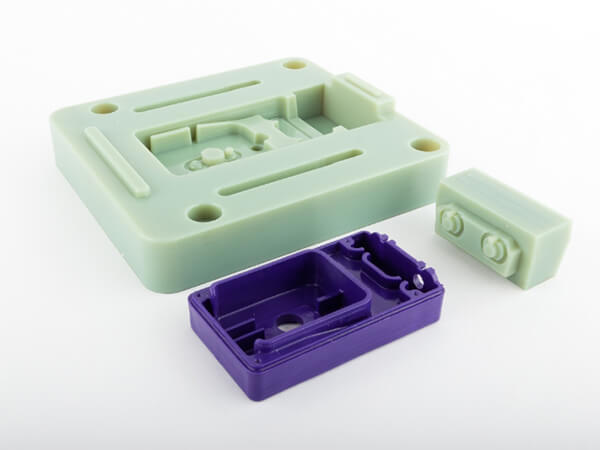
- Another problem with rotational molding is that it is a slower process and, therefore, more expensive for the manufacturer. It’s best you use an injection molding process. In this process, molten plastic is pumped into a two-piece silicone mold. Pressure is then applied to hold the silicone mold together while the plastic cools and hardens. The mold is then opened, and the plastic component is ejected. Each piece of the figure is made in this fashion.
- After all the individual plastic components have been molded, they are assembled to form the finished figures. Instead of glue, some pieces may be bonded together by an ultrasonic sealing method that uses high-frequency vibrations to fuse the plastic together. This process provides a tighter seal between pieces and gives a very thin, almost invisible seam. Glue is used to attach some auxiliary pieces such as chest plates and boots.
3.2, Craft Industry
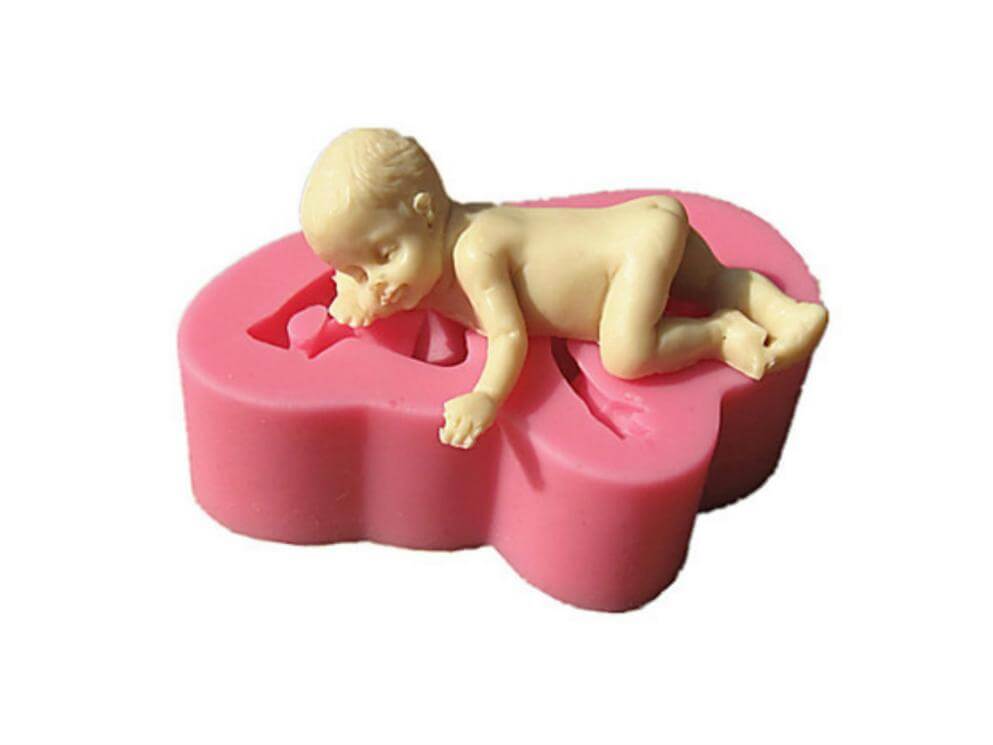
A number of custom, Do-It-Yourself craft and hobby projects can be completed with molding and casting materials. Any decorative object (e.g., resin jewelry, model trains, custom tiles, small figurines, wall art, much more) can be molded using silicone or polyurethane mold rubber and then replicated in any number of materials, including plastic, concrete, plaster, foam and more.
Silicone molds make it so easy to turn a boring project into something memorable and special. Whether you love making bioplastics and or you chose to make milk plastic or a clear gelatin plastic, the best part is you can pick a silicone mold to shape your homemade plastic into something awesome.
What about bath bombs? Do you love making bath bombs and discussing the amazing reactions behind the fizz? If you love making bath bombs with silicone molds, you can get some really cool shapes and bath bombs that kids can have fun decorating. Silicone molds are also great for shaping your baking soda paste into some amazing little creations that kids can then erupt.
What about the flair and fancy that comes with making your own homemade soap? Not only is it incredibly easy, but it can save you money and also make an amazing gift. Plus, with the right silicone molds, you can make soaps that will be the perfect addition to any theme, project, or gift.
Also, note that while you can make your jewelry and magnets using a bioplastic, you can also use resin or even clay in your 3D printer for silicone mold to create shapes that you can string into necklaces or bracelets or glue a magnet onto the back of so you can hang it on the fridge.
3.3, Furniture Decoration Industry
Do you ever look at a piece of furniture and say, “wow you are boring” or “you just feel like you need something extra”? Adding molds to furniture is a great way to transform that boring old piece, as well as adding a little flair.
You can follow the below-listed steps to use silicone molds in transforming your furniture. The first step is to take the modeling material and push it into the silicone mold.
Once you feel like it is even in the mold, you will want to take your thumb and push the extra modeling material across the mold to get the extra material off and make the back of the mold smooth.
After you have made it smooth, you can bend the mold and pop out the material. When you make all the molds you want, you will allow the material to dry 12-24 hours before you glue it to the knobs.
Once you have allowed the modeling material to dry, you are ready to glue it to the knobs or your piece.
Note that If you are putting a silicone mold on furniture, make sure you clamp it down or put a little weight on it. You don’t need a lot of glue, just a small dab, then press down the dried mold onto the knob. Set the knobs aside and allow them to dry.
Once your glue is dried, you are ready to paint and decorate your mold. These products have completely transformed those boring ceramic knobs into some pretty, ornate knobs.
3.4, Decoration Industry
Have you heard of the silicone fondant mold? These silicone molds are widely known for their impact on the decoration industry. To better iterate the widespread use of silicone molds in the decoration industry, we would base our focus on its usage in cake decoration.
Silicone fondant molds, when used correctly, these molds can help you achieve stunning cake decorating results. Not knowing how to use them correctly can lead to sheer frustration and stress.
Silicone molds are very easy to use, and this ease of use comes with equally pretty results too. So, if you are into cake decorating, investing in silicone molds is actually very worth it.
Not only do you get professional-looking results on your cakes, but you also get to achieve them pretty quickly too. To use silicone fondant molds for cake decoration correctly, you need the following supplies;
Food grade silicone molds, Icing sugar or cornstarch for dusting, rolling pin, cake decorating brush, sieve, or a dusting pouch.
If the required supplies are handy, adhere to the following steps.
- Start by dusting the mold. Make sure every nook and corner of the mold is dusted. Its recommended you can use cornstarch, but if you don’t have cornstarch, you can always use icing sugar.
- For the dusting, you can use a dusting pouch, or you can even use a sieve to sift a layer of cornstarch onto your mold. Don’t worry about excessive dusting; just focus on making sure the mold is well dusted. Tap the mold a couple of times on your workspace. This will help distribute the cornstarch to all corners of your mold.
- Next, turn the mold over. Tap it lightly on a plate to remove all the excess flour. When tapping, apply only gentle pressure; we would still want to keep a good layer of dusting on the mold.
- Next, take some fondant and knead it well until there are no more creases. If you are making large molded fondant pieces, it would be helpful to roll your fondant flat (but not too thin) so that you get to fill the fondant into your mold faster. After that, press the rolled fondant into your mold. You will need to apply some pressure here as we want the fondant to reach all the nooks and corners of the mold.
- At this point, you might notice that the fondant surface is bulgy and not smooth. Use a rolling pin to roll on the mold. Doing this will push all the excess fondant outside the mold.
- Once you are happy with the surface, carefully peel off the silicone mold. Place the pushed out molded fondant onto a tray. Let it sit for a few minutes so that the fondant has time to set a little. If there is excess cornstarch or sugar on the fondant, brush off gently with a soft bristles brush before using the molded fondant to decorate your cakes and cookies.
3.5, Resin Craft Industry
Resin is a highly viscous fluid that hardens as it cures. In the case of synthetic resins, a catalyst needs to be mixed with the resin so that it will harden properly.
Natural resins can be processed in a variety of ways to achieve the desired hardness, and these techniques can include the use of a catalyst. Resins used for casting are often clear, although they can be blended with pigments and dyes to create colored finished products.
To use casting resin, the resin is poured into a mold and allowed to harden before the mold is removed. Rubber and silicone molds are popular because they are easy to use, and no mold release needs to be applied before casting.
Plaster and other materials can also be used for mold making, and a number of different styles of molds are available.
Silicone resin molds are reusable molds made from two-part silicone and can last for many years if cared for properly. The use of silicone molds in the resin crafts industry brings flexible casting operations, especially for hobbyists and professionals making use of 3D printers for silicone molds.
You can purchase two-part silicone yourself and mold anything you want to (assuming you have a model). Note that the usage of silicone molds by experts in the resin craft industry offers a casting just as shiny as the original.
3.6, Gypsum Craft Gift Industry
Mold Making in the gypsum craft gift industry is popularly done using liquid silicone rubber. Liquid silicone rubber for gypsum mold making is primarily intended for poly resin crafts, PU crafts, PU resin crafts, gypsum crafts, unsaturated resin crafts, lighting and candles crafts, plastic toy, stationery gifts crafts industry, a large statue Buddha, furniture decorative materials, statues, artifacts, building decoration materials, large-scale cement mold, artificial fossils Factory, Europe component factory, simulation landscapes, plants sculpture, sandstone crafts and so on.
Silicone mold is currently enjoying a renowned reputation in the gypsum craft industry because of features such as good characteristics of easy-operation, light viscosity, and good flowability, low shrinkage, excellent tensile and tear strength, favorable hardness, high-temperature resistance, acid and alkali-resistance, and aging resistance.
Here are is a brief analysis of the operation instruction when using liquid silicone rubber for gypsum mold making. Gypsum craft-making requires a flowable liquid silicone, and the quality has nothing to do with the color. It consists of two-component. Part A is flowable liquid silicone rubber; part B is the curing agent.
Firstly, after your prototyping and designing the original model using a 3D printer, take some liquid silicone rubber, add 2%-3% curing agent of the amount of silicon, and mix them evenly. Then after vacuum pumping the mixture, you can pour it into the mold frame. The silicone mold will be cured in 2-4 hours.
Package of liquid silicone rubber for gypsum mold making ranges between 1kg/drum, 5kg/drum, and 25kg/drum. The shelf life of liquid silicone rubber for gypsum mold making is twelve(12) months when stored under dry and cool place by original package under 25℃.
Analysis of the Advantages of Using 3D Printers to Make Silicone Molds
3D printers for silicone molds have not only made life easier but it has also heightened production, improved mold quality, and influenced the design and development process of experts and hobbyists in numerous industries.
If you need to make hundreds of copies of the same model, you might spend several months if you decide to 3D print silicone molds individually.
A smarter way to approach this problem would be to 3D print several silicone molds and use each of these molds multiple times. This is faster, easier, and less power-intensive than running your 3D printer for several weeks on end.
While 3D prints have become more reliable for the most part in the last couple of years, it’s almost unavoidable to run into issues every now and then.
Now, imaging having to 3D print a hundred copies of the same model. How many of those are going to have extrusion or warping issues?
How much time and filament might you end up wasting because of production rejects? This is an issue that you can avoid by using a mold instead. The following sections contain the key advantages attached to using 3D printers to make silicone molds.
4.1 Shorten Mold Production Cycle
3D printer for silicone mold shortens the entire product-development cycle and encourages innovation. In the past, companies sometimes opted to postpone or abandon product design updates due to the large amount of capital needed to make new molds.
By reducing 3D print silicone mold setup times and enabling existing design tools to be updated quickly, casting silicones in 3D printed molds enables businesses to afford more frequent mold changes and improvements. It enables the mold design cycle to keep pace with the product design cycle.
In addition, some companies have purchased their own 3D printer for silicone mold, thus further accelerating the speed of product development, increased flexibility, and adaptability. Strategically, it increases the ability of supply chain defenses to extend deadlines and minimize the risk of stagnation, such as obtaining inappropriate molds from suppliers.
4.2 Manufacturing Cost Reduction
If the current cost of metal 3D printers for silicone mold is higher than the cost of traditional metal fabrication processes, the cost savings will be made easier in the plastic area.
Silicone molds from 3D prints are economically advantageous in the production of small, discontinuous series of end products because the fixed costs for these products are difficult to amortize or because they are limited to certain specific geometries (i.e., they are optimized for 3D printing only).
But there are even more economic advantages. In particular, molding 3D print food-grade silicone is cost-effective when using materials that are very expensive and where traditional mold-making results in high material scrap rates.
In addition, the ability of a 3D printer for silicone mold to produce accurate molds in just a few hours can have a positive impact on the manufacturing processes and margins, especially when the production downtime or mold inventory is very expensive.
Finally, there are often times when the mold has to be changed after the start of production. The flexibility of a 3D printer for silicone mold allows engineers to simultaneously produce multiple iterations, thus reducing upfront costs associated with mold-design changes.
4.3 Custom Molds Help Realise the Customization of End Products
Shorter production cycles, more complex geometries, and the ability to reduce final manufacturing costs allow companies to create a large number of personalized tools to support the manufacture of custom parts.
3D printer for silicone mold is very conducive to customized products, such as medical equipment and other elements within the medical industry. Silicone mold from 3D prints offer surgeons personalized 3D printed instruments, such as surgical guides and tools that enable them to improve surgical results and reduce operating time.
4.4 Not Limited by Mold Size
Making a standard manufacturing mold is a multifaceted process that doesn’t allow for easy change once you’ve completed the final version. But 3D printers for silicone molds give you design ease with the duplication benefits of manufacturing. If you notice a change you need to make after your first batch, no sweat.
Just go to your CAD, tweak it, and 3D print it into your next mold in the time it would take an industrial manufacturer to notice there’s a problem at all. No paying extra for new silicone molds, no waiting another month and a half to see if the change worked, and no need to settle for silicone molds not in-line with your desired mold size – you’re already back in business.
4.5 The Improvement of Mold Design Adds More Functionality to the End Product
Often, the special metallurgical approach to 3D printers for silicone molds improves the microstructure of the metal and produces a fully dense print component with mechanical or physical properties as good as or better than those forged or cast (depending on the heat treatment and test orientation).
Silicone mold 3D printers offer engineers unlimited options to improve mold design. When the target part consists of several subcomponents, 3D printed silicone molds have the ability to integrate the design and reduce the number of parts. This simplifies the product assembly process and reduces the tolerances.
4.6 Optimize Tools to Make Them More Ergonomic and Improve Their Performance
3D printers for silicone mold reduces the barrier of validating new tools that address the unmet needs in the manufacturing process, enabling more moving fixtures and fixtures to be manufactured. Traditionally, tool design and corresponding devices have always been used for as long as possible due to the cost and effort required to redesign and manufacture them.
With silicone molds from 3D prints, businesses can refurbish any tool at any time, not just those that are already scrapped and do not meet the requirements. Due to the small amount of time and initial cost required, making silicone molds with 3D printing makes it more economical to optimize tools for better marginal performance.
How to Buy a 3D Printer for Silicone Molds Making
With all the information provided above, we believe by now, you have the basic understanding needed to keep your silicone mold production line running. With that being said, let’s dive into the processes and steps involved in purchasing a 3D printer for silicone mold. This chapter details out all the information you need to make an informed decision when trying to kickstart your silicone mold production business.
5.1 The Types of 3D Printer You Need
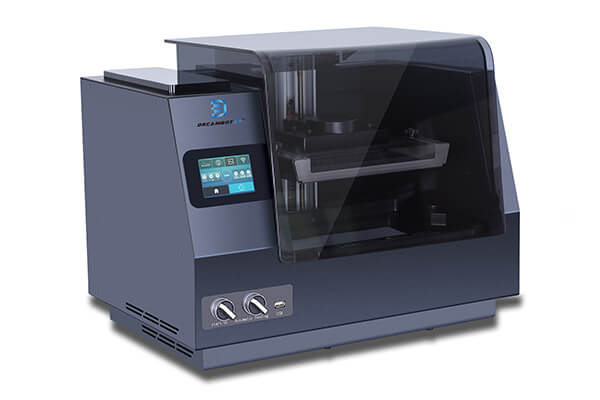
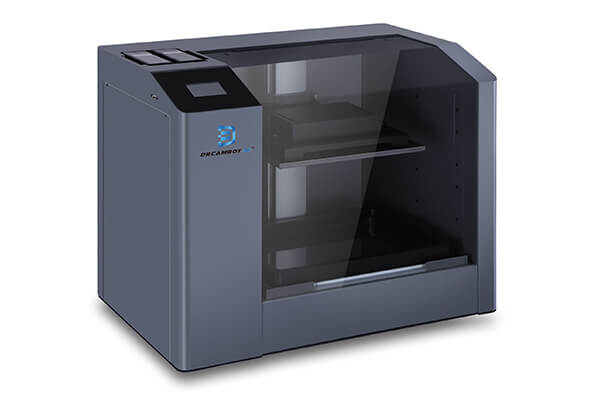
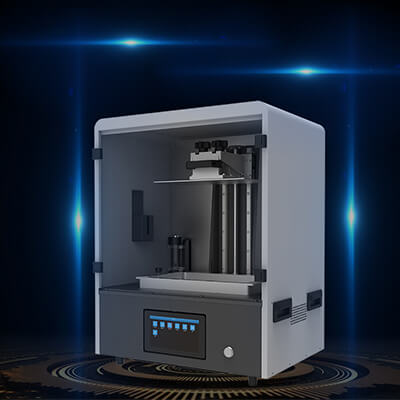
First thing first, what type of silicone mold 3D printer do you need to keep your production line running? Whether you are looking to create silicon molds for resin crafts or you want to satisfy the diverse needs of individuals in the building decoration industry, LLCD and FDM 3D printers can serve as durable options. Below is the working principle and key factor influencing the dominance and usage of LCD and FDM 3D printers for silicone molds.
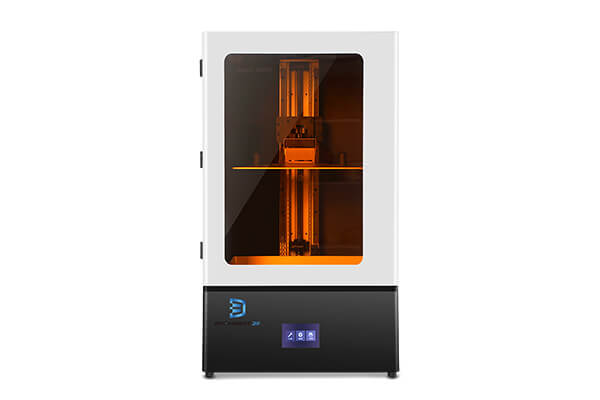
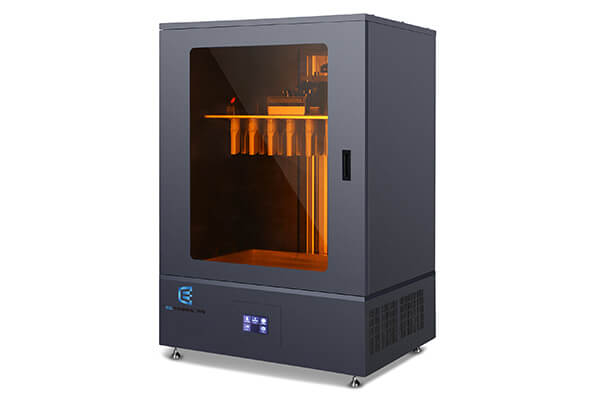
- LCD 3D Printer for Resin
Liquid crystal display printers, or LCD 3D printers as they are popularly known, are silicone mold 3D printers use to create 3D models or designs of numerous objects in education, automotive, aerospace, medicine, dentistry, etc. LCD silicone mold 3D printers generate their light source through an array of UV LCDs.
These printers are used to create 3D patterns or images of CAD models using materials such as resin, wax, or metals. The images or 3D models obtained using LCD 3D printers are composed of dots.
LCD mold 3D printers display images by sending light from a metal-halide lamp through a prism or series of dichroic filters. This dichroic filter separates light into three polysilicon panels. In simple terms, a liquid 3D mold making printer uses an array of UV LCD as its light source. The printer shines light directly from the flat LCD panel in a parallel fashion onto the build area.
As the light travels through the light source, the individual pixels open up to allow light to pass or close to block the light. This combination of open and closed pixels creates room for the liquid polymer 3D printer to produce multiple colors and shades on the projected image.
The light emitted from an LCD 3D printer for silicone mold isn’t expanded—that’s, it doesn’t spread beyond its projected frame. When using these silicone mold 3D printers, you can design patterns and images of multiple variations; rest assured you wouldn’t experience pixel distortion halfway. Note that unlike most other resin printers, the LCD silicone mold 3D printers print quality depends on its LCD density.
FDM 3D printer for silicone mold is currently the most popular 3D printer for mold 3D printing. It is used in casting and molding 3D printed parts for jewelry, shoe industry, dentistry, aerospace, etc. FDM printing was originally developed and implemented by Scott Crump from Stratasys, founded in the 1980s.
Other 3D printing companies have embraced similar technology but under different names. A well-known manufacturer MakerBot coined a virtually identical technology, calling it Fused Filament Fabrication (FFF).
3D printers for silicone molds that use FDM Technology construct objects layer by layer from the very bottom up by heating and extruding thermoplastic filament. The whole process is somewhat similar to stereolithography. Specialized programs or Slicers “cut” CAD models into layers and computes the manner printer’s extruder would assemble each layer.
In addition to thermoplastic, a printer may extrude support materials too. Then the printer heats thermoplastic until its melting point and extrudes it throughout the nozzle on a printing bed, which you may know as a build platform or a desk, on a predetermined pattern determined by the 3D model and Slicer software.
The Slicer software running on the computer connected to the silicone mold 3D printer translates the measurements of an object into X, Y, and Z coordinates and controls the nozzle and the foundation to follow the calculated route during printing.
When the thin layer of plastic binds to the layer beneath it, it melts and hardens. When the layer is completed, the base is lowered to accommodate the printing of the next layer.
5.2 What is the size of the Print
3D printers for silicone molds come in multiple variants. Some are suitable for large printing tasks, while others possess printing parts that can cater to only small tasks.
What sort of 3D print food-grade silicone do you want to create, how big is the project, and what size of prints do your customers demand from you regularly? At Dreambot3D, we have seen the irregularities and extra expenses that come with purchasing an industrial FDM 3D printer or LCD 3D printer for silicone mold that’s not compatible with the print size of the 3D print silicone mold.
Over the years we have been in business, we have had the opportunity of interacting with consumers from different countries and regions. One of the most highly influential factors most hobbyists or professionals who have walked through our door to purchase a 3D printer for silicone mold ignore is the size of the print.
Yeah, it’s practically impossible to determine the exact size or specification attributed, or that would be required in most of the prints you make—especially if you are a business owner looking to satisfy the needs of clients from different parts of the world. However, totally ignoring the print size of your industrial FDM 3D printer or an LCD 3D printer can create is unacceptable.

FDM 3D printers for silicone molds garnered renowned usage ahead of LCD, SLA, and DLP as a reputable printer for creating 3D print silicone models not just because of its printing speed or the remarkable finish product it is known for, but also because of its ability to perfectly create sustainable 3D models using filaments.
Before buying any LCD or FDM 3D printer for silicone mold, try to know the type of resin or filament it can print on and whether it’s durable enough to print perfect models on wide materials without leaving distorted edges.
The material you chose for your printing task has a lot to say about the printing size. The dimension, weight, and size of the object obtained from a 3D model printed with PLA are quite different from the result you would obtain using an ABS material—regardless of whether the CAD file and design are the same.
Considering the type of materials you would print on regularly can help you pinpoint a 3D printer for silicone mold that wouldn’t create constraints in your design’s dimension, weight, and size.
5.3 Choose a Reliable Brand
For most professionals in the silicone mold printing industry, it all comes down to brand. Hundreds of brands have built a formidable reputation for themselves by offering 3D printers for silicone mold with remarkable features.
While it’s essential you check out a brand’s track record and reviews from previous customers, it’s also important you don’t base your buying decision entirely on a brand’s name.
There are a lot of 3D printers for silicone mold available world-wide with reputable brand tags but void of the innovative design and features required to keep your printing line functional.
Many brands built a good name for themselves in the early 90s but haven’t been able to keep up with the diverse changes needed to excel in the 21st-century market.
Before putting hours of research into exploring a brand’s portfolio or track record in the global market, make sure the 3D printer you want to buy possesses features in line with your needs and has been ascertained satisfactory by other users and experts in your industry.
Hundreds of 3D printers for silicone mold are developed and released into the market every day. While most of these printers meet the basic requirements and features of SLA, FDM, LCD, SLS, DLP printers, you should not be hasty while sealing the deal yet. Why? You may ask.
3D printers for silicone mold are not cheap machines. You’ll part ways with a considerable amount of your money; therefore, you must ensure that you get value for your money.
While your choice should not solely be made on the brands’ name, it is crucial that you do thorough background research on the company’s Google ratings and reviews before making a purchase.
Consider buying your printer from an industrial 3D printer manufacturer that has a good track record, a higher rating on Google, and a genuine customer support system.
Such a company will be apt to respond to all your urgent needs, for instance, if your printer breaks or runs out of filaments. The company/brand that you’ll pick for your printer can make or break your printing experience if something goes amiss.
5.4 Safety Configuration of the Machine
The first step in turning your dreams into a reality is purchasing the right 3D printer for silicone mold. But this is a demanding process. There will be tons of highly affordable brands thrown in your way. 3D printers for silicone molds come with a substantial amount of risk, including hotbed, hot extruders, toxic fumes, and so on.
While the idea behind creating silicone molds for 3D prints is to provide a safe printing environment, it is important that you take the safety configuration of the machine seriously, especially if you have kids around.
The constant plea of safety first can seem inconsequential when an FDM or LCD 3D printer for silicone mold offering formidable features is thrown your way at a discounted price. The idea behind silicone mold 3D printers is to provide a safe printing experience and, at the same time, help users save filament, resin, and time.
Backing your purchase up with detailed information on the precautionary measures and built-in safety designs accessible via A 3D printer of choice is paramount. We believe that professionals or hobbyists who have been in the industry for a long time would understand why we took our time to emphasize the machine’s safety configuration.
However, suppose you are a newbie trying to navigate rocky paths with a 3D printer for silicone mold optimized with formidable advantages. In that case, we recommend you don’t allow features such as the stable default settings or the printer’s ability to keep your printing model in a perfect state make you go head over heels and forget to analyze the safety configuration of the machine.
3D printers for silicone mold cannot be termed user-friendly in scenarios where issues arise during the printing process. To be on the safe side, don’t finalize your purchase without carrying out a thorough analysis of the printer’s safety configuration.
If you are new to the industry and cannot navigate your way around the safety configurations, don’t hold back your questions; feel free to ask as many questions as you deem probable before paying a penny.
Safety comes first. Therefore, back up your purchase with detailed safety guidelines and precautions regarding your machine. Enclosed 3D printers for silicone mold are highly-priced compared to the open frame type. But, they are safer, and they protect their users from getting injured.
5.5 Resolution Requirement of the Machine
A 3D printer for silicones mold printing resolution is the level of detail quality at which your part is created. 3D printers for silicone mold extrude plastic through a nozzle to create 3D printed objects.
That nozzle pin can be adjusted to different widths to allow for higher or lower resolution printing. It’s necessary that you keenly take into account the resolution of a printing machine before buying one, depending on the industry you are operating in.
While the resolution requirement of a 3D printer for silicone mold is regarded as the number one factor to consider when making a 3D printer purchase by experts in numerous industries, this can be referred to as a myth that doesn’t apply to all. The resolution of an FDM or LCD 3D printer for silicone mold determines the clarity and precision that can be enjoyed from a given 3D model and pattern.
However, the resolution of a 3D printing system used in the animation industry doesn’t have to be on the same level as the one used in the jewelry or engineering industry.
When looking at the resolution requirement of an FDM 3D printer, it’s important you take into consideration the industry you are operating in. In which industry do you want to use the machine? What sort of models do you want to print? How clear or precise does the model have to be for it to be termed efficient?
Answering the above-listed questions would help you demystify some of the myths attached to buying a 3D printer for silicone mold. Yeah, buying a high-resolution 3D printing system should be considered a priority if the funds and budget to finance it is available. But in scenarios where you are on a budget, you can save cost by analyzing the machine usage and model requirement.
3D printers for silicone molds come in different variants, shapes, and sizes, optimized with a fitting design and resolution. At Dreambot3D, our daily task revolves around catering to individuals’ dynamic needs and desires from numerous parts of the globe. We know how daunting navigating a machine with a proper resolution can be.
Dreambot3D core value is to provide satisfactory all-round services. To keep up with this mission, we offer a support team that can help you understand the resolution requirements of multiple machines, the industries they are optimized to serve and direct you towards multiple variants that would serve you better.
Note that while the quality of print detail is more paramount in some industries than it is in others, the resolution of a machine decides how fine the details of your part will be. A lower resolution, less quality, and low details on the print object. The objects will have smooth surfaces at the expense of extra filament usage and time consumption. A high resolution, conversely, gives fine quality and better details on print objects.
5.6 Consider Weather the Price of the Machine is Acceptable
If you run a big production line or you are a hobbyist looking to purchase a remarkable 3D printing system, and you firmly stand by the belief that your budget is sizable enough to purchase any printing machine of choice—we recommend you explore our catalog armed with the basic features and specification you require from a preferred LCD or FDM 3D printer for silicone mold.
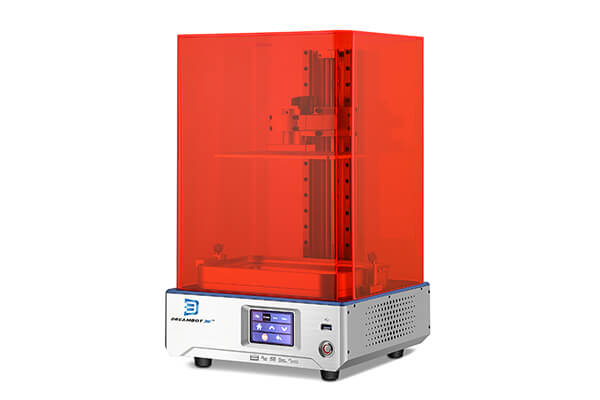
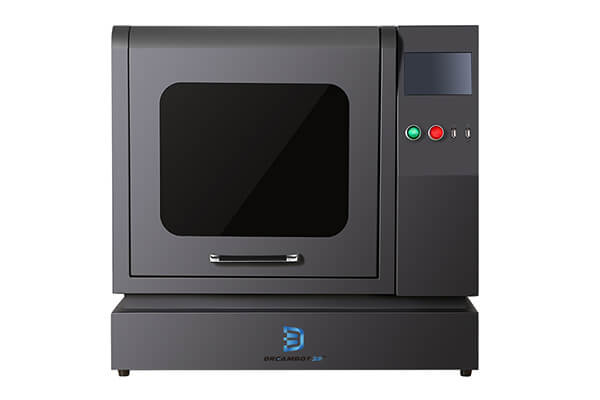
The price of our ME-192 LCD 3D printer is only 600-900 US dollars (less than 1,000 US dollars), and the L-200 of the FDM 3d printer is only about 200 US dollars. So, if you are on a low budget and require something substantial to cater to your day to day printing needs, please put a call through today—our support representative will guide you through the buying process.
Sometimes people tend to purchase 3D printers for silicone mold based on the price only. The price of a 3D machine plays a big role in decision making. But with so many industrial and commercial 3D printers for silicone mold available for sale at the consumer level today, you must keep a keen eye on the machine’s brand, resolution, and safety configuration.
The price of a machine is dictated by many factors, including features and size. You will encounter a range of prices for each type of FDM, SLA, SLS, and LCD 3D printers. But, the main question you should ask yourself is, which one is best for my purposes?
5.7 Consider the Suppliers After Sales Service Capability
Making a purchase is one thing; enjoying the benefit of your purchase to the fullest is another. The best FDM and LCD 3D printer for silicone mold always requires an investment, and we are certain you wouldn’t want to make such an investment from a supplier with little to no track record of authenticity or credibility in the industry.
To avoid making such a mistake, take into consideration the technical support service offered. Every reliable silicone mold 3D printer supplier should provide a minimum of 12 hours of technical support service Monday to Friday. However, there are a lot of reputable companies providing 24 hours technical support 365 days a year.
Vetting the technical sales service’s credibility would help you better understand the type of after-sales service a silicone mold 3D printer manufacturer offers. Bear in mind that it’s practically impossible to authenticate the viability of a brand’s after-sales service directly from the company. The fastest way to get hold of such information is by contacting individuals who have done business with the brand before.
Like always, Dreambot3D is here to satisfy your every need. Our technical support service is available on around a clock basis. Whether you have made up your mind about the machine you want to purchase or are still scouring our catalog for the best FDM or LCD 3D printer for silicone mold to cater to your printing needs; our support service is just a call away.
Before sealing your 3D printer for silicone mold purchase, research and find out as much as you can about the company’s customer support system; you want to enjoy your printing experience, and even when things go south; you want to be assured that there is a professional ready to assist you.
5.8 Consider the Service Life of the Machine
Every 3D printer for silicone mold making comes with designated service life. Most manufacturers state how long a machine would last base on the equipment and products that went into the design and development phase. To authenticate this claim, most silicone mold 3D printer suppliers attribute a warrantee on their machine based on the service life.
Most 3D printing mold casting machines come with a one-year warranty. While this is the normal service life for most silicone mold 3D printers, it shouldn’t come as a surprise if mold printers with six months warranty are thrown your way. In most cases, such printers are relatively cheaper and come with limited benefits and features.
It’s best you ask your supplier’s support representative about the warrantee policy backing up the machine you are about to purchase. Try as much as possible to weigh in on the same scale as your production line and the price tag attached. If the service life of the silicone mold 3D printer doesn’t seem to one that can yield profitable returns within the estimated time, it’s best you abort the purchase.
5.9 Consider the Maintenance Cost of the Machine
One thing you should not forget is that 3D printers for silicone molds for either machine. And like every other machine, they need maintenance from time to time. The maintenance cost of a 3D printer for silicone mold is not huge. However, this cost will be determined by where you’ll be using the machine.
These machines print for hours, so you can expect that some mechanical parts may become loose, and some might even degrade after months of being in use. If not upgraded, the final quality of your prints will consequently reduce. Therefore, machine maintenance is necessary, and it might come with added costs where some parts like the nozzle may need to be replaced entirely. You must incur a reasonable maintenance cost of your machine to consistently get clean and fine detailed prints.
3D printer manufacturers have defied the odds and manufactured machines that are highly versatile, cost-effective, easy to use and maintain while still giving you high detail prints. If you are interested in finding out which 3D printer for silicone mold is best suited for your needs, consider all the factors listed above to get the best 3D printers in the market.