Mannequin 3D Printer

The mannequin 3D printer prints 3D mannequin models accurately. The mannequin 3D printer is used in the fashion industry. The mannequin 3D printer is large enough to print small and large mannequin models.

How 3D printers work for Mannequin

How 3D printers work for Mannequin

3D scan
human body

How 3D printers work for Mannequin

3D printing
Mannequin

How 3D printers work for Mannequin

assemble
Mannequin

The mannequin 3D printer is an industrial sized printer that allows you to print custom made mannequin that better represents your product and brand message as opposed to buying mass-produced or off the shelf mannequin.

Traditional methods of creating mannequins are expensive when compared to the 3D printed mannequin due to the availability of low cost printing materials. In addition to the high expense, production time takes a longer time. When you use the mannequin 3D printer, you can print large batches of 3D mannequin within a short time.

The mannequin 3D printer has alarm systems that notifies you when the printer is out of printing material. The printing continues after the material has been fixed without skipping any layer.

The mannequin 3D printer has a high printing resolution making all your 3D printed mannequin appear smooth and detailed after printing.

Don't know how to choose a model?

Are you confused about how to choose the correct model and type of 3d printer? We support 24/7.

4 points why choose us

fdm 3d printer

Automatic resume printing

Continue to print the unfinished model after the power is restored when the power fails

fdm 3d printer

PLC control system

All 3d printers are equipped with PLC control system as standard, makes the operation more convenient, and reduces the error.

fdm 3d printer

Extremely speed printing

Higher straightness, lower friction coefficient, better smoothness, higher positioning accuracy and more stability during printing.

fdm 3d printer

Reinforced structure

The all-metal one-piece shell reduces resonance, makes printing more stable and improves printing accuracy.

What our customers say

How to Make a Mannequin With a 3D Printer
Mannequin 3D Printer Buying Guide

Mannequins are not just vehicles for the fashion industry to showcase their creations; they communicate more than we might think about attitudes and encourage onlookers to imaginatively identify with what they see.

As many more people look to the internet to sell products, mannequins have become a top seller for multiple business owners.

And also, in this COVID plagued economy where people long for interaction, businesses are also looking to incorporate mannequins in ways that we never thought of using them before.

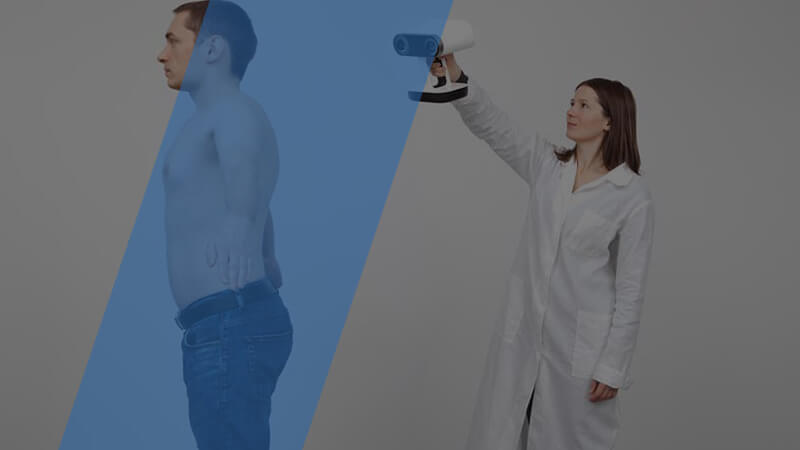
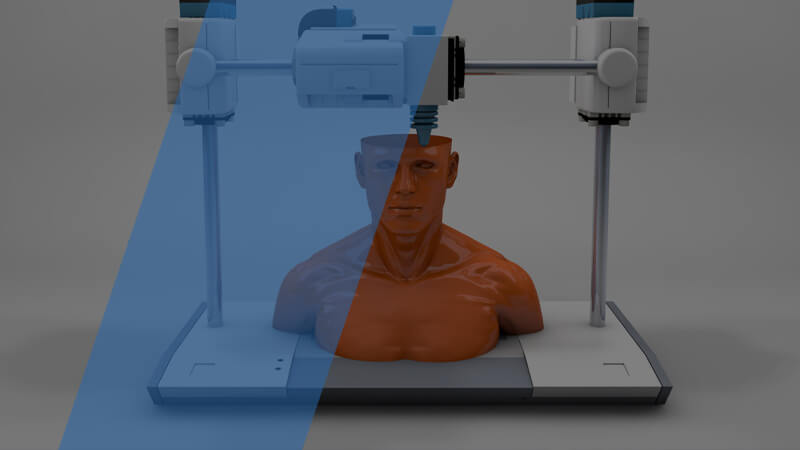
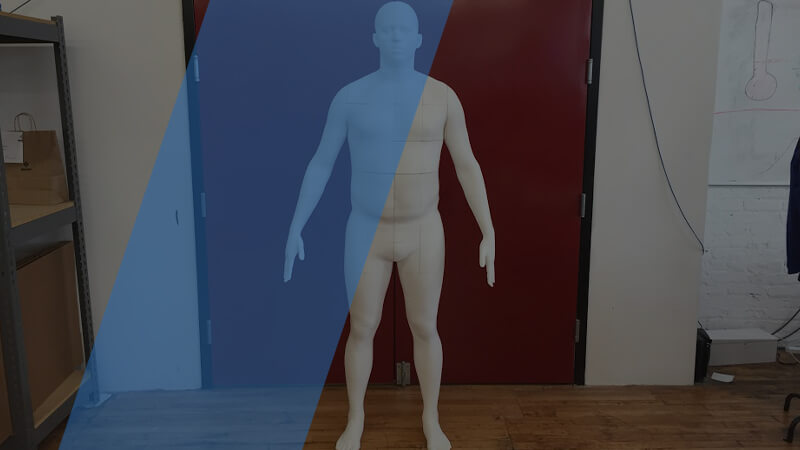
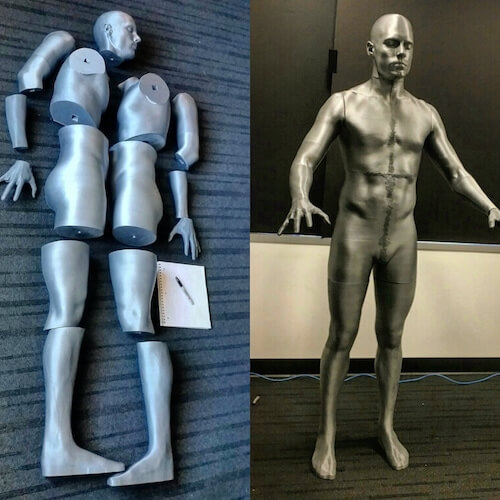
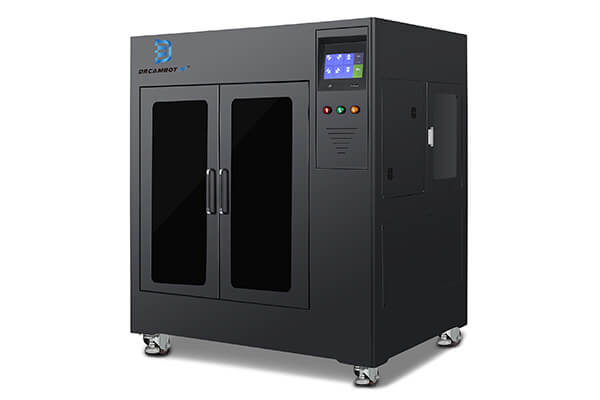
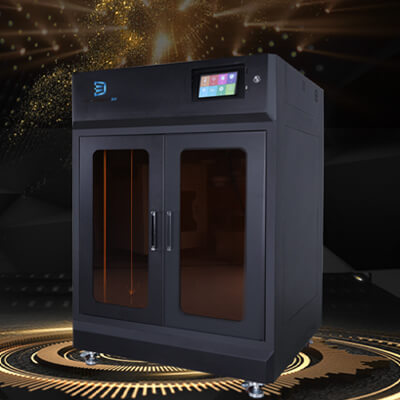
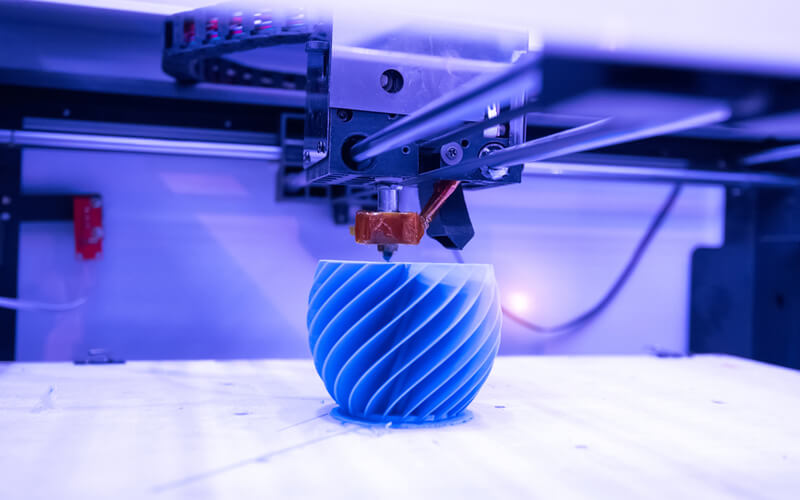
However, it’s important to note that beyond the plastic or rubber-like designs displayed in numerous shops and sporting stadiums, there is more to the design and creation of mannequins. Most mannequins are 3D printed using a mannequin 3D printer.

This mannequin 3D printer buying guide is optimized to breakdown all the steps and processes involved in mannequin design and creation, its significance in the global market, how it’s influencing numerous industries, and a step-by-step process to help you chose the right mannequin 3D printer. All that’s required from your end is just to sit back and enjoy a good read.

Chapter 1:

The Significance of Mannequins in the Market

A mannequin is an often-articulated doll used by artists, tailors, dressmakers, window-dressers, and others specially to display or fit clothing.

The term is also used for life-sized dolls with simulated airways used in the teaching of first aid, CPR, and advanced airway management skills such as tracheal intubation and for human figures used in computer simulation to model the behavior of the human body.

Mannequins may be lifeless dolls incapable of moving their parts, but their impact when used in the right scenarios can never be undermined. These dolls are designed to provide a real-time feel and stimulation of how apparel or event would look if real humans were involved.

3D printed mannequins are built to help heighten perceptions, influence decisions, and bring otherwise boring and dull scenarios to life. While the mannequin industry might not be able to boast of an appreciated influence across multiple sectors, the industry is currently worth billions of dollars.

To further demystify the impact and significance of 3D printed mannequin in the global market, let’s take a look at its application in the apparel industry and as a human body template for fashion designers.  

1.1, Apparel Industry for Advanced Customization

Nowadays, 3D printed mannequins have become an important aspect of the interior design of the store and a highly desired object of advanced customization for the apparel industry.  

They enhance the ambiance and traits of the store. Moreover, the way a 3D printed mannequin is dressed and presented tells what type of clothes and customers the store will accommodate. The facade of 3D printed mannequins must add the zest that the customer looks for in a store.

3D printed mannequins are the creation of skilled sculptors who give life to them through their work. At present various types of mannequins with different postures are available in the market.

In the apparel business, mannequins in the form of men, women, and children are usually employed. Moreover, there are mannequins in the form of head alone or headless, or just the upper body. It can be used depending on the need of the retail store.

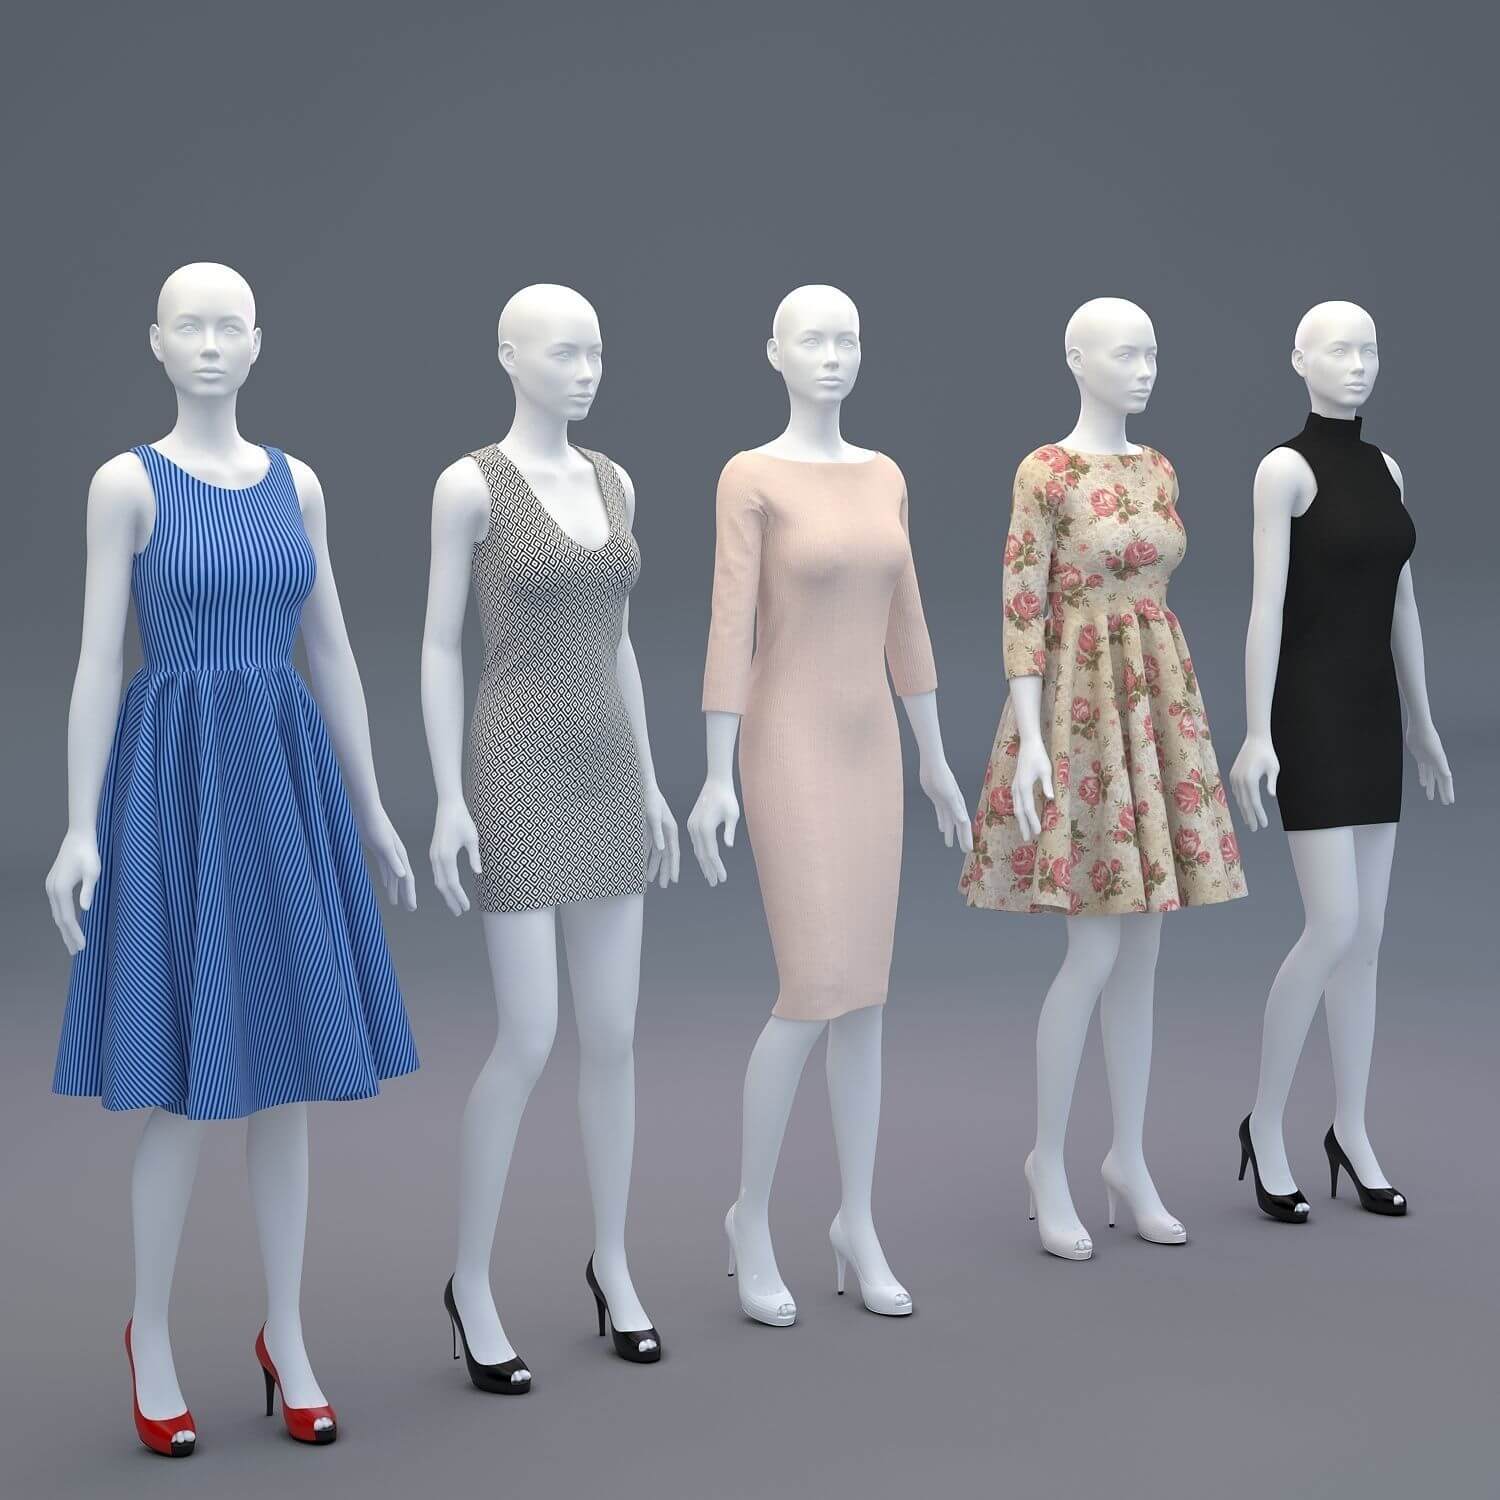
3D printed mannequins that can be inflated are also found in the market. Using mannequins with glass eyes, expressive faces, real hair are in fashion. Apart from using wigs, hairstyles are also carved on the mannequins when they are made. Moreover, they are also available with different shades of skin. These effects and additions make the mannequins look and feel humanlike.

Furthermore, 3D printed mannequins are also used to showcase jewelry, eyewear, footwear, etc. In these situations, a full mannequin is not required. For example, only the head can be used to display eyewear, earrings, nose rings. To display bangles and bracelets, hands are required, and footwear or anklets can be displayed by using only the feet.

3D printed mannequins are of great help for both the retailers and the customers. When any fashion trend or style is introduced, we can first see it on them. They are the ones who tell the people what products have arrived in which store.

Retailers make sure to change the dress of the mannequins regularly and adorn them with their latest collection. Today most of the stores use mannequins to create a particular atmosphere or give a certain feel to the store.

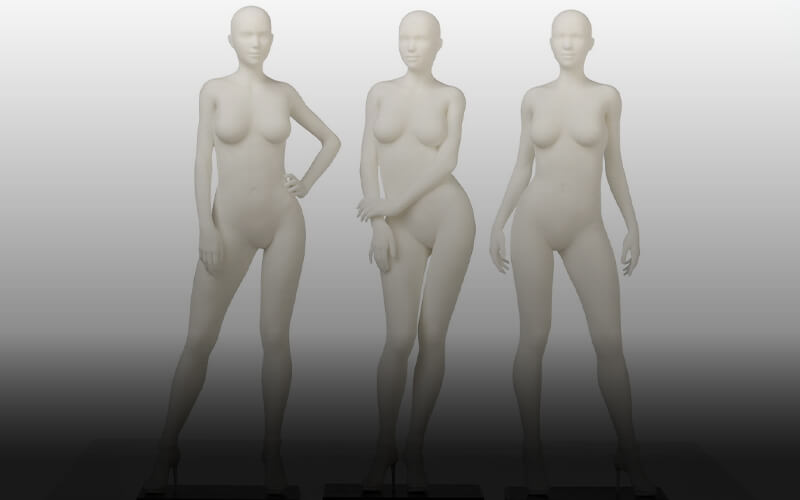
One can find a variety of options to select 3D printed mannequins as per the need. They are strong and not very expensive. The female mannequins present female clothing very well, and so do the male mannequins enhance the male garments.

Today 3D printed mannequins play a prominent role in the retail apparel business. They have undoubtedly become an effective and commanding tool to attract customers for retailers worldwide. They add great value to the products and growth of the retail business.

1.2, Human Body Template for Fashion Designers

In a retail business, it is essential that the merchandise is displayed and presented in a manner, which is appealing and eye-catching. Only then will it draw the attention of the customers and persuade them to buy the products.

Hence, in the fashion retail trade, visual display of goods can have a big impact on sales, and what can be a better option than mannequins to display ones’ products.

A perfect skin, ultra-thin waist, and long beautiful legs, they pop out from the windows of a shop. They tempt us to give a look while passing by the store. This is the world of mannequins.

There are numerous methods to promote a brand and its sales. 3D printed mannequins are used as one of these methods to showcase the merchandise. The word mannequin is derived from the Dutch word ‘Manneken,’ which means ‘small man.’

It is a model of the human body used by retail store owners to display their merchandise. Retailers use various techniques to display their products so as to attract potential buyers. 3D printed mannequins help the retailers to draw the customers to their stores.

For a layman, 3D printed mannequins are dolls or dummies that showcase the latest trends of the store. They are important tools of the retail business. They first communicate with the customers through visual merchandising.

Displaying fashion apparel in the store is the first step to entice probable customers to the store. Further, it gives free publicity to the store’s collection. Retailers put up the best clothes on the mannequins to allure the customers to their stores.

It is a natural phenomenon that customers see the window display of the store first. The customer takes the decision to enter the store on the basis of the information he can gather from the window display.

3D printed mannequins add value to the merchandise. They draw attention to the collection of the shop and lure the customers into buying garments and thus generate income for the store.

Displaying is not the only purpose of mannequins. The customer should also understand the usage of the product. This is when the mannequins come to help. Mannequins can give a complete understanding of the utility of the product. For example, each occasion needs different clothes.

Like sportswear is needed while playing games, the bridal gown for a wedding or swimwear on a beach. 3D printed mannequins can effectively showcase which apparel to wear, when, and how.

For many years, 3D printed mannequins have been used as a valuable tool in the apparel retail business. When the clothes are displayed at the store using the mannequins, the customer can analyze all the aspects of the garment before entering the store. If the 3D printed mannequins are able to impress the customers with their beauty and the clothes they wear, it becomes very easy for the retailer to sell his merchandise.

When mannequins are such important tools of retail business, there are some points to be considered while selecting a mannequin. Firstly, they should not be heavy. Their shape and size should gel with the clothes they will drape. The clothes must be well fitted on the mannequin.

They must look pretty and must not be dirty with stains. Lastly, the clothes should be changed at regular intervals, and they must be relevant to the season and trends.

Moreover, mannequins are not only responsible for selling the clothes they wear, but other products are also sold due to them. For example, along with a dress, its accessories will be sold as they complement the dress very well.

Mannequins display what kind of collection do the stores have and what the store can deliver to the customer. They sometimes become a guiding light to a particular area of the store as they are the most evident thing in a store.

Chapter 2:

3D Printed Mannequins May Change Some Industries

Everyone knows that retail stores are at a crossroads of sorts, but probably not the one you expect. While there is this misconception that nobody buys in stores due to the rise of online shopping, the numbers don’t actually bear that out. In fact, shoppers spend more money in-store than online.

The greatest challenge isn’t from online stores but rather how to be the retail store that shoppers spend their time in. How can shops stand out from others? How can they grab customer attention and hold on to it? This is where custom mannequins, reinvigorated by digital technology and 3D printing, can make a definite impact.

For retail shops that could afford the time and cost commitment, the choice of a custom mannequin to present wares, or simply draw attention, has always been attractive. As opposed to buying mass-produced, off-the-shelf mannequins, having them custom made can better convey product and brand messaging.

This creative freedom is what can set one store apart from another and maximize foot traffic. The problem is that traditional methods for producing custom made mannequins had created a narrow market. In addition to the high expense, the long production timeline often made it impractical.

Plenty of stores simply couldn’t afford to wait for sculptors to create mannequins out of fiberglass, clay, and metal. Even if they could, handcrafting them took so many work hours that price points were too high for most. Thankfully, breakthrough mannequin 3D printers have brought down these barriers of entry. For print service providers, it opens up an entire market with a product offering that is both attractive and attainable.

It’s important to note that while 3D mannequin printers gained widespread usage in the fashion and apparel industry, their usage and durability exceeds the four corners of those industries. To help you further understand its influence, let’s look at the impact of mannequin 3D printers in the creation of wax for museum characters and the design of anatomical models in medicine.

2.1, For Character Making in the Wax Museum

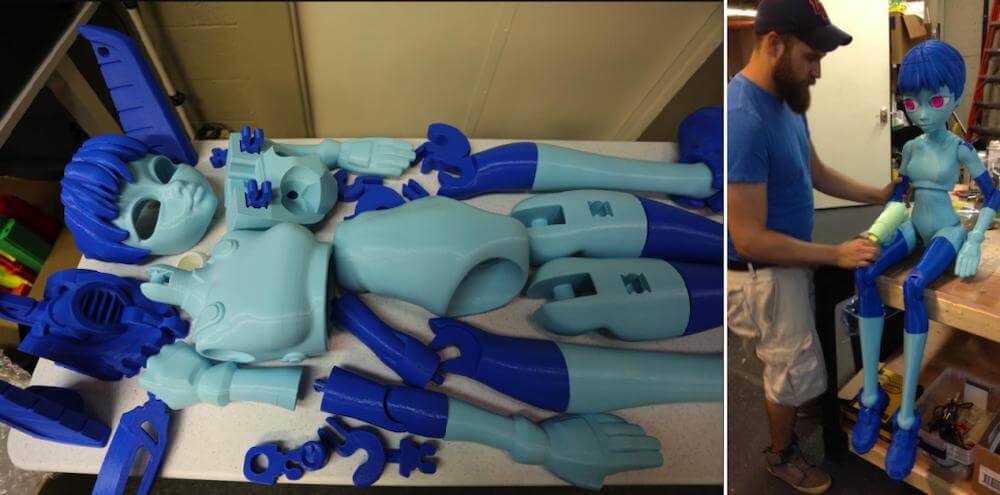
Thanks to 3D printing, Mannequins can be made in a large variety of poses, colors, and features, each of them unique.

The world of mannequins doesn’t just revolve around clothing. Mannequin 3D printers have become a dominant part of the character making process in wax museums.

It’s a world in which trends follow each other rapidly; inspiration is taken from the real world, and the total picture has to be right. The presentation is no exception, so the mannequins are just as important as the rest.

The wax mannequins are used by numerous museums all around the world. Most hobbyists, experts, and professionals using mannequin 3D printers to create wax mannequins for museums are constantly innovating to satisfy the whimsical wishes of their clients, taking inspiration from fashion, architecture, movies, and more.

Realistic, abstract, or special, developing a wax mannequin takes time, and before 3D printing, the prototypes were made from clay by hand. 3D printing can save a lot of time but also offers more possibilities in design freedom.

It takes two days to 3D print a wax mannequin, as opposed to weeks when they are made by hand—the timeframe from idea to prototype in one week, at one-tenth of the costs. To limit the CO2 footprint, you can use biodegradable filament made with corn starch or sugar cane.

Using a mannequin 3D printer to design a wax character for museums, you get to enjoy tailor-made and customized mannequins. You can design several parts, from the basic form to the stand, to make the mannequins as individual as real people in a variety of poses and body sizes.

It’s even possible to make changing mannequins, like a thermo-sensitive mannequin. Under normal circumstances, the mannequin is black, but the material turns white when heated.

Here is a breakdown of the character making process in the wax museum

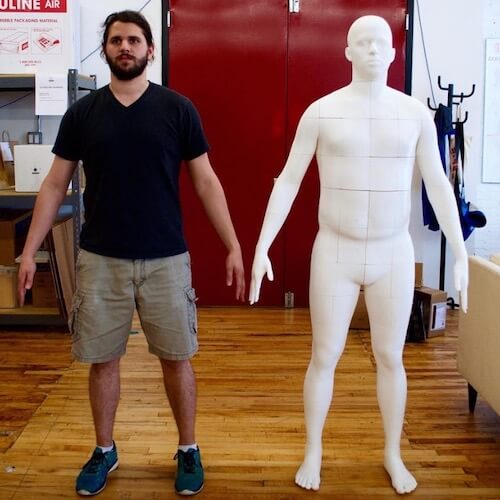
Sculptors of wax figures start by getting to know their subject. By looking at photographs and watching videos, they get to know what their subject looks like and how he or she behaves. If at all possible, they will also try to meet with their subject in order to observe them closely and take precise measurements.

They start the construction process by building a full-size clay model with a steel frame for the body using a mannequin 3D printer. The head, which contains the most detail and is the most difficult part to perfect, is created as a separate, removable piece.

Once they have the clay model finished, sculptors then create a plaster mold of the face and head. After removing the plaster mold from the clay model, they fill the hollow mold with hot wax and then let it cool so that the thick layer of wax hardens. At that point, the plaster mold can be removed.

Precise tools can then be used to add fine details to the wax face and head. For the eyes, hand-painted acrylic eyeballs are placed into the eye sockets. Multiple layers of oil paint are applied to create the right skin tone and accentuate prominent facial features. Facial and head hair, as well as clothing, are then added to finish the figure.

Why make figures out of wax? Sculptors note that wax is easy to cut and shape at room temperature. It also mixes with colors and takes paint very well. It’s also easy to manipulate with other materials to get the precise texture and consistency desired to be as lifelike as possible.

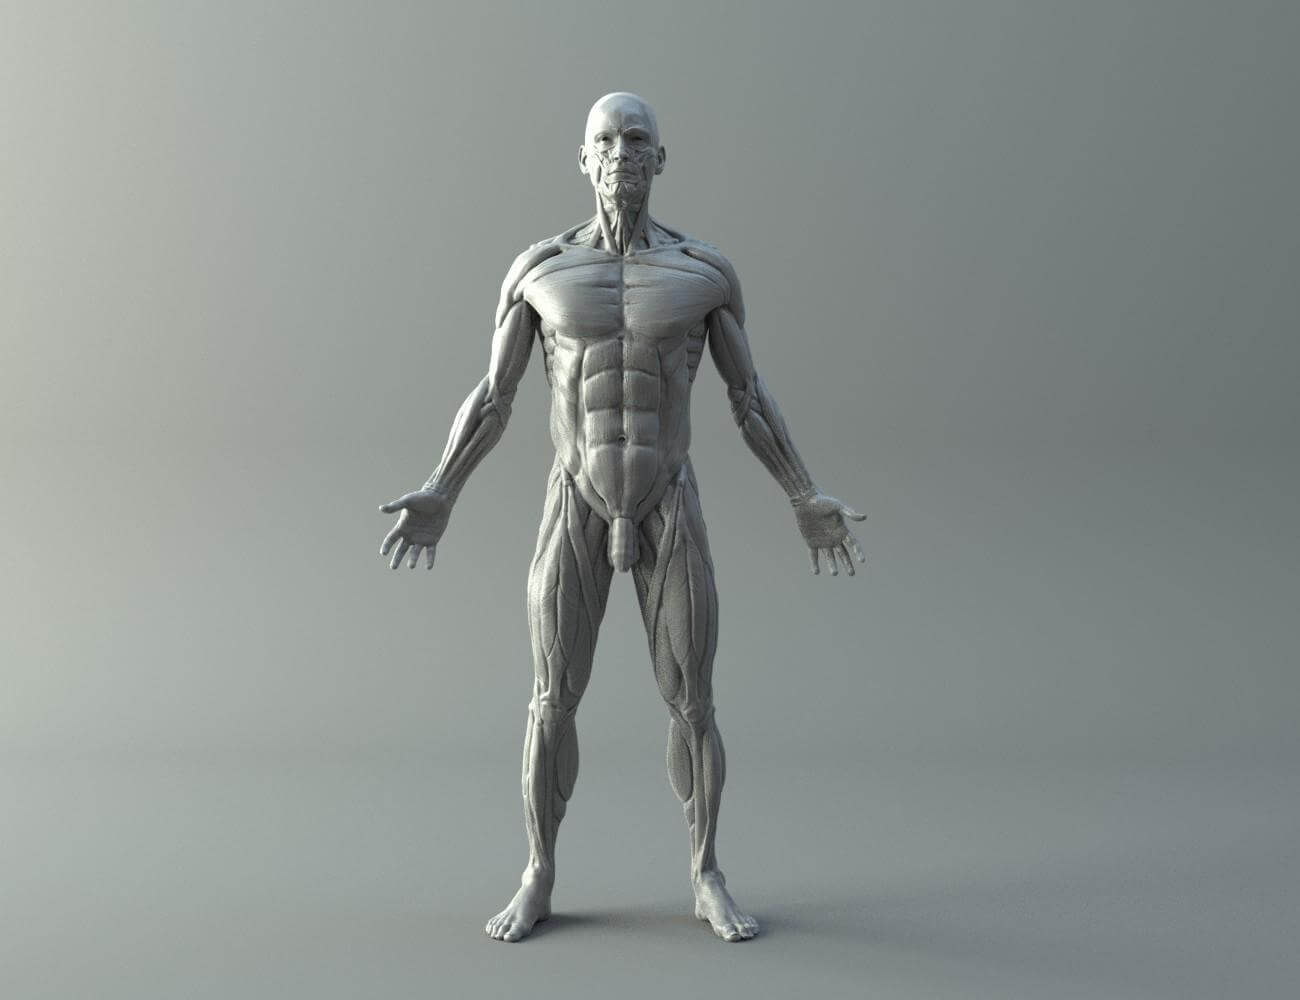
2.2, For Making of Human Anatomical Model

Three-dimensional (3D) printing is an emerging technology widely used in medical education. In the medical sector, additive manufacturing technologies are slowly but surely having more impact on treatment outcomes for patients than they once were.

For example, they can be used to create tailor-made medical devices thanks to enhanced design freedom during modeling and manufacturing. Some of these devices include prosthetics, orthotics, implants, but also anatomical models.

Indeed, surgical planning and rehearsal is a critical stage in any treatment pathway, and many experts believe that 3D printing will become a normal step in clinicians’ daily routine when assessing different treatment options.

Whether used for surgeon training or to perform testing during device development, you can count on mannequin 3D printers to provide unmatched clinical versatility, mimicking both the appearance and response of human tissue and reducing the costs and inconveniences of cadaver and animal labs.

You can use mannequin 3D printers’ capabilities to create models with an incredible array of fine features and minute structures that look, feel, and function like actual human tissue, with true haptic feedback. And do all of this in a single print operation with minimal to no finishing steps like painting, sanding, or assembly.

Mannequins 3D printer anatomical models can be customized for specific patients and pathology, unlimited by the costs and inconvenience of cadavers or traditional production methods.

Create models that are biomechanically realistic and highly functional for training and validating medical devices. Educate patients on their exact condition with customized models built from their CT scans. Map out procedures and increase the efficacy of a technique with an accurate anatomical representation.

Some of the benefits that come with using an FDM mannequin 3D printer to create anatomical models include

Custom on-demand models: with a mannequin 3D printer, the design and optimization phase can be hastened and shortened to the shortest possible time without hindrance to the output. Simply put, you get to meet and satisfy the dynamic needs of your client within the shortest possible time.

Multiple Colours and Materials: Print models that reflect the blues, reds, and nudes of true human antimony. Highlight internal features with external transparencies and incorporate flexible and rigid materials for a more realistic feel.

Short lead time: FDM 3D printers continue to be the fastest 3D printing technology on the market, completing some parts in a matter of hours. Mannequin 3D printers also deliver consistent parts faster than traditional molding.

Chapter 3:

How to Make a Mannequin

Before mannequin 3D printers garnered widespread usage across multiple industries, the creation of mannequin required a handmade designing process. In this section, we will provide a detailed description of the processes involved in creating a mannequin without an industrial FDM 3D printer.

Note that while the custom methods for creating mannequins might be cheaper, the process and procedures involved are quite tiring. If you haven’t engaged in the custom mannequin design process before, it’s advisable you seek advice from an expert or professional sculptor before proceeding.

3.1, Several Popular Custom Methods

There are several popular custom methods for creating mannequins. Most of the custom methods available are quite similar. While some require the use of clay, tape, and a few DIY equipment, you would also come across a huge number of custom made mannequins made out of EVA foam.

To avoid boring you with all the popular methods available, below is a detailed step by step guide of one of the simplest mannequin method you can trust.

How to Make Mannequin with DIY

  • Put on an old, fitted shirt you don’t mind ruining. Make sure that the shirt conforms to your torso without too many wrinkles. Also, make sure that the shirt comes down to your hips. Don’t wear a baggy t-shirt as it will create too much bulk. You won’t be able to salvage this shirt. You will cover it with tape and cut it up.
  • Cover your neck and collar area with plastic wrap. Tear off a sheet of plastic wrap and fold it until it’s the same height as your neck. Gently wrap it around your neck. Tuck the two ends under the front color of your shirt so that no skin is showing. You will eventually be taping up your neck as well, so you need to protect the delicate skin there. If you don’t have plastic wrap, you can use paper towels instead.
  • Wrap a strip of duct tape around your torso, just under your breasts. Make sure that you wrap it firmly so that it conforms to your figure, but not so tightly that you can’t breathe. If you are male, wrap the tape just under your pecks. You will need to have someone help you during this step and for the rest of the steps in this part.
  • Cross two pieces of tape across the front of your chest. Lay down one piece of tape so that it goes from your left shoulder down to the underside of your right breast. Lay down a second piece of tape so that it goes from your right shoulder down to the underside of your left breast. You should be left with an X-shape, with the center being between your breasts.
  • Continue adding tape across the shoulders, breast, and back area. Lay down a strip of tape across your left shoulder. Bring one end down across your left breast towards the horizontal strip of tape. Bring the other end down across your back. Continue adding strips of tape until you reach the edge of your shoulder. Overlap each piece of tape by ½-inch (1.27 centimeters). Repeat this step for the right shoulder and breast.
  • Fill in the gaps under your armpit. Tear off smaller strips of tape. Lift up your arms, and lay them down across your ribcage horizontally. Be sure to cover the gap between your armpit and the horizontal strip of tape. Again, overlap the strips by ½-inch (1.27 centimeters).
  • Fill in the gaps on your back and chest. You should now have a V-shaped gape on your chest and back. Tear off more strips of tape and lay them across your back and chest. If you have a low-cut shirt, make sure that your chest is covered by plastic wrap or a paper towel.
  • Wrap the tape around your neck. Wrap 1 to 2 strips of tape loosely around your neck. Use smaller strips to fill in any gaps showing through.
  • Wrap more tape around your waist down to the bottom of the shirt. Keep wrapping the tape in rows, overlapping each one by about ½-inch (1.27 centimeters). Stop when you reach the bottom hem of your shirt.
  • Cut up the back of your duct tape shirt. Have a person you trust help you cut down the back of your duct tape shirt, from bottom to top. Make sure that they cut through the duct tape, shirt, and plastic wrap layers.
  • Take the shirt off. You should now have a body-double made out of duct tape. If anything became dented on the mannequin during this step, such as a beast, use your fingers to gently push it back out.
  • Seal the gap with a strip of duct tape. Place the cut ends together so that they match up. Cover them with a strip of duct tape to seal the gap. For extra security, apply tape to both the inside and outside of the shirt.
  • Touch up the top and bottom edges, if desired. Take a look at the top and bottom edges of the mannequin. If you are happy with them, leave them be. If they look ragged or jagged, touch them up with more tape.
  • Consider cutting the top edge of the neck down at a slight, downward angle to mimic a real mannequin. Make sure that you still have some neck left, however!
  • Stuff the shirt with polyester stuffing. If you need to, cover the neck hole with a few strips of duct tape so that the stuffing doesn’t come out the other end. Keep stuffing until the mannequin feels full and firm. You will need about two bags of polyester stuffing.
  • Trace the base of the mannequin onto cardboard or foam board. Stand the mannequin upright on a sheet of cardboard or foam board. Trace around the mannequin using a marker. This will eventually make the bottom of your mannequin.
  • Cut the base out using a box cutter or craft blade. Make sure that you cut just inside the lines that you drew. Make your cuts smooth and precise.
  • Tape the base to the bottom of the mannequin. Turn the mannequin upside down. Set the cardboard base into the bottom of the mannequin. Fold short pieces of duct tape over the edges of the cardboard onto the bottom edge of the mannequin. If you want to, you can cover the entire bottom of the cardboard with more duct tape so that it matches the rest of your mannequin.
  • Cover the top of the mannequin using the same method as you did for the base. Trace the neck opening onto a sheet of cardboard. Cut the circle out. Set it down on top of the neck. Secure it with strips of tape all the way around. Cover the top of the cardboard with more tape, if desired.
  • Secure the foam base to a metal stand. Choose a sturdy, metal stand, such as a lamp post. Trace the top of the metal stand against the bottom of the mannequin. Cut the hole out, then set the mannequin on top of the stand. Seal the seam between the edges of the hole and the stand with hot glue.
  • For extra security, use epoxy or an industrial-strength glue instead.
  • If you are using a lamppost, make sure that you cut away any wires so that you are just left with the metal stand.
  • Cover the mannequin with fabric, if desired. The easiest way to do this would be to find another fitted shirt and place it over the mannequin. You can also sew a fitted, corset-like cover for it using cotton or jersey fabric. At this junction, your mannequin is done and ready for use.

Traditional Method of Creating Mannequin

The traditional way to make a mannequin prototype is with clay. A sculptor will study a human subject, or a suitable physical model, and replicate what they see in clay. This is the case with high-end handmade prototypes. Prototypes made in the factory are often clones, made from cardboard-mâché, which is layered into a mold and then baked solid. They are then finished with linen.

Note that the finished product obtained from designing a mannequin via the above-listed method is quite cheap. However, the process takes longer than 3D mannequin printers, and the finished product wouldn’t provide the smooth and accurate finish 3D mannequin printers offer.

3.2, How to Make with 3D Printer

Since you are fully aware of what it’s like to make a mannequin using the traditional method, it’s high time we focused on the processes and procedures involved in creating a mannequin using an industrial FDM 3D printer. Industrial FDM printers are quite expensive and require a bit of technical expertise. However, the process involved is time-saving, and the finished product is seconded to none.

Creating Mannequin Using 3D Printers

Scan the body with a 3D Scanner: Whether you are using a mannequin 3D printer or you are trying to design a mannequin using any of the methods listed above, the need for a prototype remains the same. You can create a mannequin of the same size and shape as you, or you can use the measurement of a friend. In any case, you need to scan the shape and body size of the person using a 3D scanner.

This process helps provide detailed information on the type of mannequin you are about to design. After carrying out a detailed scan of the individual or object you would like to create a mannequin in line with, the next phase is design.  

Segment Different Part through Software: CAD software is the ideal used by most professionals and hobbyists in the 3D printing industry. With CAD software, you can detail out the scanned part and create segmentations. These segmentations would help you easily 3D print the various parts involved.

Print Each Part with FDM 3D Printer: This is where your FDM 3D printer comes in. after detailing out the parts and creating a software representation, it’s time to 3D print. There are numerous filaments suitable for 3D printing mannequins—more details on the type of materials you can use in chapter 4.

Try as much as possible to prints the detailed-out parts using an FDM 3D printer. Using a resin 3D printer to 3D print mannequin is in no way recommended.

Assemble: time to assemble. Assemble the 3D printed parts together and customize with fashion apparel of choice, and your 3D printed mannequin is good to go.

Note that while 3D printing mannequin, it’s advisable you divide into smaller parts to pint. Mannequins are all in a 1.1 ratio, so printing all together is relatively high. For the best printing experience, divide into smaller parts to print.

3.3, Why 3D Printer is the Best Way Now

You might be wondering why mannequin 3D printers are regarded as the most prioritized method for creating mannequins. The traditional methods are quite cheaper and require minimal investment; why opt for an expensive method that requires a bit of technical expertise?

To help you understand why industrial FDM 3D printers should be your prioritized pick for creating mannequins, let’s look at some of the advantages 3D printing brings to hobbyists and professional sculptors in numerous industries.

Faster Production

3D printing is quicker than conventional manufacturing, including injection molds and subtractive production. Think the speed of a sports car versus the speed of a horse cart. Both will reach their destination, but the time difference is significantly huge. From a prototype to a final product, 3D printing tests ideas and designs quickly.

Faster design and prototype production means more time to iterate the prototype and find product-market fit before competitors. 3D printing mannequin production takes just hours. Conversely, testing ideas and designs with conventional manufacturing methods can take up days, if not several weeks.

Better Quality

Traditional manufacturing methods can easily result in poor designs, and therefore poor-quality prototypes. Imagine a scenario where someone wants to bake a cake by combining all the ingredients together, mixing them up, and putting them in the oven to cook.

If the elements did not mix well, the cake would have issues such as air bubbles or a failure to cook thoroughly. That is how subtractive or injection molds can sometimes be. You are not assured of quality 100 percent of the time. 3D printing allows the step-by-step assembly of the object, which guarantees enhanced designs and eventually better-quality objects.

Creative Designs and Customization Freedom

Traditional manufacturing techniques are good at creating millions of copies of the same thing. It results in the same dull and boring designs without the capacity to be improved much. Making each design unique with these techniques is extraordinarily hard.

3D printing mannequins allow for endless personalization, which makes it much simpler to accommodate personal touches that are requested from customers. Your imagination is the only limitation. You can make a crown that is precisely engineered to fit in someone’s mouth, for example. This cuts down on the number of visits that a patient needs to make sure they have a properly fitting crown.

Risk Reduction

When it comes to 3D printing mannequins, a good designer knows that proper design verification is crucial before investing in an expensive molding tool. 3D printing technology enables product designers to verify product prototypes before starting out on substantial manufacturing investments that can sometimes be disastrous.

3D printing enables you to turn a concept into reality faster than you can imagine. Products are built quickly and cheaply. The technology will no doubt continue to transform every industry, changing the way we work and live in the future.

Unlimited use of Shapes and Geometry

The old techniques of manufacturing count on molds and cutting technologies to produce the desired shapes. So, designing complicated shapes with this technology was both difficult and troublesome for the designers. With the introduction to 3D printing, this challenge can also be overcome, and with the availability of proper materials, this technology can achieve the desired results.

Chapter 4:

How to Choose Materials

By now, we believe you have all the information you need to proceed with your mannequin 3D printing task. However, it wouldn’t be appropriate if dive into the industrial FDM 3D printer buying process without providing much-needed hints on the type of material you can use for mannequin 3D printing.

There are numerous filaments with the ability to provide sustainable mannequins. While you can easily make do with any filament, the portability, and flexibility you get to enjoy when making use of these filaments vary. Let’s take a look at three notable filaments widely used in mannequin 3D printing.

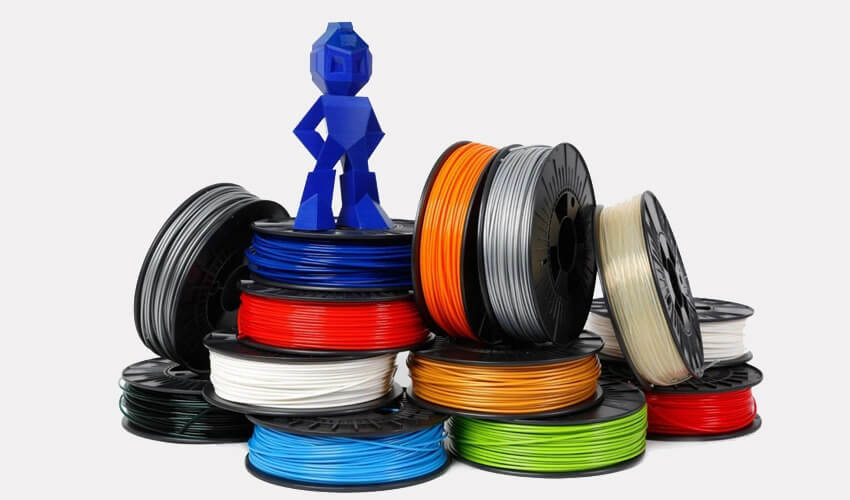
PLA {Polylactic Acid}

PLA filament is by far the most popular industrial FDM 3D printer material for mannequin printing, and there’s a good reason for that. It comes in many shades and styles, making it ideal for a wide range of applications.

Whether you’re looking for vibrant colors or unique blends, it’s an easy-to-use and aesthetically pleasing material.

PLA is short for Polylactic Acid, a thermoplastic polymer that is derived from renewable resources, more specifically from corn starch or sugar cane. This sets the material apart from other commonly used plastics, which are procured through the distillation and polymerization of non-renewable petroleum reserves.

Since PLA filament is a biodegradable product, it tends to naturally break down in about three to six months. Other thermoplastic materials can take up to a thousand years to decompose, making PLA much more environmentally-friendly.

PLA material has been thrust into the spotlight by the rise of custom industrial FDM printers. PLA filament is available in a wide variety of colors and blends, and innovative PLA-based materials seem to be constantly hitting the market.

Outside of mannequin 3D printing, PLA is also used to produce things like medical implants, food packaging, and disposable tableware. But inside of the industrial FDM 3D printing sphere, PLA filament is widely thought of as an aesthetic material best used for prototyping.

ABS {Acrylonitrile Butadiene Styrene}

As a thermoplastic polymer, it can melt and cool without altering its chemical properties. That makes it an interesting industrial FDM 3D printer material for printing mannequins.

The filament is known to be strong, tough, and durable. It is also forgiving to scratches, offers good resistance to heat and everyday chemicals.

It can endure heat, pressure, and stress like no other industrial FDM material for mannequin printing, making it a great choice for wear and tear prints. You can try this out yourself: If you move a strain of ABS filament, it will distort and bend before breaking. PLA breaks much more easily.

ABS is quite forgiving, as long as you print with the right settings and proper temperature management. You can even achieve overhangs of around 45 degrees. If the print succeeds, the results are very convincing.

Most makers like the material because you can process its surfaces with acetone, glue parts, and even file off some material. Lastly, it can be easily painted with acrylic colors.

ABS filament is not toxic when 3D printed. Only at very high temperatures (400 °C), the material decomposes into butadiene (which is carcinogenic to humans), acrylonitrile (possibly carcinogenic to humans), and styrene—nothing you want to inhale under any circumstances.

If you don’t have a mannequin 3D printer at hand, you can have ABS parts printed by a professional 3D printing service. You can put a call through to our support representative to obtain the best deal on a high-resolution FDM 3D printer for mannequin printing.  

PC {Polycarbonate}

Polycarbonate (PC) is a powerful material used in mannequin 3D printers. It stands out for three main features: optical clarity, resistance to heat, and incredible toughness. This makes it perfect for use in DVDs, safety glasses, riot shields, and even bulletproof glass.

3D printing with variants of PC will typically get you a temperature resistance of just over 110 °C, yielding translucent, icy prints. Some brands offer a small range of different colors and blends, though variants are more limited than for the more aesthetically-oriented materials like PLA.

Mannequin parts printed with PC filament will come out fabulously strong, but printing with this industrial FDM 3D printer material can be quite a challenge. As with any filament, check the manufacturer’s recommended settings before printing, but some general settings are outlined below, followed by some troubleshooting tips.

PC’s extreme resistance to heat calls for equally extreme temperatures. An all-metal hot end and a heated bed are mandatory, and printing in the controlled environment of an enclosure is highly recommended. Part cooling should also be turned off to ensure proper interlayer adhesion. Keep in mind that this material is designed to be functional (as opposed to aesthetically pleasing), which means the print quality may suffer.

PC also has a strong tendency to ooze during the rapid prototyping 3D printing process. Tune your retraction settings but avoid retraction distances of over 10 +mm to prevent jamming. If your hot end doesn’t get hot enough, start printing at slower speeds. But a warning: the material generates strong fumes and odors. Always print PC enclosed or in a well-ventilated area.

Chapter 5:

How to Buy FDM Printer to Make Mannequin

Since we are now familiar with the mannequin creation process, the industries where mannequin 3D printers have reputable impacts, and the type of material that can be used to create mannequin, it’s high time we talked about the 3D printer buying process.

0FDM 3D printers are the most sustainable 3D printers for the creation and design of mannequins. Unlike most other printers available, industrial FDM printers are capable of printing filaments used by most sculptors to design mannequins.

There are multiple variants of industrial FDM 3D printers with the capability to provide a smooth and efficient design process. However, it’s never advisable to settle for any FDM model without thoroughly considering specific factors.

To help you make the right mannequin 3D printer buying decision, we have listed out all the factors you need to put into consideration before finalizing your buying decision.

5.1 What is the Max Size of the Print

Industrial FDM 3D printers come in multiple variants. Some are suitable for large printing tasks, while others possess printing molds that can cater to only small tasks.

How big is your mannequin printing business, and what size of prints do your customers demand from you regularly? At Dreambot3D, we have seen the irregularities and extra expenses that come with purchasing an industrial FDM 3D printer that’s not compatible with the print size.

Over the years we have been in business, we have had the opportunity of interacting with consumers from different countries and regions. One of the most highly influential factors most hobbyists or professionals who have walked through our door to purchase an industrial 3D printer ignore is the size of the print.

Yeah, it’s practically impossible to determine the exact size or specification attributed, or that would be required in most of the prints you make—especially if you are a business owner looking to satisfy the needs of clients from different parts of the world, totally ignoring the print size of your industrial FDM 3D printer can create is unacceptable.

Industrial FDM 3D printing equipment garnered renowned usage ahead of LCD, SLA, and DLP as a reputable mannequin 3D printer not just because of its printing speed or the remarkable finish product it is known for, but also because of its ability to perfectly create sustainable 3D models using filaments.

Before buying any FDM industrial 3D printer, try to know the type of filament it can print on and whether it’s durable enough to print perfect models on wide materials without leaving distorted edges.  

The material you chose for your printing task has a lot to say about the printing size. The dimension, weight, and size of the object obtained from a 3D model printed with PLA are quite different from the result you would obtain using an ABS material—regardless of whether the CAD file and design are the same.

Considering the type of materials you would print on regularly can help you pinpoint an industrial FDM printer that wouldn’t create constraints in your design’s dimension, weight, and size.

5.2 Choose a Reliable Brand

For most professionals in the mannequin printing industry, it all comes down to brand. Hundreds of brands have built a formidable reputation for themselves by offering industrial FDM 3D printers with remarkable features.

While it’s essential you check out a brand’s track record and reviews from previous customers, it’s also important you don’t base your buying decision entirely on a brand’s name.

There are a lot of industrial FDM 3D printers available world-wide with reputable brand tags but void of the innovative design and features required to keep your printing line functional.

Many mannequin 3D printer brands built a good name for themselves in the early 90s but haven’t been able to keep up with the diverse changes needed to excel in the 21st-century market.

Before putting hours of research into exploring a brand’s portfolio or track record in the global market, make sure the industrial FDM 3D printer you want to buy possesses features in line with your needs and has been ascertained satisfactory by other users and experts in your industry.

There are so many industrial FDM 3D printers being developed and released into the market every day. While most of these printers meet the basic requirements and features needed to 3D print mannequins, you should not be hasty while sealing the deal yet. Why? You may ask.

Mannequin 3D printers are not cheap machines. You’ll part ways with a considerable amount of your money; therefore, you must ensure that you get value for your money.  

While your choice should not solely be made on the brands’ name, it is crucial that you do thorough background research on the company’s Google ratings and reviews before making a purchase.

Consider buying your printer from an industrial FDM 3D printer manufacturer that has a good track record, a higher rating on Google, and a genuine customer support system.

Such a company will be apt to respond to all your urgent needs, for instance, if your printer breaks or runs out of filaments. The company/brand that you’ll pick for your printer can make or break your printing experience if something goes amiss.

5.3 Safety Configuration of the Machine

The constant plea of safety first can seem inconsequential when an industrial FDM 3D printer offering formidable features is thrown your way at a discounted price.

The idea behind FDM printers is to provide a safe printing experience and, at the same time, help users save filament and time. LCD and DLP printers are comparable to industrial FDM printers in terms of durability and printing accuracy, but in terms of safety and out of the box usage, FDM printers are miles ahead.

In simple terms, backing your purchase up with detailed information on the precautionary measures and built-in safety designs accessible via an industrial FDM 3D printer of choice is paramount. We believe that professionals or hobbyists who have been in the mannequin printing industry for a long time would understand why we took our time to emphasize the machine’s safety configuration.

However, suppose you are a newbie trying to navigate rocky paths with an industrial FDM 3D printer optimized with formidable advantages. In that case, we recommend you don’t allow features such as the stable default settings or the printer’s ability to keep your printing model in a perfect state make you go head over heels and forget to analyze the safety configuration of the machine.

Industrial FDM printers cannot be termed user-friendly in scenarios where issues arise during the printing process. To be on the safe side, don’t finalize your mannequin 3D printer buying process without carrying out a thorough analysis of the printer’s safety configuration.

If you are new to the industry and cannot navigate your way around the safety configurations, don’t hold back your questions; feel free to ask as many questions as you deem probable before paying a penny.

5.4 Resolution Requirement of the Machine

How important is the resolution of an industrial FDM 3D printer to the end processor finish product? The answer to this question depends on the industry, client, and customer base you are serving.

Having a high-resolution mannequin 3D printer is quite essential for sculptors who design complex prototypes. A hobbyist can easily make do with mannequin 3D printers of any type rest assured, the finished product and design are guaranteed.

There is no ideal benchmark or resolution requirement for sculptors looking to provide their clients with the best models and designs possible. However, having a mannequin 3D printer with high definition can help you attract, build, and grow a formidable client base.

Before making a purchase, explore the resolution of the 3D printer. Try to be as detailed as possible. You can seek advice from experts and professionals with a reputable track record in the mannequin industry.

Endeavor to have a basic idea or information on the industrial FDM 3D printer resolution requirements that would keep your production line running at an optimal level before actualizing your mannequin 3D printer purchase.

5.5 Consider Weather, the Price of the Machine, is Acceptable

You can find mannequin 3D Printers for under $1000. Most of these 3D printing equipment have very small build surfaces and other limitations. Occasionally a gem is found though in that price range, so it is worth doing the research on the cheaper printers.

Keep in mind, though, that with cheap, you get what you pay for. That mannequin 3D printing equipment may need a lot of extras or add-ons to make it reliable or high enough quality. At which point it might be better to spend more on a better printer in the first place.

At the moment, a good starting FDM 3D printer can be found for around $300. These would be kits that need to be assembled. Out of the box, ready printers begin at around $800 but are routinely seen in the $2000 — $5000 range.

One kilogram of plastic filament sells for $20 — $200, depending on the filament type and vendor. PLA/PLA+ is a good general use plastic which is at the bottom end of that price scale (and recommended for starting out with). ABS or PETG would be a better choice for high-temperature applications (like sitting in the sun or in a car in the sun) and sell for $35 and up for a kilogram.

It might be considered a good practice to have a collection of replacement parts for just about everything the printer needs—a spare extruder, control board, power supply display screen, wires, rods, etc. If any of these items need to be replaced, your printer is most likely unusable until the replacement arrives. Having that replacement on hand reduces your downtime. This is not “required” but commonly recommended.

Before you dive into conclusions as to the industrial FDM 3D printer to purchase, make sure you have a proper estimate of the funds you can invest in the buying process. A mannequin 3D printer manufacturer’s support team would be able to guide you better if you can provide a rough estimate of the FDM 3D printer price range you expect your desired 3D printing equipment to be within.

5.6 Consider the Suppliers After Sales Service Capability

Making a purchase is one thing; enjoying the benefit of your purchase to the fullest is another. The best industrial FDM 3D printer always requires a sizable investment, and we are certain you wouldn’t want to make such an investment from a supplier with little to no track record of authenticity or credibility in the mannequin printing industry.

To avoid making such a mistake, take into consideration the technical support service offered. Every industrial FDM 3D printer supplier should provide a minimum of 12 hours of technical support service Monday to Friday. However, there are a lot of reputable companies providing 24 hours technical support 365 days a year.

Vetting the technical sales service’s credibility would help you better understand the type of after-sales service an industrial FDM 3D printer manufacturer offers. Bear in mind that it’s practically impossible to authenticate the viability of a brand’s after-sales service directly from the company. The fastest way to get ahold of such information is by contacting individuals who have done business with the brand before.

Like always, Dreambot3D is here to serve you better. Our technical support service is available on around a clock basis. Whether you have made up your mind about the machine you want to purchase or are still scouring our catalog for the best mannequin 3D printer to cater to your printing needs, our support service is just a call away.  

5.7 Consider the Service Life of the Machine 

The service life for most industrial FDM 3D printers is about 5 to 10 years. While the warranty policy on most 3D printers doesn’t grant you access to refunds or after-sales privileges 1 or 2 years after purchase, purchasing a 3D printer for industrial use from a reliable manufacturer comes with the guarantee that your mannequin 3D printer will be in shape and keep your production line running for at least five years.

With that being said, it’s important to note that the estimated service life of the machine can change at any time based on external factors. How you use your machine determines how long it would last. If you leave your industrial FDM 3D printer packed dirty on a regular, you shouldn’t expect the ten years life expectancy to hold any ground.

If you went gone through the hassle of finding the right industrial FDM 3D printer manufacturer, inspecting all the necessary features, and finalizing the purchase, you wouldn’t want the whole effort you put in to go down the drain based on negligence on your part. Try as much as possible to keep your mannequin 3D printer clean and in good shape, and service life expectancy wouldn’t be an issue.

5.8 Consider the Maintenance Cost of the Machine

Still, on the time topic, we need to touch on maintenance. Mannequin 3D Printers require constant maintenance. The print bed must be cleaned between prints, or failures are more likely. The moving parts need to be oiled/greased once in a while. Nozzles have to be replaced. FDM screens will need to be replaced. This maintenance applies to ALL printers, whether they are out of the box ready or not.

This is where buying a kit printer is helpful. By building the kit for mannequin 3D printing, you learn the ins and outs of how to maintain your printer. Buying an out of the box ready printer simply means you can get a few prints done before you have to learn the same lessons.

Maintaining an industrial FDM 3D printer takes less effort. Only the Z-axis moves. Everything else would either be a wear and tear item (i.e., just replace the item when it finally fails), or a routine task that has to be done for every print anyway. Industrial FDM 3D printers have those routine tasks too — such as leveling the print bed. However, there are more moving parts, which means more possible points of failure/maintenance.

Mannequin 3D Printing is not as fast as the Star Trek Replicator devices. It takes time to build a 3D object. Smaller objects can be created in 15 minutes or so, but larger objects can take many hours or even days to print. Some mannequin 3D printers are faster than others. That speed, though, is a result of the industrial FDM 3D Printer design and how the printer is tuned. Tuning a printer is part of the maintenance time.

Dreambot3D is an industrial FDM 3D printer manufacturer offering highly efficient mannequin 3D printing machines with minimal requirement for maintenance. With just regular cleaning, your Dreambot3D industrial FDM 3D printer can stay functional for 5+ years.

Chapter 6:

Conclusion

3D printing mannequins isn’t a complex task. Yes, you might require a substantial investment in setting up your production line, but as soon as your production line becomes operational, it’s certain that you would recover your profit within the shortest possible time.

Since you now know what it takes to run a mannequin 3D printing line, we are quite certain you would be in need of the best industrial FDM 3D printer to kickstart the production process. Dreambot3D is an industrial 3D printer manufacturer serving the needs of hobbyists and professionals in diverse industries.

Whether you are in need of a resin 3D printer for jewelry printing or you require an FDM printer for mannequin printing, our catalog got you covered. Put a call through today, and a 3D printer of choice would be sent your way within 3 to 5 business days.

Chapter 7:

FAQ Guide

How much does it cost to 3D print a miniature?

The average cost of an unpainted miniature is around $2.5. In comparison, a one-kilogram spool of PLA filament costs about $14. Therefore, if you need a horde of monsters, the cost of printing them on your own is only a fraction of what you would pay for similar items on the market. You might want to bear in mind that there’s a lot of great reasons to use 3D printing in your miniature Hobby. You can get incredibly detailed 3d printed custom miniatures. Albeit not quite to the same quality level as the extruded plastic models you will get from retail. But still god enough to exist as parts of your armies. They’re great for making a great multitude of terrain pieces. But the best thing is making custom components and conversion parts for existing models. Think Weapons, Emblems, and armor pieces.

Can you make miniature with a 3D printer?

You can make some decent 3d printed d&d miniatures. 3d printing miniature figurines are really fun and rewarding; it’s essentially a hobby in itself. Before we begin properly, let’s get this out of the way. As of right now, it is simply not possible to directly replicate your favorite models with 3D Printed Miniatures. One, it’s illegal to steal other companies’ intellectual property, and Two, with the available quality level of an affordable 3D printer, miniatures just aren’t there yet. Saying that it is damn close. You can make incredibly high-quality prints. But if you’re looking at 3d printing a Space Marine or printing a Stormcast model, you’ll likely be disappointed. Especially if you are hoping for something comparable to Resin Sculps

What is a 3D printer miniature made of?

3D printers come in all shapes and forms, and many are quite affordable. The sheer volume of printers on the market can make it very difficult to make a good choice. Precision is likely the most important aspect of a printer when it comes to modeling miniatures. Measured in millimeters, this figure will determine just how small the smallest details can be in print.

Is it cheaper to build or buy a 3D printer?

Buying a 3D printer is more expensive than building one. The design process, materials, and time involved can make it an extremely expensive venture. You only would build a 3D printer if you want to experience the process of building a printer. Yes, it can be more expensive but think of the process of building a printer as a learning experience. You are paying for the experience, and out of it, you happen to get a working project. One of the most remarkable things about building a 3D printer is that you’ll amaze yourself (and can take great pride in) at what you are capable of.

What is the best 3D printer for miniature making?

If you want to know how to 3d print miniatures, it really depends on the printer you get. If you what to know which 3D printer for miniatures you should get, this depends on what you want to print. It’s worth noting that there are two main types of 3d printers. One of them uses a plastic filament that is fed through a nozzle (or multiple nozzles). These are Fused Deposition Modeling (FDM) printers. The other uses a bath of liquid resin, which is hardened when light is focussed within it, commonly known as resin printers. Even within these two main categories, there are some further subcategories. The best printer for miniature making is an industrial FDM 3D printer.

How do FDM 3D printers work?

For an FDM machine to function properly, it requires a heated nozzle, a build platform, and raw material to build upon. The printing process begins after the modeling software slices the 3D CAD file creating an extrusion path for the nozzle to follow. All necessary support needed by the object is factored into the extrusion path, and the nozzle movement is controlled via the interactive interface found on the machine. When the software successfully determines a suitable path for the nozzle, the filament is let loosed and fed through the heated nozzle. As soon as the raw material gets to the nozzle, it dissolves to a semi-liquid state and is forced out of the nozzle in the form of super fine beads. Immediately after the material leaves the nozzle, it hardens and bonds to the layer under it. Using the FMD machine’s mechanical interface, you can lower the platform holding the material to about one-sixteenth of an inch, giving room for the nozzle to start working on the next layer. Note that to remove the object or model created from the platform, you have to either break them off or use a solution of detergent and water.

How dangerous is FDM 3D printing?

If you’re wondering what might happen to you if you don’t adhere to safety recommendations when working with filaments – it depends on the filament you are making use of, what safety advice you aren’t following and how fast you act to remedy an accident. FDM printed models generally have no problems, they are not dangerous and in no way life threatening. If you are directly contacted, there are very few contact allergies. While it is recommended that customers wear gloves; even if they do not Wear gloves, there will be no much complications.

How does the FDM 3D printer work?

How difficult is it to learn FDM 3D printing?

It’s not difficult to learn, just an overwhelming number of things that you’d need to learn. But if you’re good at math, then it’s not that difficult. Or if you’re good at sculpting or carpentry and stuff. If you can build Ikea furniture without a manual and within an hour, then you should be able to understand the concept of 3D. Still, the whole 3D printing world is a simplified version of Computer-aided design/Computer-aided manufacturing where the CAD is you modeling a model in 3D with software, and the CAM is sending the model to the 3D printer for the final result. Both techniques are decades-old already but are now brought to the masses through 3D printing. The CAM part of 3D printing is hardware dependent. You generally need a 3D printer that uses one of the many techniques to make a 3D model from a filament, resin, or other materials. But you can also use a CNC machine where the machine basically cuts away parts that are not part of the model.

What is a 3D printer and plotter?

A plotter is the category of printer that takes commands from the computer and then makes drawings on the paper with the help of various pens. It is used for producing hard copies of large graphs and designs on paper like construction maps, engineering drawings, architectural plans, and business charts. On the other hand, a printer is an external hardware output device whose work is to acquire the text and graphics output from the computer and generate a hard copy of it. So, basically, it processes the soft copy and produces its hard copy.

Apply Our Best Quotation

    You will get reply within 24 hours